Assembly Removal and Replacement, MS202xC 6-26 Replacing Fan Assembly – ND70948
MS20xxC MM PN: 10580-00307 Rev. D 6-61
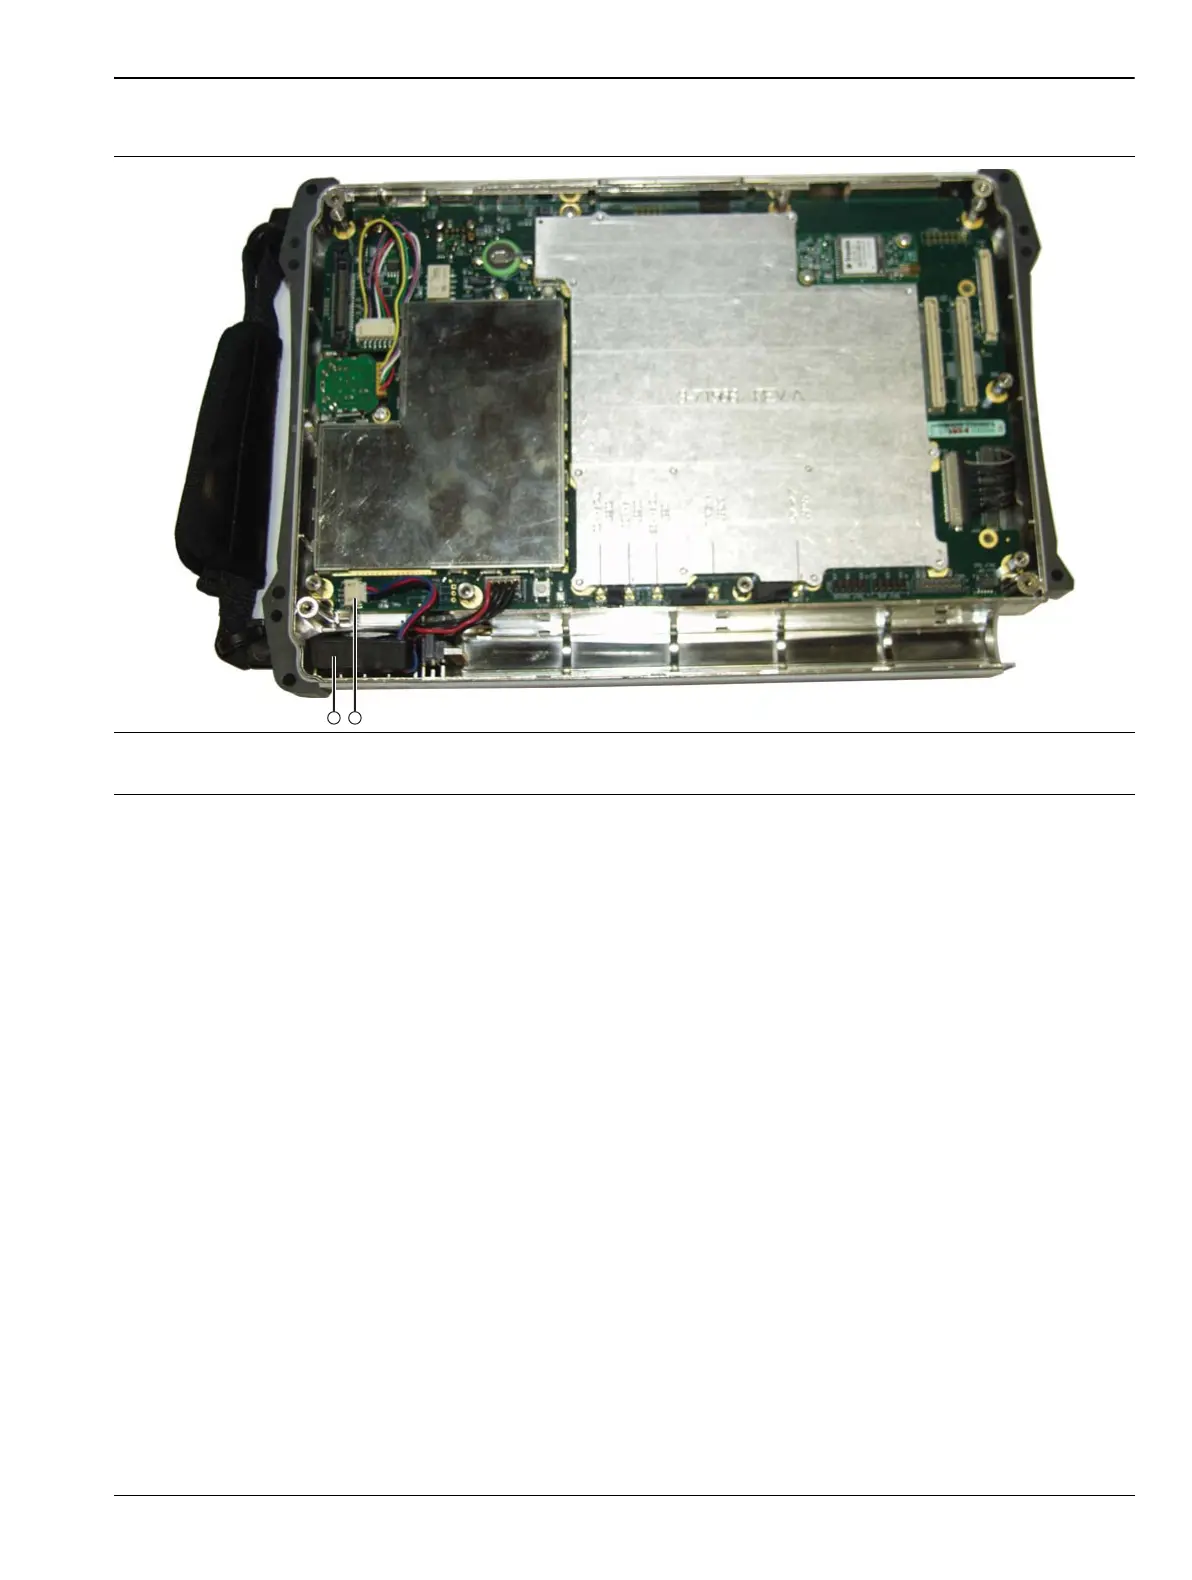
9. Use a Phillips-head screwdriver to remove the 2 mounting screws that hold the Fan Assembly in place,
and then remove the Fan Assembly.
The shape of the Mother Board and other components allow the screwdriver to reach the fan mounting
screws.
Installing the Fan Assembly:
10. Install the replacement Fan Assembly and tighten the 2 mounting screws.
Torque these screws to 4.0 lbf·in (0.45 N·m).
11. Connect the fan cable to connector J1002 on the Mother Board.
Installing the VNA PCB Assembly:
12. Carefully reposition the VNA PCB Assembly over the Mother Board and prepare to secure it in place.
13. Using Figure 6-22 on page 6-60, identify the locations of the eight (8) Phillips-head mounting screws that
hold the VNA Assembly PCB in place. Figure 6-21 on page 6-58 shows the 8 hexagonal standoffs on the
Mother Board. The 8 VNA Assembly PCB screws attach to the 8 hexagonal standoffs in the Main PCB
(Mother Board).
1. Fan
2. Fan Cable connected to MB
Figure 6-23. Removing the Fan

 Loading...