90 Avaya 374x DECT Telephones - User Guide 02/2016
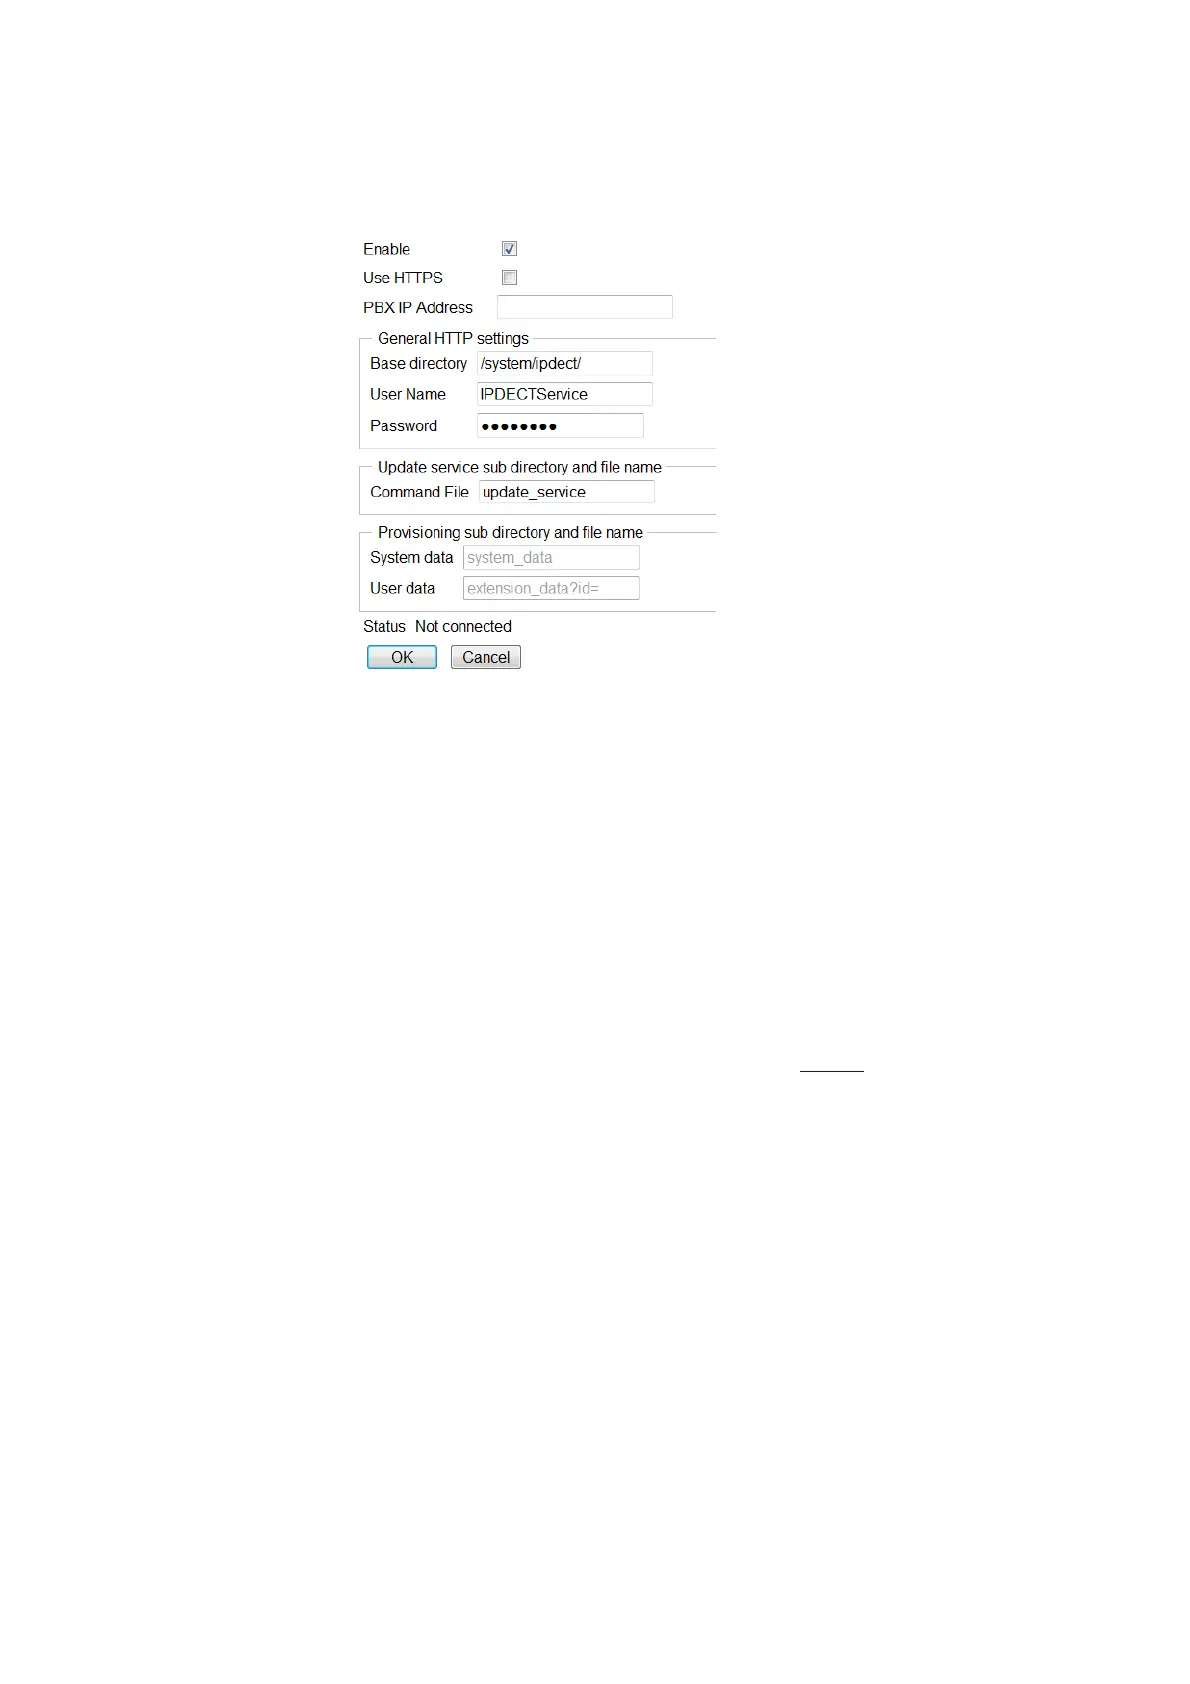
Figure 24. Configure Provisioning
To enable provisioning do the following:
1. Select General > Provisioning.
2. Select the Enable check box.
3. The communication between the IPBS and the IP-PBX can be encrypted using https.
Select the Use HTTPS check box to enable the encryption.
4. Specify the IP address of the IP-PBX in the PBX IP Address field.
5. The other values on the page are default values and filled out automatically.
6. Click "OK".
7. Reset the IPBS/IPBL to make the changes take effect, see Reset
on page 141.
If the https protocol is used the IPBS/IPBL downloads a certificate from the IP-PBX to ensure a
secure transaction. The IPBS/IPBL does not initially trust the certificate so it must be added
manually to the trust list of the IPBS/IPBL. It is also possible that more than one certificate is
downloaded creating a certificate chain. The root CA certificate is at the end of the chain which
contains a self-signed signature and it is able to approve other certificate requests. It is
recommended to add the root CA certificate to the IPBS trust list.
Note: The connection to the IP-PBX will only be established after the certificate is acknowledged.
If the certificate expires, the ongoing connection is maintained but it will not be possible to start
a new connection until the certificate is renewed.
To add a certificate to the trust list do the following: