PAGE 28
Windows PC Software
also check or change settings. When you want to establish a connection,
you can select the new transmission mode directly from the front keypad
of the system or in the PC software.
• Changes are applied by pressing the Apply button.
• Close the window with Close.
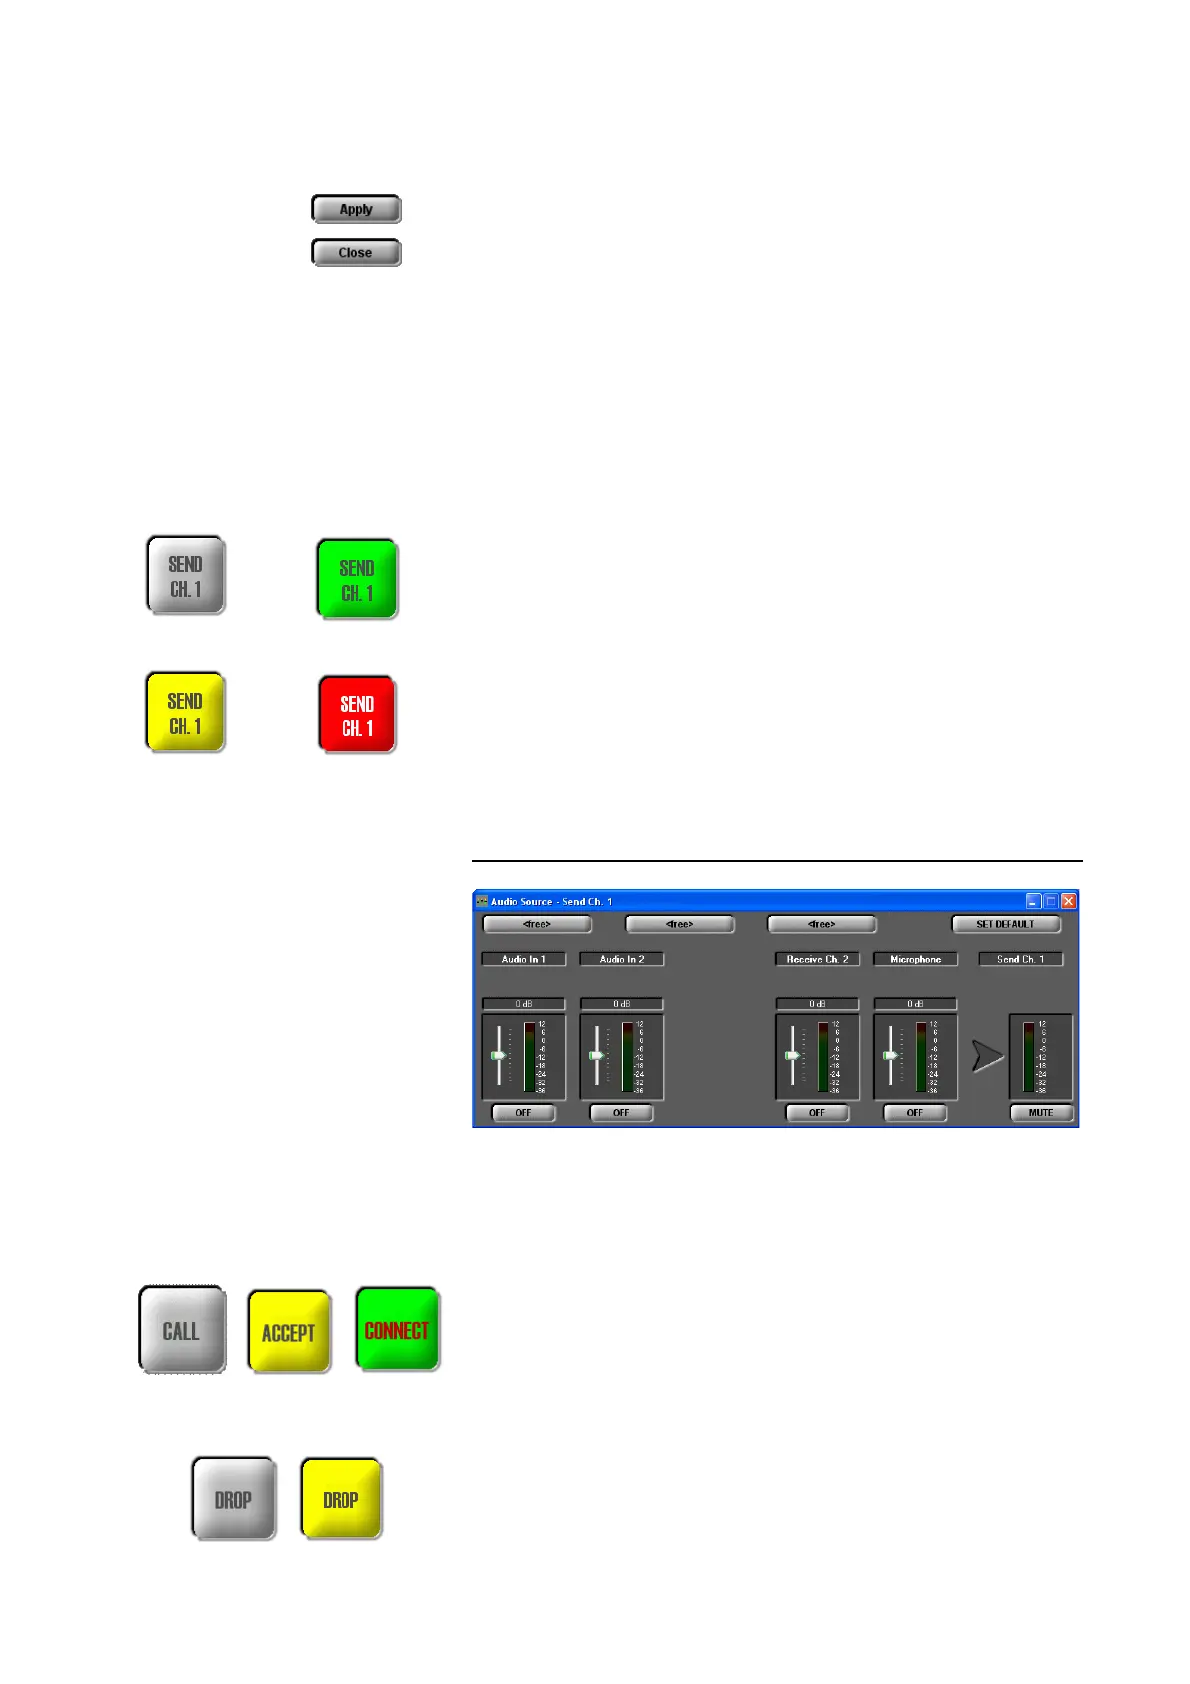
Selection of the Audio sources for the transmit direction
By pressing the button SEND CH.1 respectively SEND CH.2 the window, in
which the Audio sources (Audio Source) for the transmit direction can be
selected, is opened.
Depending on the configuration of the Audio mixer, the SEND CH. button
can have the following colours:
grey: No Audio source is selected for the transmit direction. The remote side
would hear nothing.
green: At least one Audio source is activated.
blinking in red: The Mute function is enables for the selected channel. The re-
mote side would hear nothing.
yellow: The Auto-Ducking function (see PAGE 74) is enabled.
Depending on the transmission procedure, the available levels are displayed.
Details for the operation of the Audio mixer can be found under
CHAPTER 4.5.3.1.
FIG. 10 AUDIO MIXER TRANSMIT DIRECTION
CALL/ACCEPT/CONNECT button
grey: With the CALL button, the connection can be established after the cal-
ling number has been entered and the mode has been selected.
blinking in yellow: An incoming call can be accepted with the ACCEPT but-
ton if the auto answer is disabled.
green: The connection is established. If you click on the CONNECT button
and the Security option is enabled, a control panel is diplayed (see
CHAPTER 10).
DROP button
grey: With the DROP button you can disconnect a connection.
Mute
no Audio source
Auto-Ducking
activated activated
selected
at least one
Audio source selected