111
g) Remove the broken Peltier.
h) Put heat-conductive silicone on the plate of the spiral and on both sides of the Peltier.
i) Fir the Peltier in the centre of the copper plate. Guide the cables through the upper slot of the needle body.
j) Put heat-conductive silicone on the radiator and fit it. Attention: the Peltier is a very fragile component and screws
should be fastened gradually and alternately.
k) Fir the electronics and the fan.
l) Fit the unit on the Z carriage. Attention: tighten the screws gradually and alternately.
m)Plug in the electrical connectors and the Teflon tube.
n) Replace the needle.
5.1.3.4. Changing the needle temperature sensor
a) Remove the arm housing
b) It is recommendable to remove the needle before continuing to handle the unit to prevent it from being damaged.
c) Disconnect connectors and the Teflon tube.
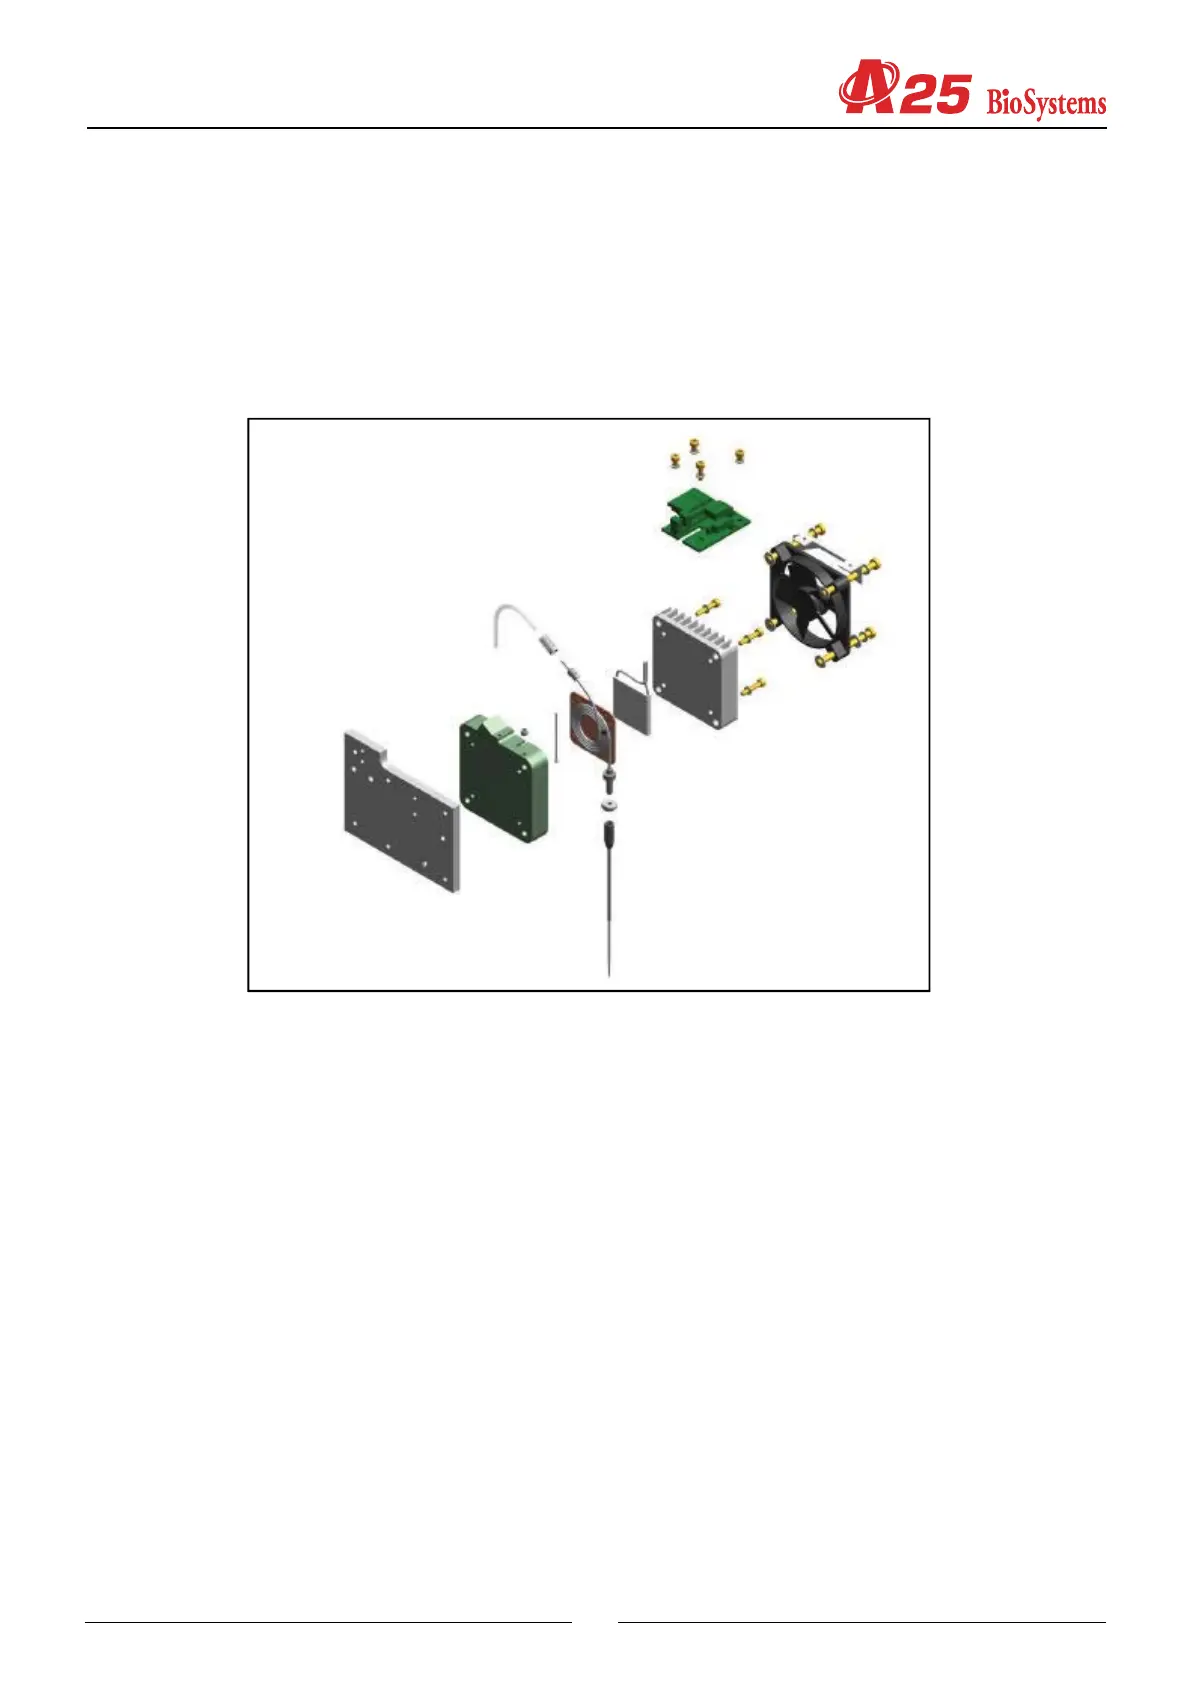
d) Remove the entire needle thermostatation system (body, fan and electronics), held in place by the 4 screws (1).
e) Remove the electronics board.
f) Remove the radiator and the Peltier.
g) Remove the upper nut and the lower nut of the spiral unit.
h) Remove the spiral unit.
i) Change the thermistor. Attention: the heat-conductive silicone must be replaced in the thermistor housing so that it is
completely covered in it.
j) Guide the cables through the upper slot of the needle body.
k) Remount the spiral unit and the lower nut and upper nut.
l) If the heat-conductive silicone has degraded or spread, put heat-conductive silicone on the plate in the spiral and on
both sides of the Peltier.
m)Put heat-conductive silicone on the radiator and fit it. Attention: the Peltier is a very fragile component and screws
should be fastened gradually and alternately.
n) Fit the electronics and the fan.
o) Fit the unit on the Z carriage. Attention: tighten the screws gradually and alternately.
p) Plug in the electrical connectors and the Teflon tube.
q) Replace the needle.