67
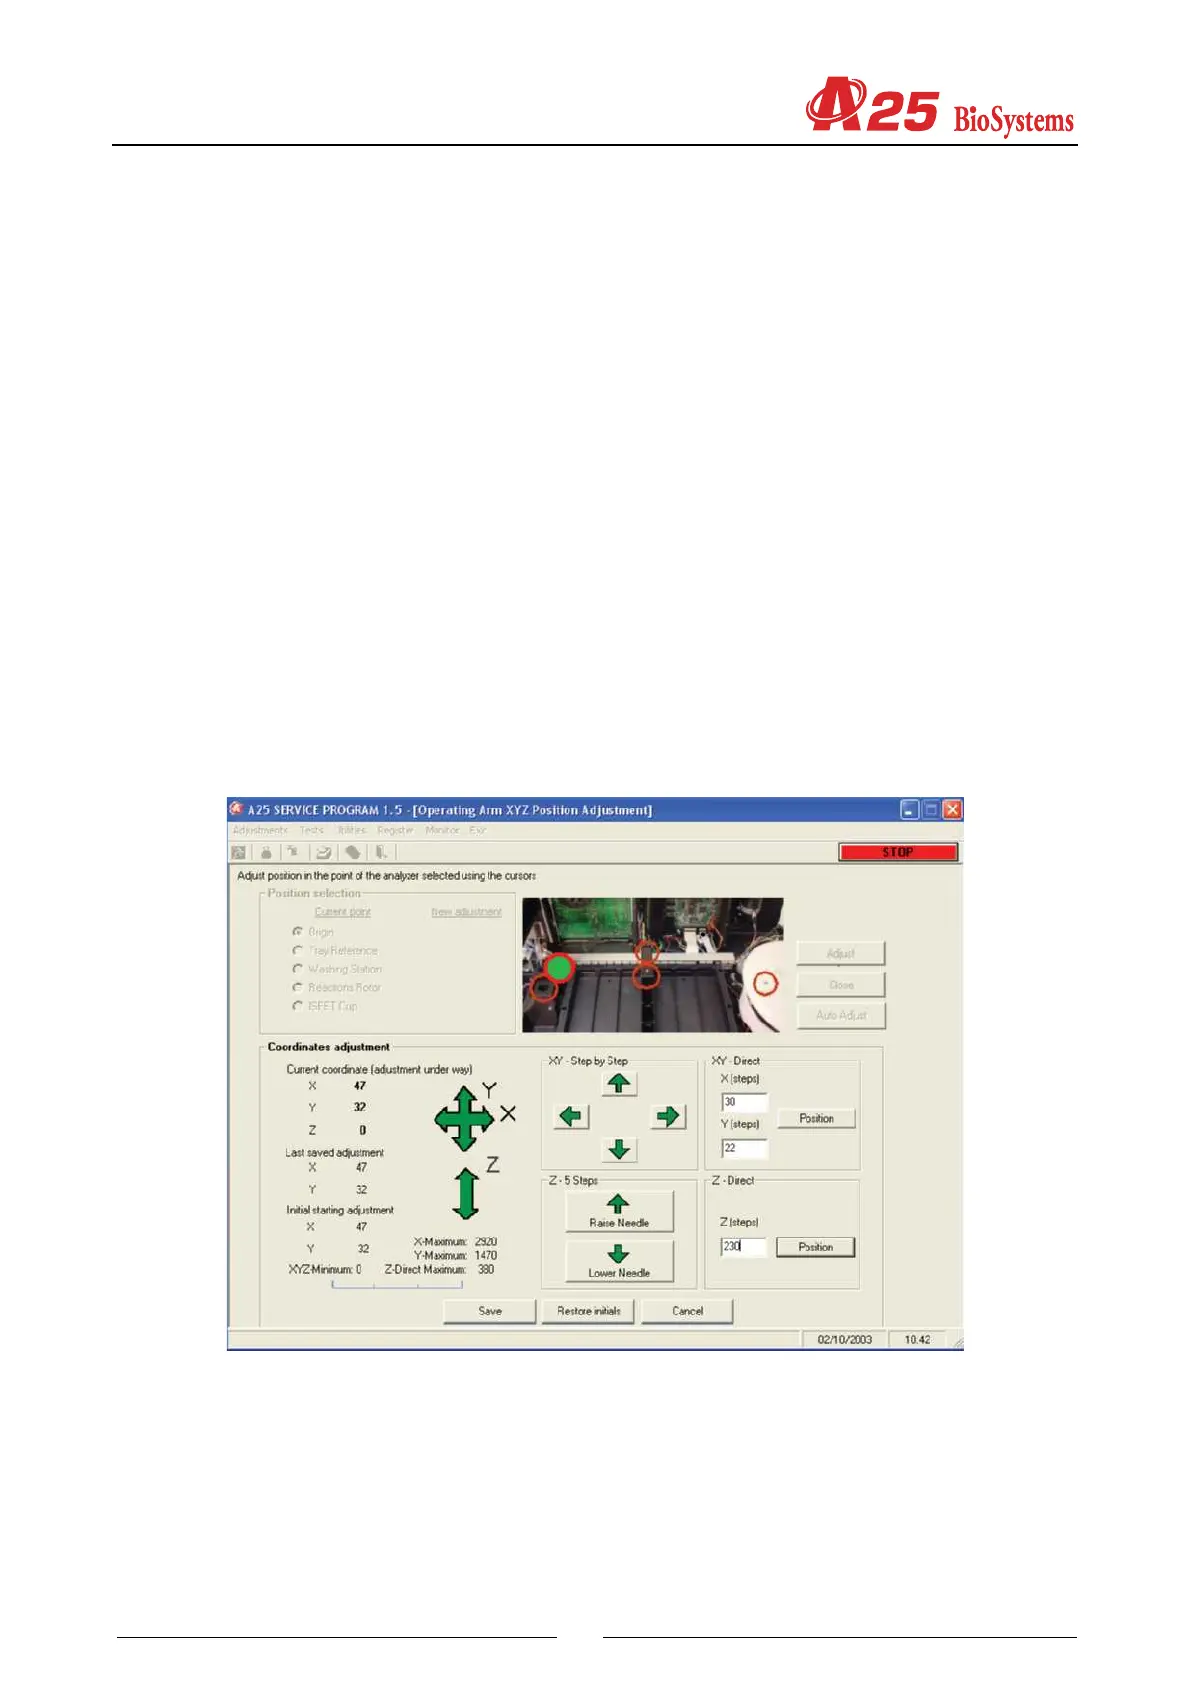
4.2.3. Adjustment of the positioning of the operating arm
This screen makes it possible to adjust the horizontal positioning (X, Y) of the arm. The arm housing must be
removed to see the position of the needle. Before making the adjustments, visually check the verticality of the
needle. If necessary, carefully straighten it up ensuring you do not damage it. On the screen, select the point at
which you wish to adjust the horizontal positioning. On pressing the Adjust button the arm initialises and positions
itself over said point. The technician has buttons to move the arm step by step over the horizontal plain (X, Y) and
vertically (Z). The arm can also be moved introducing a certain number of absolute movement steps. These
absolute movements of the arm must be made with the needle at its highest position so as not to damage it
(coordinate 0). The technician must lower the needle to the adjustment point and adjust its horizontal position.
When the position is satisfactory, save the current coordinates (X, Y) by pressing the Store button. Pressing the
Cancel button keeps the last adjustment values stored. Pressing the Restore button restores the initial screen
input values. At all times, the screen shows the current coordinates of the arm for the selected point, the last
coordinates stored and the initial screen input coordinates, as additional information for the technician. The technician
may repeat the procedure to adjust the positioning of the arm at the different possible adjustment points. These
points are as follows:
(1) Origin. Vertex of the self-centering plate of the needle.
(2) Rack tray Screw that fastens the washing station cover.
(3) Washing station. Centre of the stainless steel font of the washing station.
(4) Reactions rotor. Dispensing point on the rotor reactions cover.
(5) Zmax (on tray reference) Screw that fastens the wash station cover.
If you select the point of origin, automatic adjustment is possible in this position by pressing an AutoAdjustment
button (the process can take around 3 minutes).
4.2.3.1 Adjusting the maximum sweep of the Z axis.
This adjustment prevents the needle from colliding with the rack tray and minimises the zero volume of reagents
and samples.
The adjustment is separated into two parts: (1) the adjustment of the maximum sweep; (2) fine tuning (offsets) by
rack type.