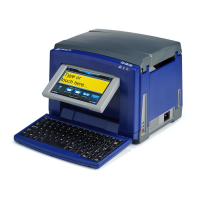
BradyPrinter S3100 Sign & Label Printer User’s Manual
49
Working with Text
Expanding or Condensing Text
2. If not already displayed, touch the More Options button to go to the
Justification controls.
3. Touch the desired justification option (left, center, right) . The
text is immediately displayed and justified to the new setting.
Note: Text objects can all be formatted with different alignments, however the
last text object set becomes the default for any new text objects during the
current editing session. See “Set Text Defaults” on page 22 for more details.
Vertical Text
Use this procedure to align text vertically as a string of characters.
Once text has been sized to fit vertically, selecting the vertical setting again will
not change the text back to the original size. You will have to manually change the
text size back to its original setting.
To set text vertically:
1. In the Editor, select the text object you want to change.
2. In the Control Panel, touch the More Options button to navigate to
the Vertical controls.
3. Touch the Vertical button . The text is immediately displayed vertically
on the label.
4. To toggle the vertical setting on and off, touch the Vertical button again.
Notes:
• Line breaks in the text are treated as spaces when the text is formatted
vertically.
• If the vertical object does not fit on the label, the object and text will be
resized so it fits within the printable area of the label (i.e., text is not
truncated).
Expanding or Condensing Text
Use this procedure to expand or condense the text characters horizontally. This
does not change the font size.
To expand or condense text:
1. In the Editor, select the text object you want to expand or condense.
2. In the Control Panel, touch the More Options button to navigate to
the Expand/Condense controls.
 Loading...

