BradyPrinter S3100 Sign & Label Printer User’s Manual
60
Handling Objects
Sizing Objects
Sizing Objects
Use this procedure to set the object size. Objects can be sized by using the size
buttons, dragging objects to size or setting object label length and width.
Note: Sizing an object too large may cause it to overlap or cover other objects in
the Editor.
Use Size Buttons
To use the size buttons:
1. In the Editor, select the object you want to resize.
2. In the Toolbar, touch the increase or decrease button. Increasing
or decreasing the object size with the Size buttons results in proportional
resizing only.
Note: For barcode objects, resizing occurs only in the direction of the barcode
bars (usually the vertical direction, unless the barcode has been rotated).
3. Repeat Step 2 until the object is the size you want.
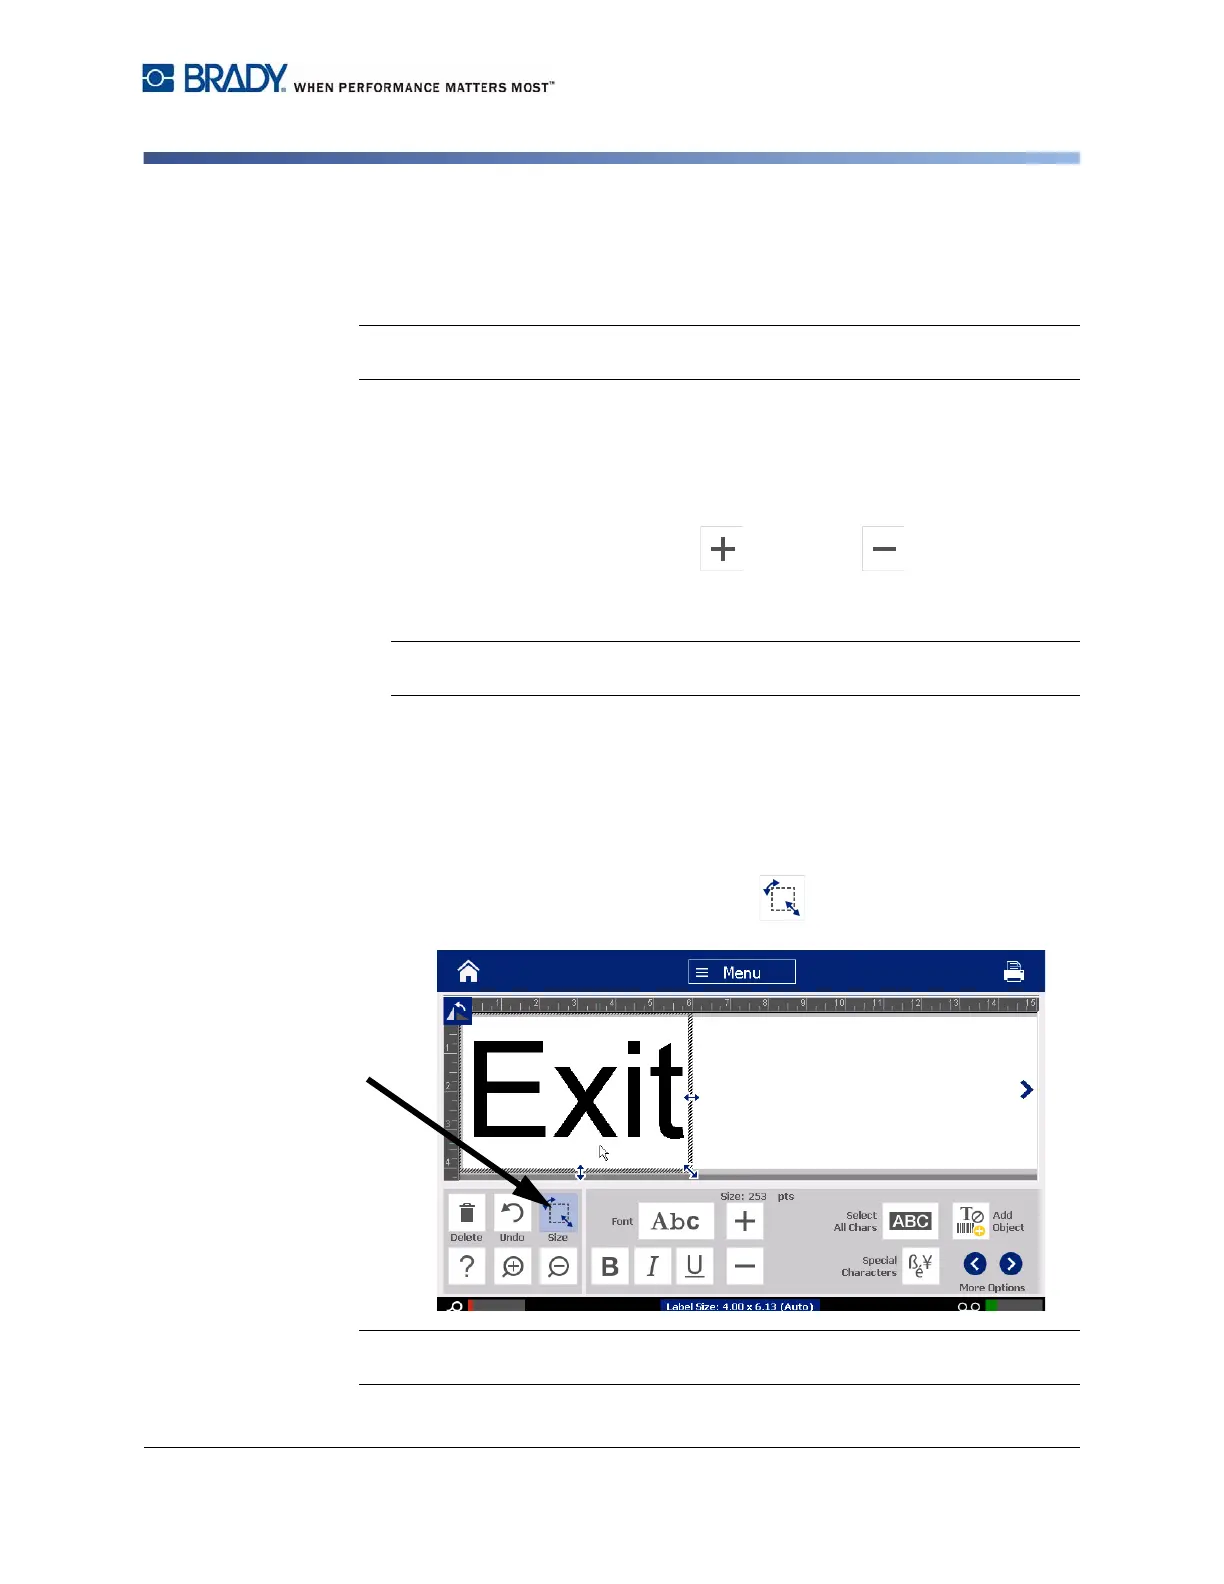
Drag Objects to Size
To drag objects to size:
1. In the Editor, select the object you want to resize.
2. In the Tools panel, touch the Size button to display the sizing handles
on the object.
Note: If an object is rotated, the non-proportional sizing handles are hidden. To size
non-proportionally, return the object to an unrotated state (0 degrees).