BradyPrinter S3100 Sign & Label Printer User’s Manual
137
Right to Know (RTK)
Create RTK Labels
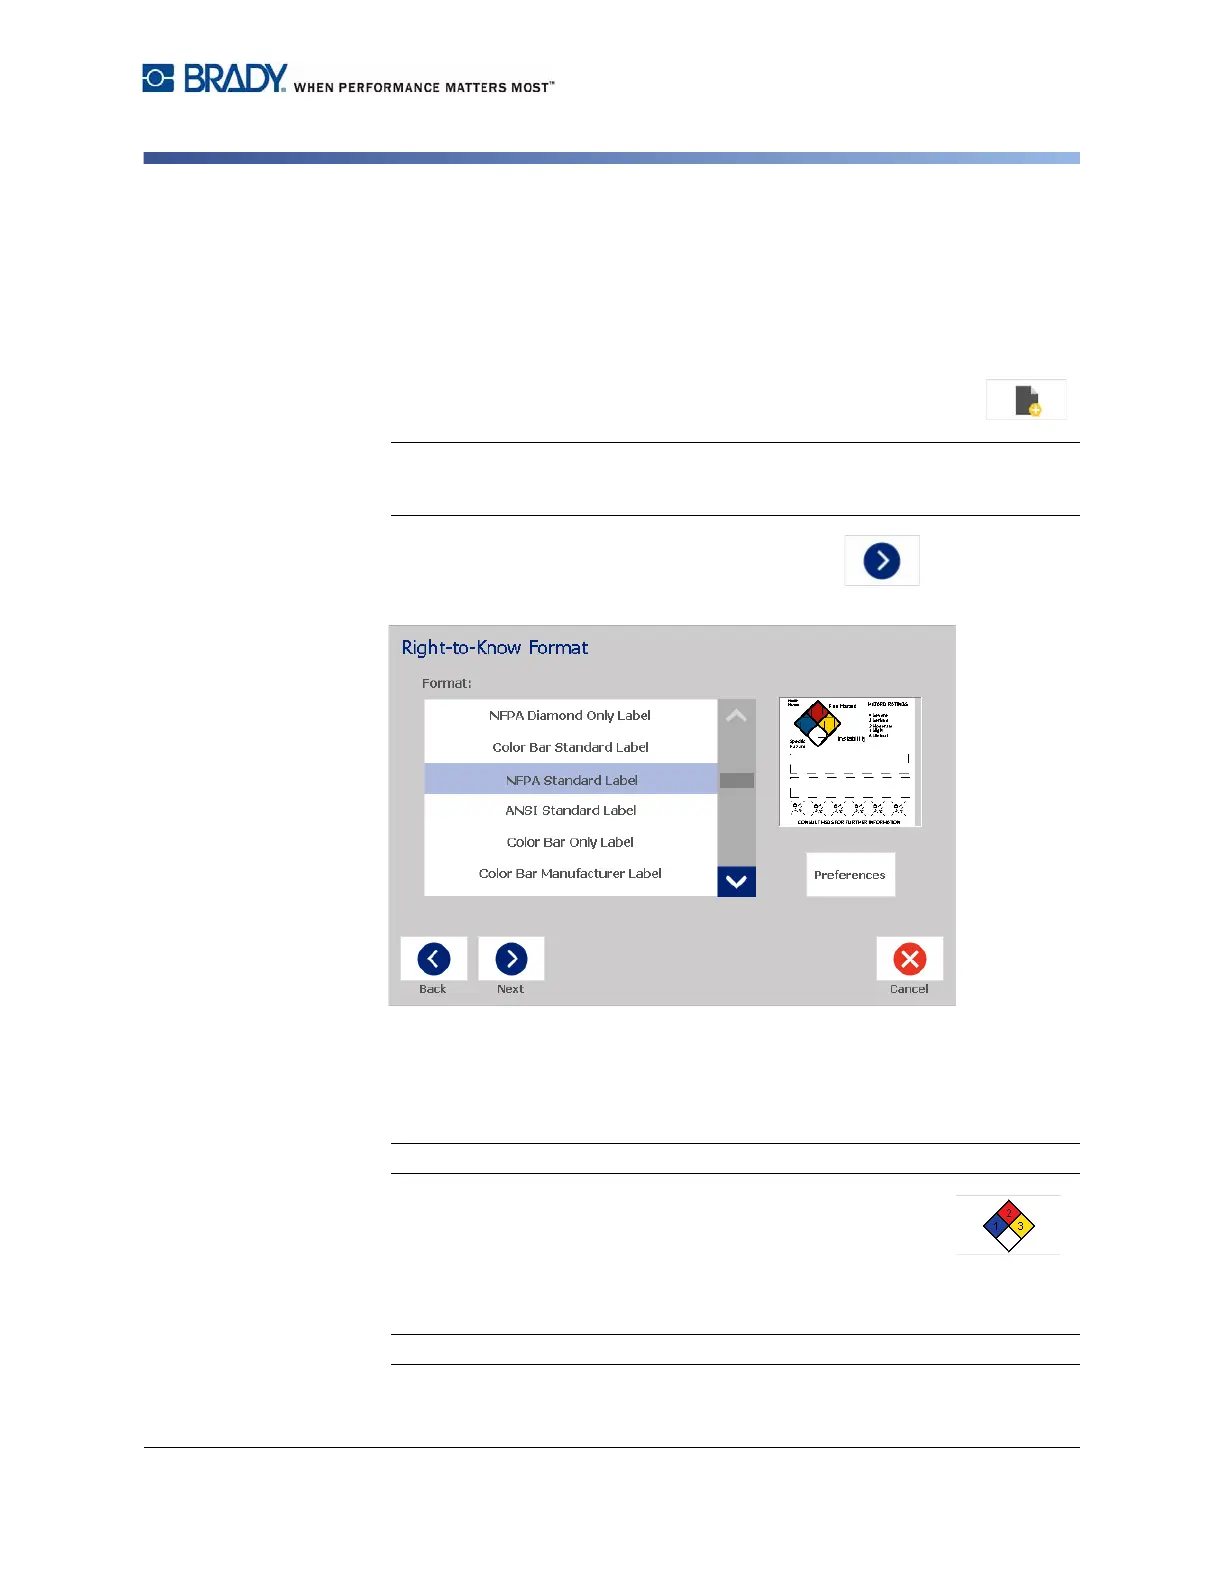
Create RTK Labels
The selected label format determines the options that are available. See Table C.1
“Available RTK Formats and Options” on page C-139 for a list of formats and
options that are available from the RTK menu.
To create a new RTK label:
1. From the Right To Know panel, touch the Create New File button.
Note: Depending on the defaults selected in the Setup menu, the defaults
selected will vary. To change the selected defaults, see “Setting RTK
Preferences” on page 133.
2. Select a new label format, or click the Next button to continue with
the default selection.
3. Select or enter data for each of the dialogs that display for your label format.
The dialogs that display depend on the label format you selected.
4. When done, touch the Finish button. The label is generated and displayed in
the Editor.
Note: Before printing, install the supply that matches the label you are creating.
5. To edit or change the objects, touch the Edit RTK Data button.
6. In the dialog(s) that display, select or enter the new data, then click the Next
or Finish button.
Note: The format cannot be edited after a label has been created.