2007 Buell Lightning: Engine 3-81
HOME
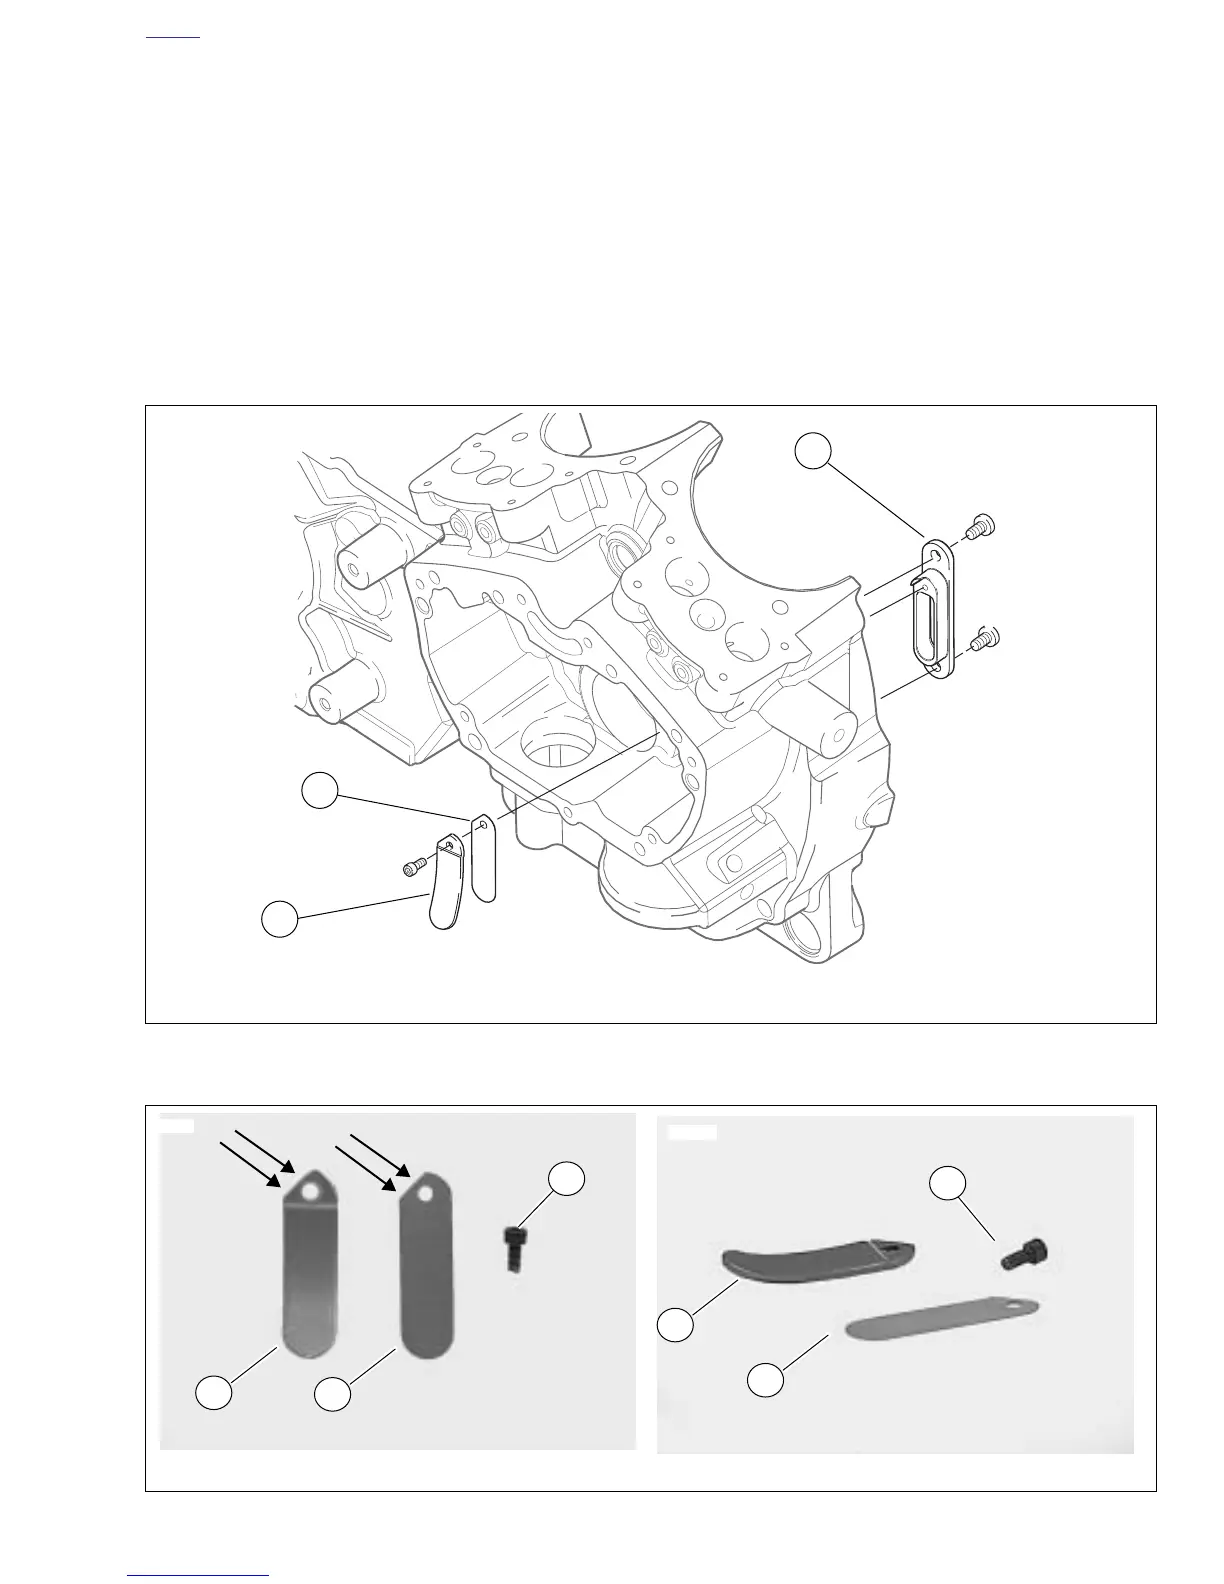
Reed Valve Replacement
NOTES
●
See Figure 3-117. The reed valve (3) opens on the
downstroke to relieve crankcase pressure and closes on
the upstroke to prevent vapors returning to the crank-
case. The curved reed valve stop (2) limits the movement
of the reed valve. See 3.13 CRANKCASE BREATHING
SYSTEM.
●
Whenever the gearcase cover is removed, the reed valve
should always be inspected for cracks, chips and break-
age.
1. Remove the fastener (1), the reed valve stop (2) and the
reed valve (3).
2. See Figure 3-117. To replace the assembly, align the
edges of the reed valve (3) and the reed valve stop (2) to
prevent premature failure of the reed valve.
NOTE
See Figure 3-116. It is not necessary to replace the reed
block (4) along with the reed valve. The block can only be
replaced after separating the crankcase halves.
3. With the lower part of the curve on the stop facing out,
Apply LOCTITE 222 (purple), install and tighten fastener
to 5-7
in-lbs
(0.6-0.8 Nm).
4. If it was necessary to replace the reed block, apply LOC-
TITE 222 (purple), install the fasteners and tighten to 25-
35
in-lbs
(2.8-4 Nm).
Figure 3-116. Reed Valve Assembly
1. Reed valve stop 2. Reed valve 3. Reed block
3
2
1
b1033x3x
Figure 3-117. Reed Valve Stop and Reed Valve
1. Reed valve stop 2. Reed valve 3. Stop screw
3
1
2
8759
1
2
3
8794