7-74 2007 Buell Lightning: Electrical
HOME
22. Install wire harness guide on steering neck and tighten to
36-60 in-lbs (4-6.7 Nm).
23. Verify that front forks can be turned from full left to full
right lock without wire harness binding or pinching.
1WARNING1WARNING
Connect positive (+) battery cable first. If positive (+)
cable should contact ground with negative (-) cable con-
nected, the resulting sparks can cause a battery explo-
sion, which could result in death or serious injury.
(00068a)
24. Install positive battery cable (red) to positive terminal of
battery. Tighten to 72-96 in-lbs (8-11 Nm).
25. Connect negative battery cable. Tighten to 72-96 in-lbs
(8-11 Nm).
26. Verify operation of all electrical components.
27. Install windscreen. See 2.43 WINDSCREEN.
28. Install intake cover assembly. See 2.38 INTAKE COVER
ASSEMBLY.
1WARNING1WARNING
After installing seat, pull upward on front of seat to be
sure it is in locked position. While riding, a loose seat can
shift causing loss of control, which could result in death
or serious injury. (00070a)
29. Install seat. See 2.44 SEAT.
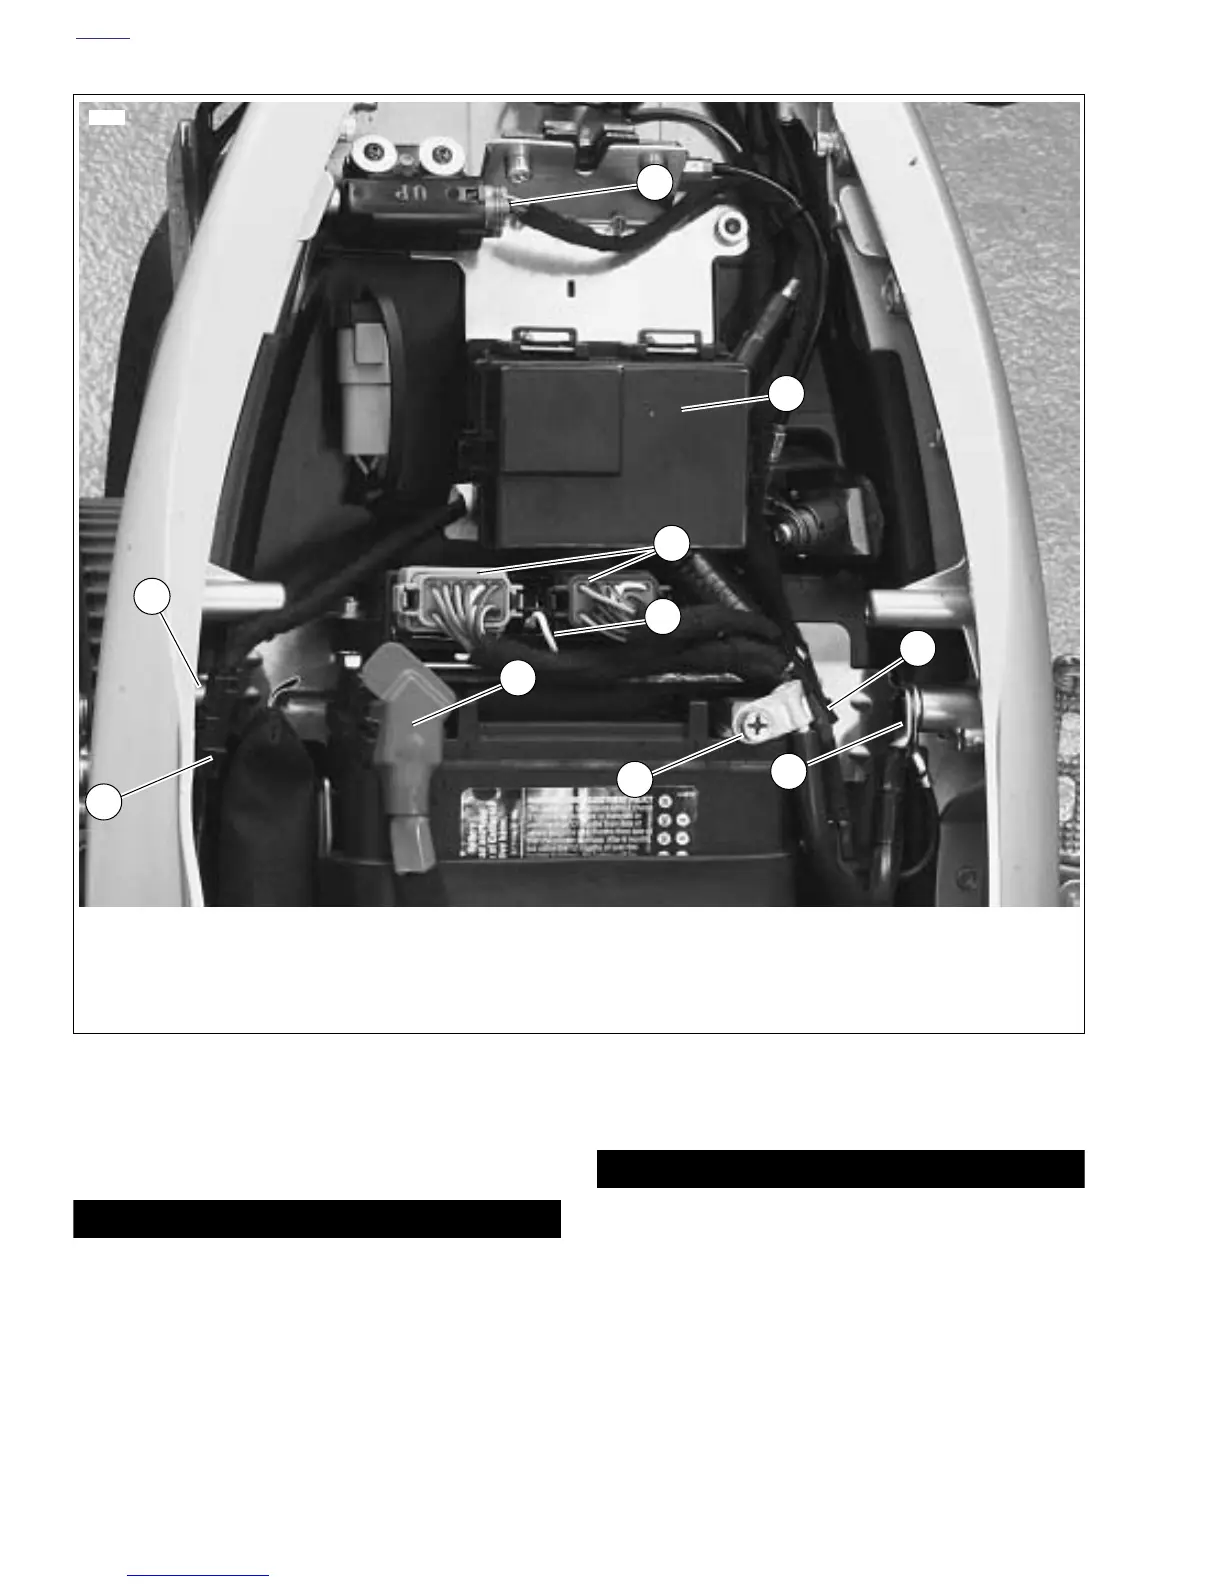
Figure 7-94. Main Harness and Electrical Connectors Under Seat (XB12Ss)
3
4
9
8
7
2
6
1
1. Main harness
2. Main harness ground (high voltage ground wire)
3. Battery ground cable
4. Battery positive cable
5. Rear brake light switch connector [121]
6. Ground terminals (low voltage ground wires)
7. ECM connectors [10] & [11]
8. Fuse block and relay center
9. BAS (bank angle sensor) connector [134]
10. Interactive exhaust connector [165B]
5
10
12153