2-12 2007 Buell Lightning: Chassis
HOME
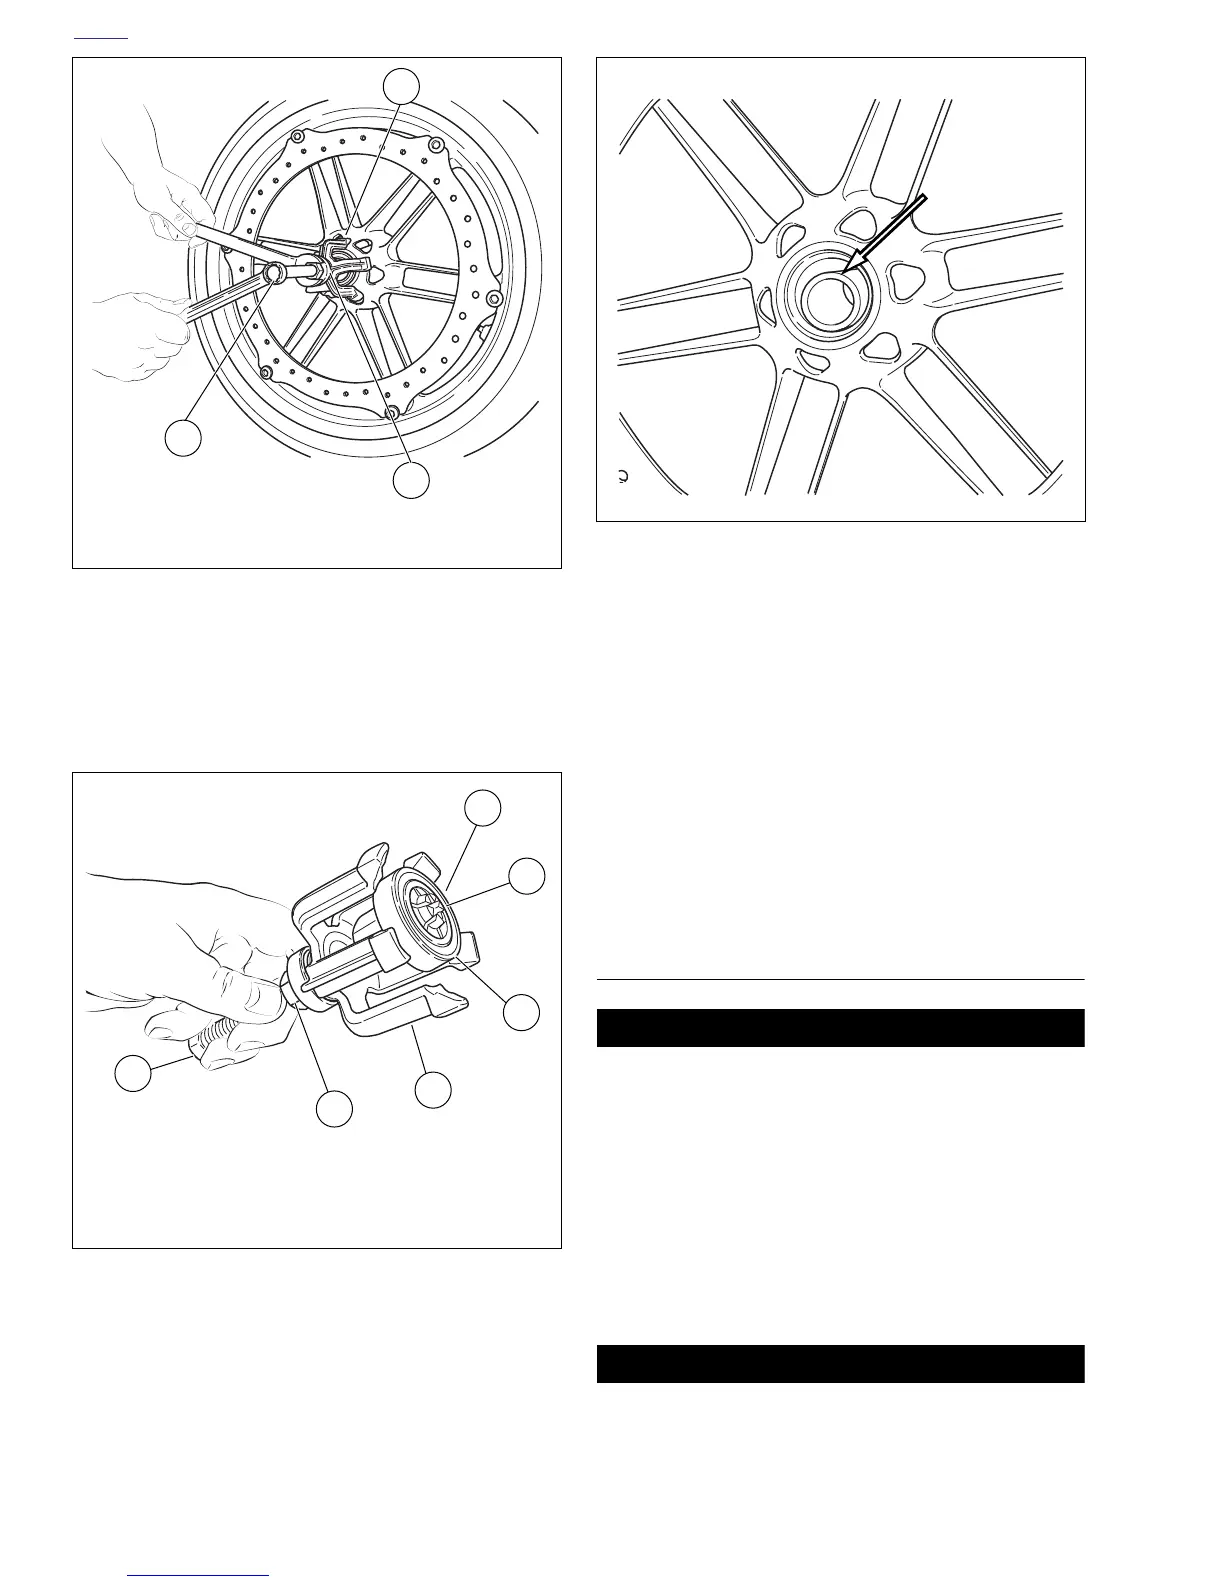
10. See Figure 2-9. Loosen the nut (3), and back off the
bridge (1). Hold the forcing screw (2) while holding the
collet to remove the forcing screw from the collet.
11. See Figure 2-10. Remove the ball bearing (5) and wheel
bearing (6) from the collet (4).
12. See Figure 2-11. Remove the spacer.
13. Repeat Steps 4-12 for the bearing on the other side of
the wheel.
Front Rotor Removal
1. See Figure 2-17. Remove and discard rotor mounting
fasteners (7).
2. Remove and inspect brake rotor (6) for wear and warp-
ing. See 2.12 FRONT BRAKE CALIPER/1.6 BRAKE
SYSTEM MAINTENANCE.
3. Remove drive bushings (8) and discard.
4. Remove washers (9) and discard.
5. Remove front brake springs (4) and discard.
CLEANING AND INSPECTION
11WARNING1WARNING
Never use compressed air to “spin-dry” bearings. Very
high bearing speeds can damage unlubricated bearings.
Spinning bearings with compressed air can also cause a
bearing to fly apart, which could result in death or seri-
ous injury.
1. Inspect all parts for damage or excessive wear.
NOTE
The wheel bearings are designed as sealed bearings which
are not intended to be disassembled, serviced or cleaned
with solvents.
11WARNING1WARNING
Always replace brake pads in complete sets for correct
and safe brake operation. Improper brake operation
could result in death or serious injury. (00111a)
2. Inspect brake rotor and pads. See 1.6 BRAKE SYSTEM
MAINTENANCE and 2.12 FRONT BRAKE CALIPER.
Figure 2-9. Remove the Bearing
Figure 2-10. Removing Bearing from Puller
i04279
3
1
2
1. Bridge
2. Forcing screw
3. Nut
i04282
1. Nut
2. Bridge
3. Forcing screw
4. Collet
5. Ball bearing
6. Wheel bearing
3
1
2
6
4
5
Figure 2-11. Remove the Spacer
i04280