64-44
Cisco ASA 5500 Series Configuration Guide using ASDM
OL-20339-01
Chapter 64 General VPN Setup
Configuring AnyConnect (SSL) VPN Client Connections
Step 1 Log into the ASDM and select Configuration > Firewall > NAT Rules.
Step 2 Create a NAT rule so that the hosts in the Engineering VPN address pool can reach the hosts in the Sales
VPN address pool. In the NAT Rules pane, select Add > Add NAT Rule Before “Network Object”
NAT rules so that the ASA evaluates this rule before other rules in the Unified NAT table. See
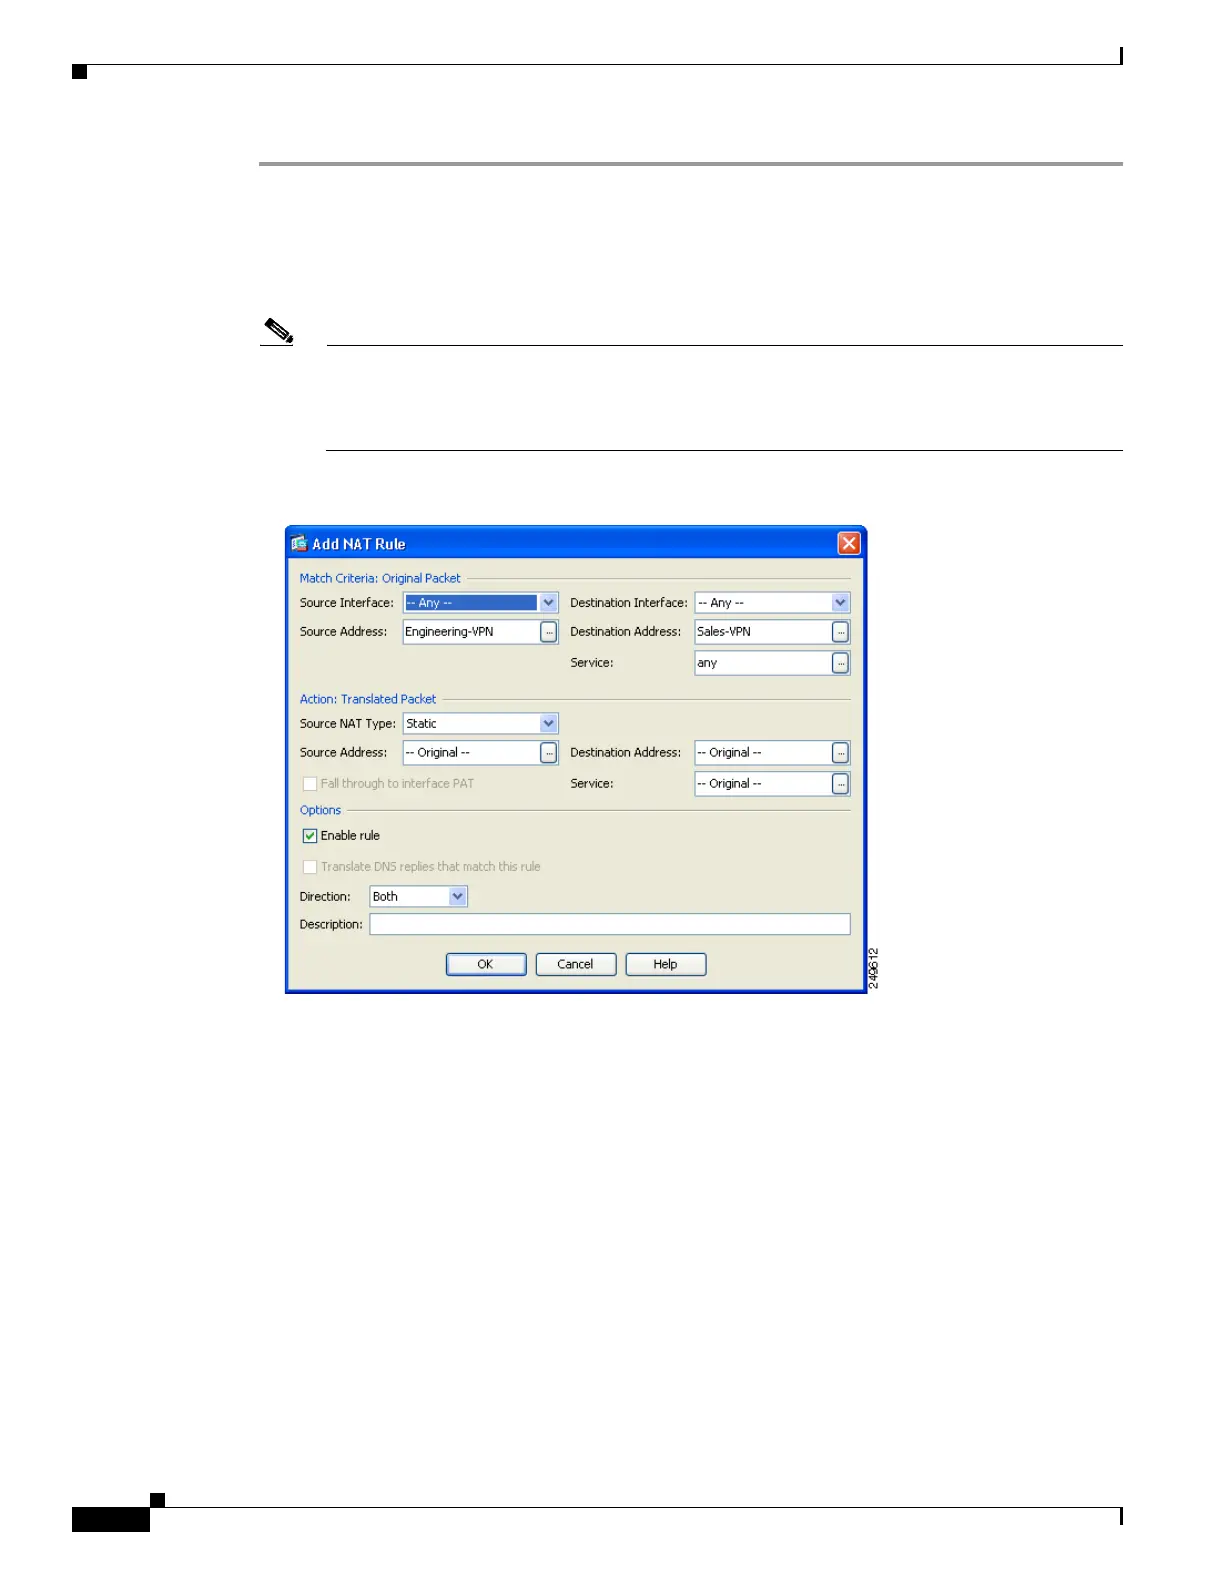
Figure 64-2 on page 64-44 for an example of the Add NAT rule dialog box.
Note In ASA software version 8.3, NAT rule evaluation is applied on a top-down, first match basis.
Once the ASA matches a packet to a particular NAT rule it does not perform any further
evaluation. It is important that you place the most specific NAT rules at the top of the Unified
NAT table so that the ASA does not prematurely match them to broader NAT rules.
Figure 64-2 Add NAT rule dialog box
a.
In the Match criteria: Original Packet area, configure these fields:
–
Source Interface: Any
–
Destination Interface: Any
–
Source Address: Click the Source Address browse button and create the network object that
represents the Engineering VPN address pool. Define the object type as a Range of addresses.
Do not add an automatic address translation rule. See Figure 64-3 for an example.
–
Destination Address: Click the Destination Address browse button and create the network
object that represents the Sales VPN address pool. Define the object type as a Range of
addresses. Do not add an automatic address translation rule.

 Loading...


