63
E9000
HANDPIECES
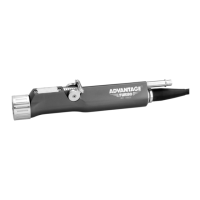
B
(e) Pull on the shaver blade or bur to
ensure it is locked in place.
(f) To remove the shaver blade or bur,
open the locking collet by turning it
counterclockwise as viewed from the
collet end of the handpiece. Pull the
shaver blade or bur out.
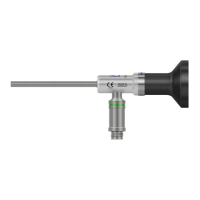
2. If irrigation is being used, and the E9416
or E9417 Tubing Set is utilized:
(a) Attach the tubing to the shaver blade
and handpiece by sliding the tubing set
irrigation collar over the distal end of
the shaver blade toward the shaver
blade hub.
NOTE: Prior to bending the shaver blade,
the irrigator collar must be installed. See
blade insert sheet for blade bending
information.
Warning: If operating the E9005
Shaver in the oscillate mode between
2500 and 5000 rpm, and with a shaver
blade in the bent position, you MUST use
either the E9416 or E9417 Irrigation Tubing
Set and irrigation MUST be set to 100%.
(b) Slide the inner recesses of the collar
completely over the two hub-ears on
the shaver blade hub.
(c) Turn the irrigation collar clockwise
(approximately 90°) and securely lock
it into place.
(d) Snap the handpiece cord clips onto the
handpiece cable to secure the tubing.
3. For best resection performance, completely
open the handpiece suction port valve by
positioning it towards the front of the
handpiece.