3
Print Operations
3-8 ineo+ 650/550/451
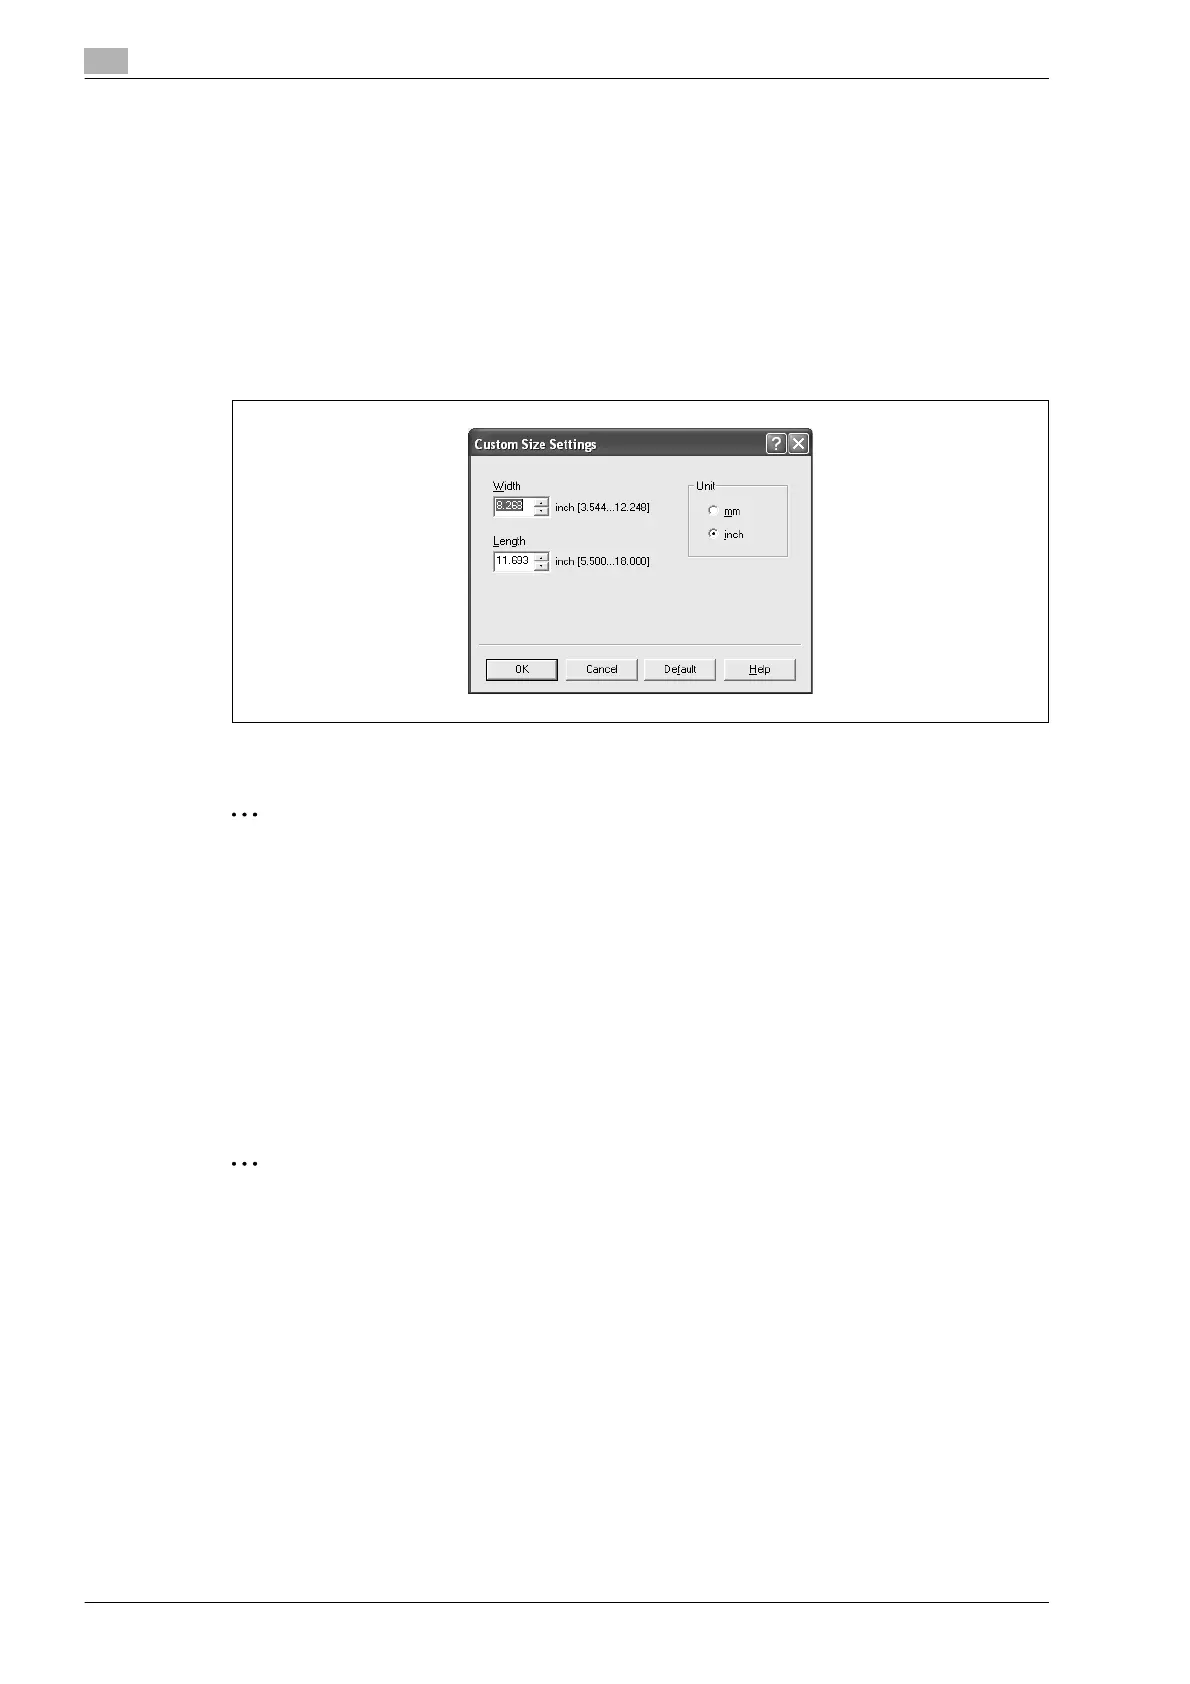
Specifying a custom size
When printing on paper of a custom size, you can select a preregistered custom paper size or specify a paper
size value as described below.
1 From the "Original Size" or the "Paper Size" drop-down list, select "Custom Size".
The Custom Size Settings dialog box appears.
2 Specify settings for the following:
– Width: Specifies the width of the custom paper size according to the selected measurement unit.
– Length: Specifies the length of the custom paper size according to the selected measurement unit.
– Unit: Selects the measurement unit that specifies the size.
3 Click the [OK] button.
2
Note
For custom sizes that are used often, it comes in handy if you add them to the paper size list. Add a
custom paper size from the Settings tab.
ineo+ 451: If using banner paper, specify the size of the banner paper in Custom Size.
Selecting the paper tray
You can specify the paper you want to use for printing by selecting the paper tray that contains the loaded
paper.
1 Click the Basic tab.
2 From the "Paper Tray" drop-down list, select the desired paper tray.
2
Note
If "Auto" is specified as the paper tray, you can select the paper type. If the paper tray setting is
changed to a setting other than "Auto", the paper type is fixed to its preregistered setting. Specify a
paper type by clicking the [Paper Settings for Each Tray] button. For details, refer to "Specifying the
paper type for a paper tray" on page 3-9.