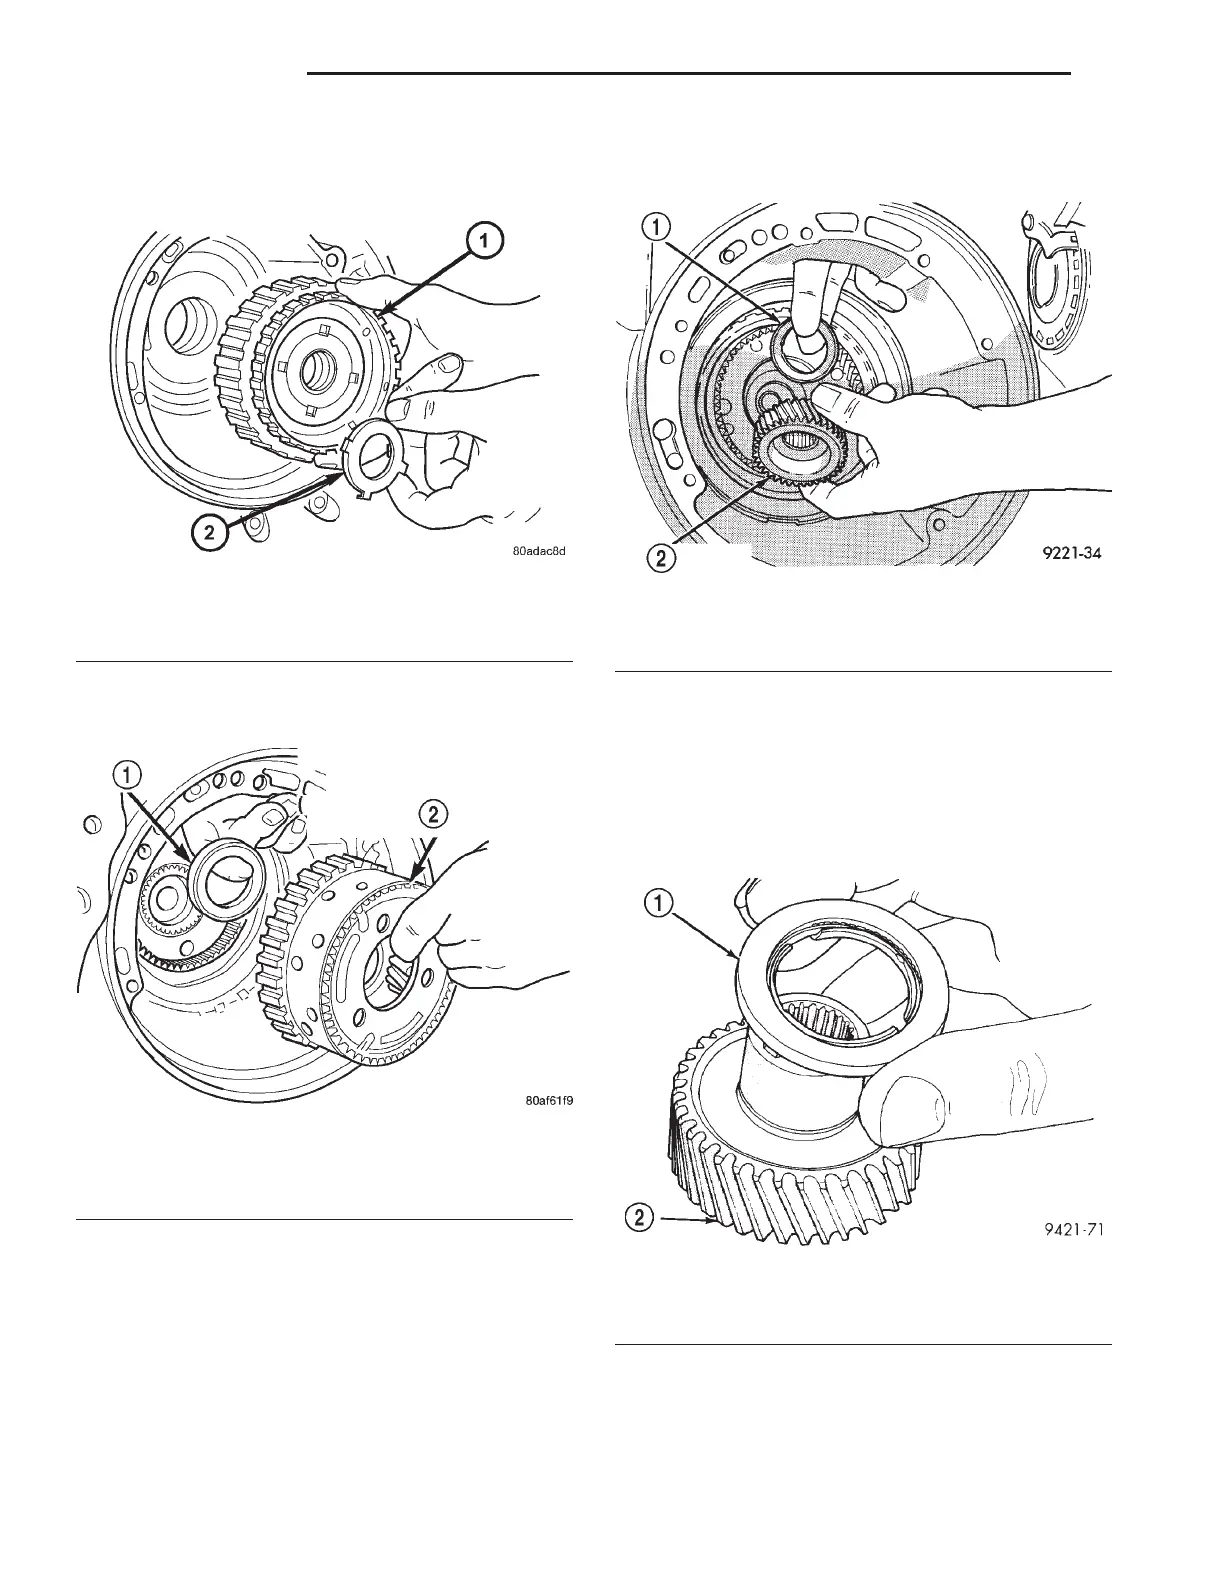
(22) Remove front sun gear assembly and #4
thrust washer (if still in place) (Fig. 35).
(23) Remove front carrier/rear annulus and #6 nee-
dle bearing (Fig. 36).
(24) Remove rear sun gear and #7 needle bearing
(Fig. 37) (Fig. 38).
NOTE: The number seven needle bearing has three
antireversal tabs and is common with the number
five and number two position. The orientation
should allow the bearing to seat flat against the
rear sun gear (Fig. 38). A small amount of petrola-
tum can be used to hold the bearing to the rear sun
gear.
Fig. 35 Remove Front Sun Gear Assembly
1 - FRONT SUN GEAR ASSEMBLY
2 - #4 THRUST WASHER (FOUR TABS)
Fig. 36 Remove Front Carrier/Rear Annulus
1 - #6 NEEDLE BEARING
2 - FRONT CARRIER AND REAR ANNULUS ASSEMBLY (TWIST
AND PULL OR PUSH TO REMOVE OR INSTALL).
Fig. 37 Remove Rear Sun Gear
1 - #7 NEEDLE BEARING
2 - REAR SUN GEAR
Fig. 38 Number 7 Bearing
1 - #7 BEARING
2 - REAR SUN GEAR
21 - 18 TRANSAXLE LH
42LE AUTOMATIC TRANSAXLE (Continued)