Page 30 of 112
DMM-0200 Product User Guide
159 Swanson Road
Boxborough, MA 01719
Tel: 508-475-3400
Email: sales@dovermotion.com
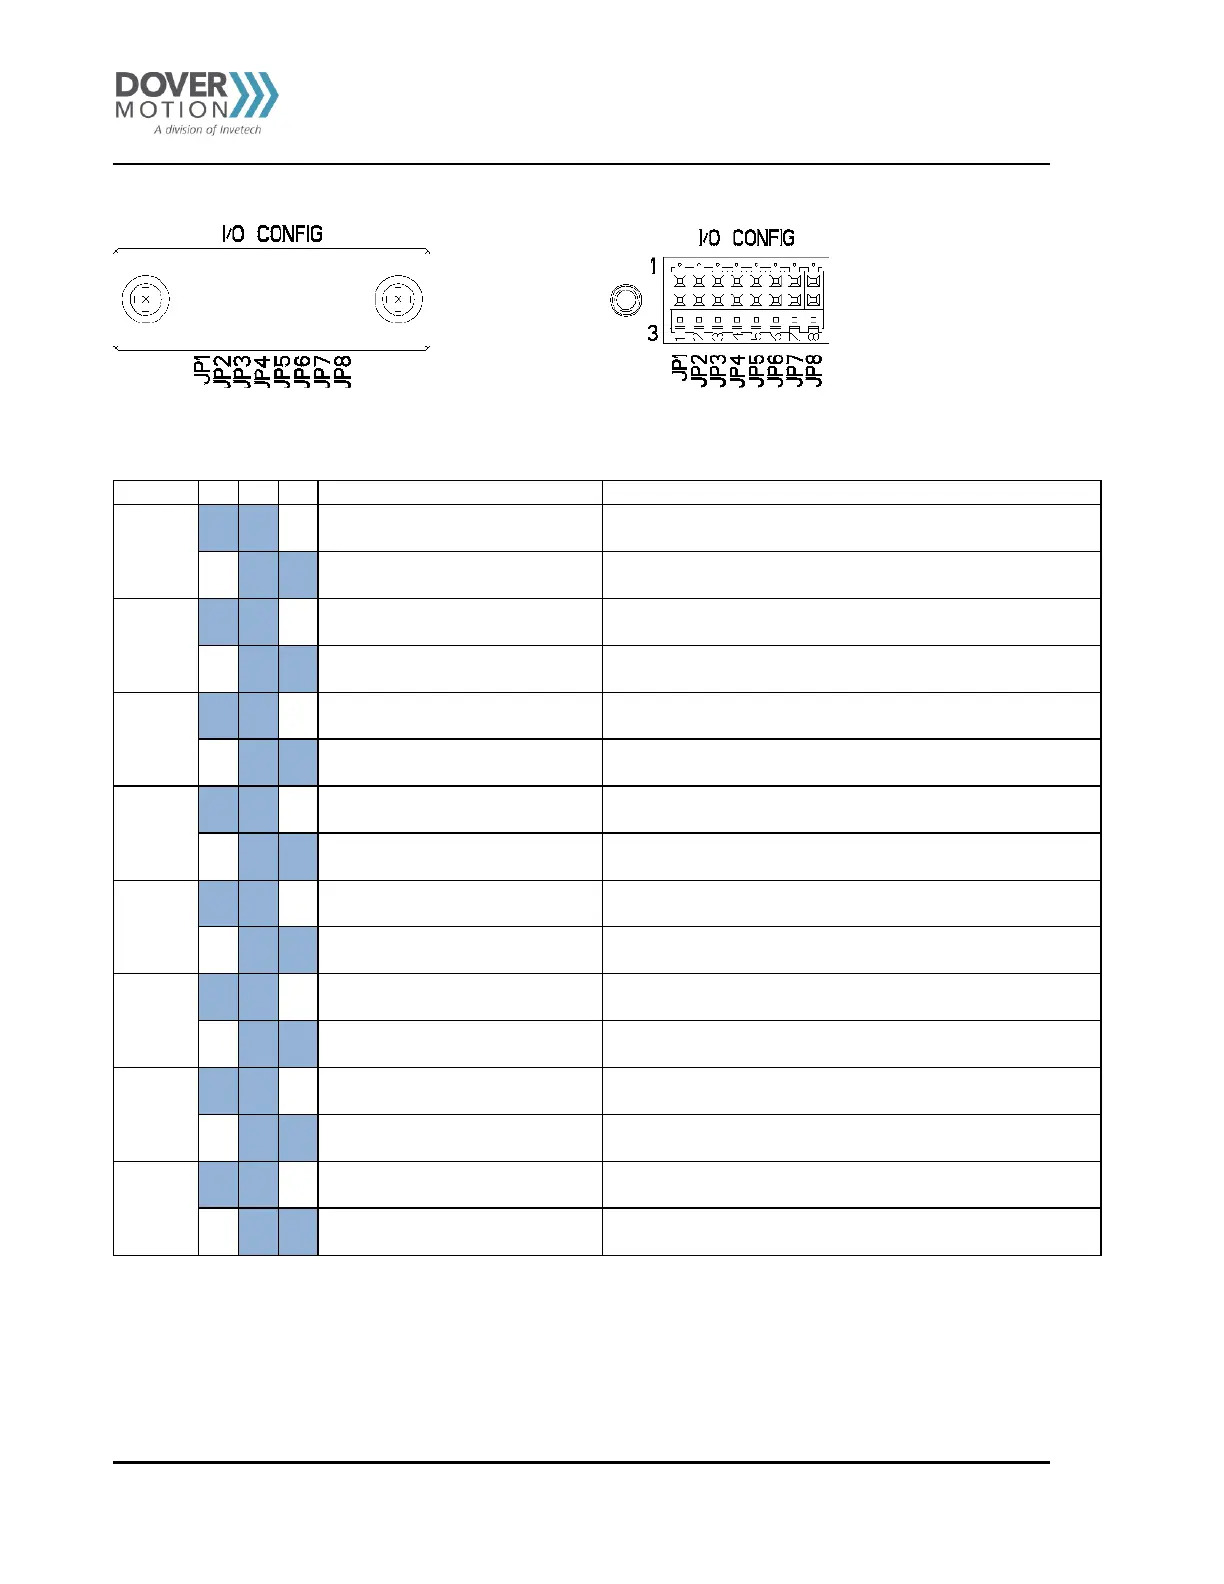
Jumper Selection – JP1 – JP8
I/O Config with Cover I/O Config without Cover
1-2 for Output 8 to rear panel
Installing a jumper on JP1 1-2 will disable the SPDT Relay
and Output 8 will be routed to J18
Installing a jumper on JP1 2-3 will enable the SPDT Relay
and Output 8 will be used to switch the relay
1-2 for Input 8 to rear panel
Installing a jumper on JP2 1-2 will route Input 8 to J18
Installing a jumper on JP2 2-3 will disable Input 8
1-2 for Input 7 to rear panel
Installing a jumper on JP3 1-2 will disable the front panel
THUMBWHEEL button and Input 7 will be routed to J18
2-3 for front panel thumbwheel
Installing a jumper on JP3 2-3 will enable the front panel
THUMBWHEEL button and Input 7 will not be available on J18
1-2 for Input 6 to rear panel
Installing a jumper on JP4 1-2 will disable the front panel
THUMBWHEEL button and Input 6 will be routed to J18
2-3 for front panel thumbwheel
Installing a jumper on JP4 2-3 will enable the front panel
THUMBWHEEL button and Input 6 will not be available on J18
1-2 for Input 5 to rear panel
Installing a jumper on JP5 1-2 will disable the front panel
THUMBWHEEL button and Input 5 will be routed to J18
2-3 for front panel thumbwheel
Installing a jumper on JP5 2-3 will enable the front panel
THUMBWHEEL button and Input 5 will not be available on J18
1-2 for Input 4 to rear panel
Installing a jumper on JP6 1-2 will disable the front panel
THUMBWHEEL button and Input 4 will be routed to J18
2-3 for front panel thumbwheel
Installing a jumper on JP6 2-3 will enable the front panel
THUMBWHEEL button and Input 4 will not be available on J18
1-2 for Input 3 to rear panel
Installing a jumper on JP7 1-2 will disable the front panel
STOP button and Input 3 will be routed to J18 & J19
2-3 for front panel Stop button
Installing a jumper on JP7 2-3 will enable the front panel
STOP button and Input 3 will not be available on J18 & J19
1-2 for Input 2 to rear panel
Installing a jumper on JP8 1-2 will disable the front panel
START button and Input 2 will be routed to J18 & J19
2-3 for front panel Start button
Installing a jumper on JP8 2-3 will enable the front panel
START button and Input 2 will not be available on J18 & J19
Table 15 Jumper Selection–JP1 – JP8