Operating instructions
30 Operating manual 867 Version 01.0 - 12/2012
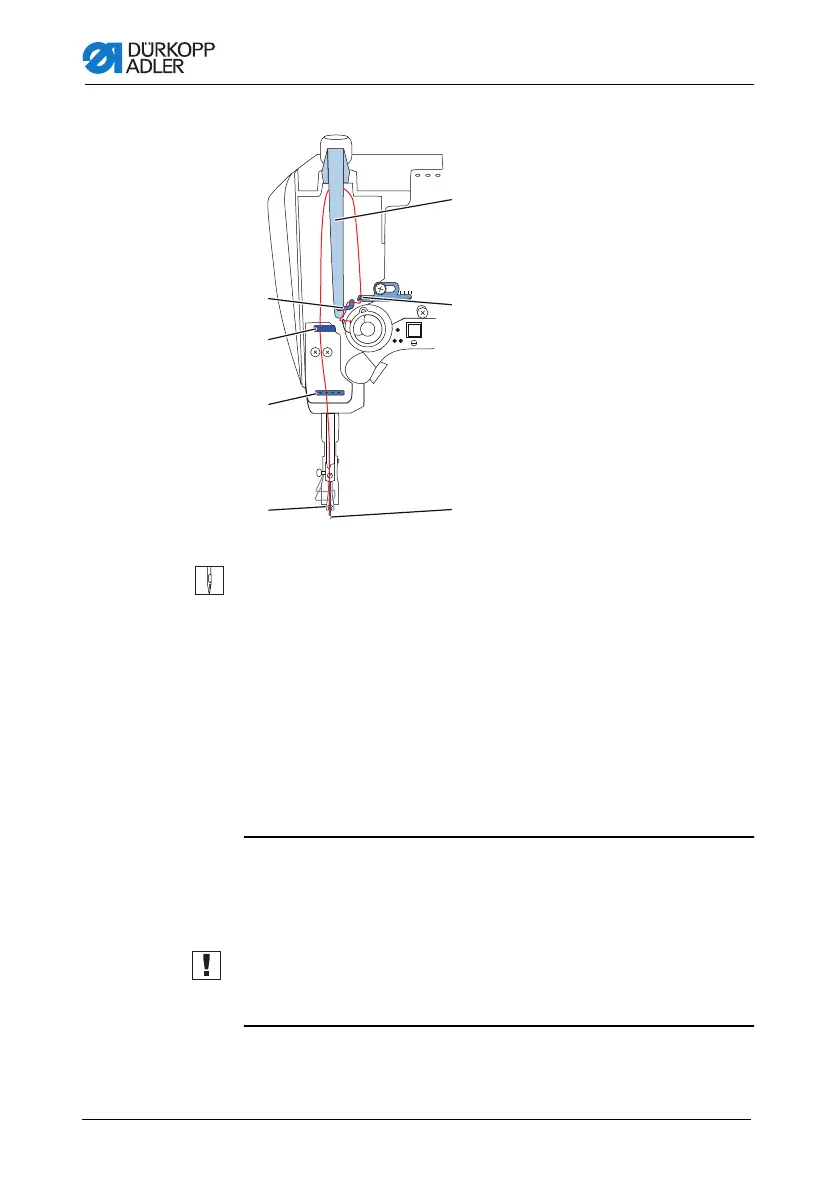
Figure 8: Threading procedure for needle thread - part 2
11. Guide the thread under the hook (10).
12. Insert the thread from bottom to top through the hole on the
thread regulator (15).
13. Insert the thread from the right to the left through the thread
lever (16).
14. Insert the thread through the upper thread guide (11).
15. Insert the thread through a hole in the lower thread guide (12).
16. Insert the thread through the thread guide on the needle
bar (13).
17. Insert the thread through the needle eye (14) in such a way
that the loose thread end faces the hook.
Short thread
cutter
18. For machines with a short thread cutter:
Pull the thread through the needle eye (14) until the loose
thread end has a length of approx. 4 cm with the thread
catcher (16) in the highest position.
Important:Check the thread length.
The short thread cutter does not function correctly
when the loose thread end is too long.
1234
-
.
,
0
^
<
+
(10) - Hook
(11) - Upper thread guide
(12) - lower thread guide
(13) - Thread guide on the needle
bar
(14) - Needle eye
(15) - Thread regulator
(16) - Thread lever
 Loading...