Set-up instructions
Operating manual 867 Version 01.0 - 12/2012 89
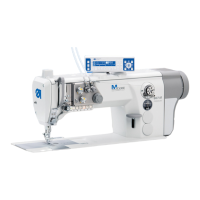
7.11 Fitting the control panel
Figure 59: Fitting the control panel – Part 1
1. Unscrew the valve cover (2) and upper machine cover (1).
2. Screw the control panel (5) firmly onto the control panel
bracket (4).
Long arm
machines
Additional step for long arm machines:
3. Install the connecting cable through the cable duct (3).
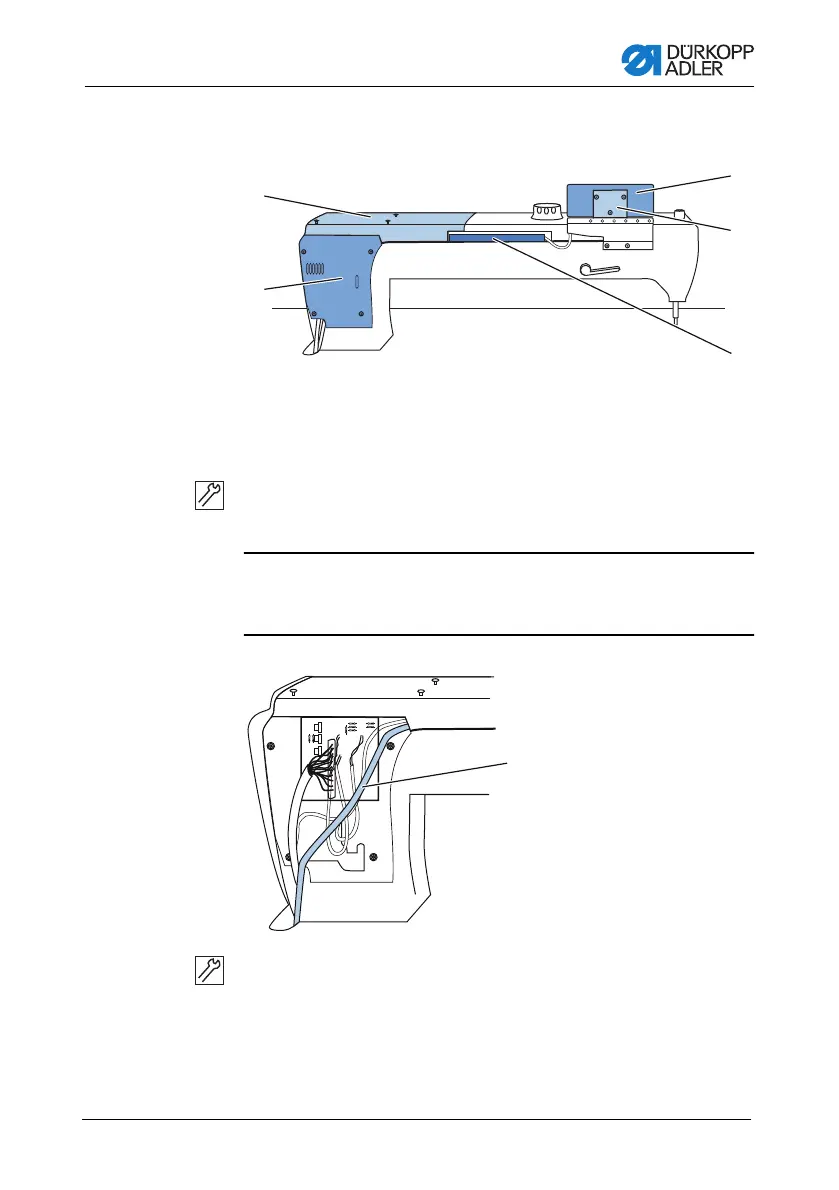
Figure 60: Fitting the control panel – Part 2
4. Install the connecting cable (6) in the machine arm.
5. Guide the cable through the hole in the table plate.
6. Insert the plug of the connecting cable in the socket of the
control.
7. Screw on the valve cover (2) and upper machine cover (1).
5
4
3
2
1
(1) - Upper machine cover
(2) - Valve cover
(3) - Cable duct (long arm only)
(4) - Control panel bracket
(5) - Control panel
6
(6) - Connecting cable
 Loading...