CHAPTER 2
Dyno Installation
Above Ground Model 200iX/250iX Motorcycle Dynamometer Installation Guide
2-12
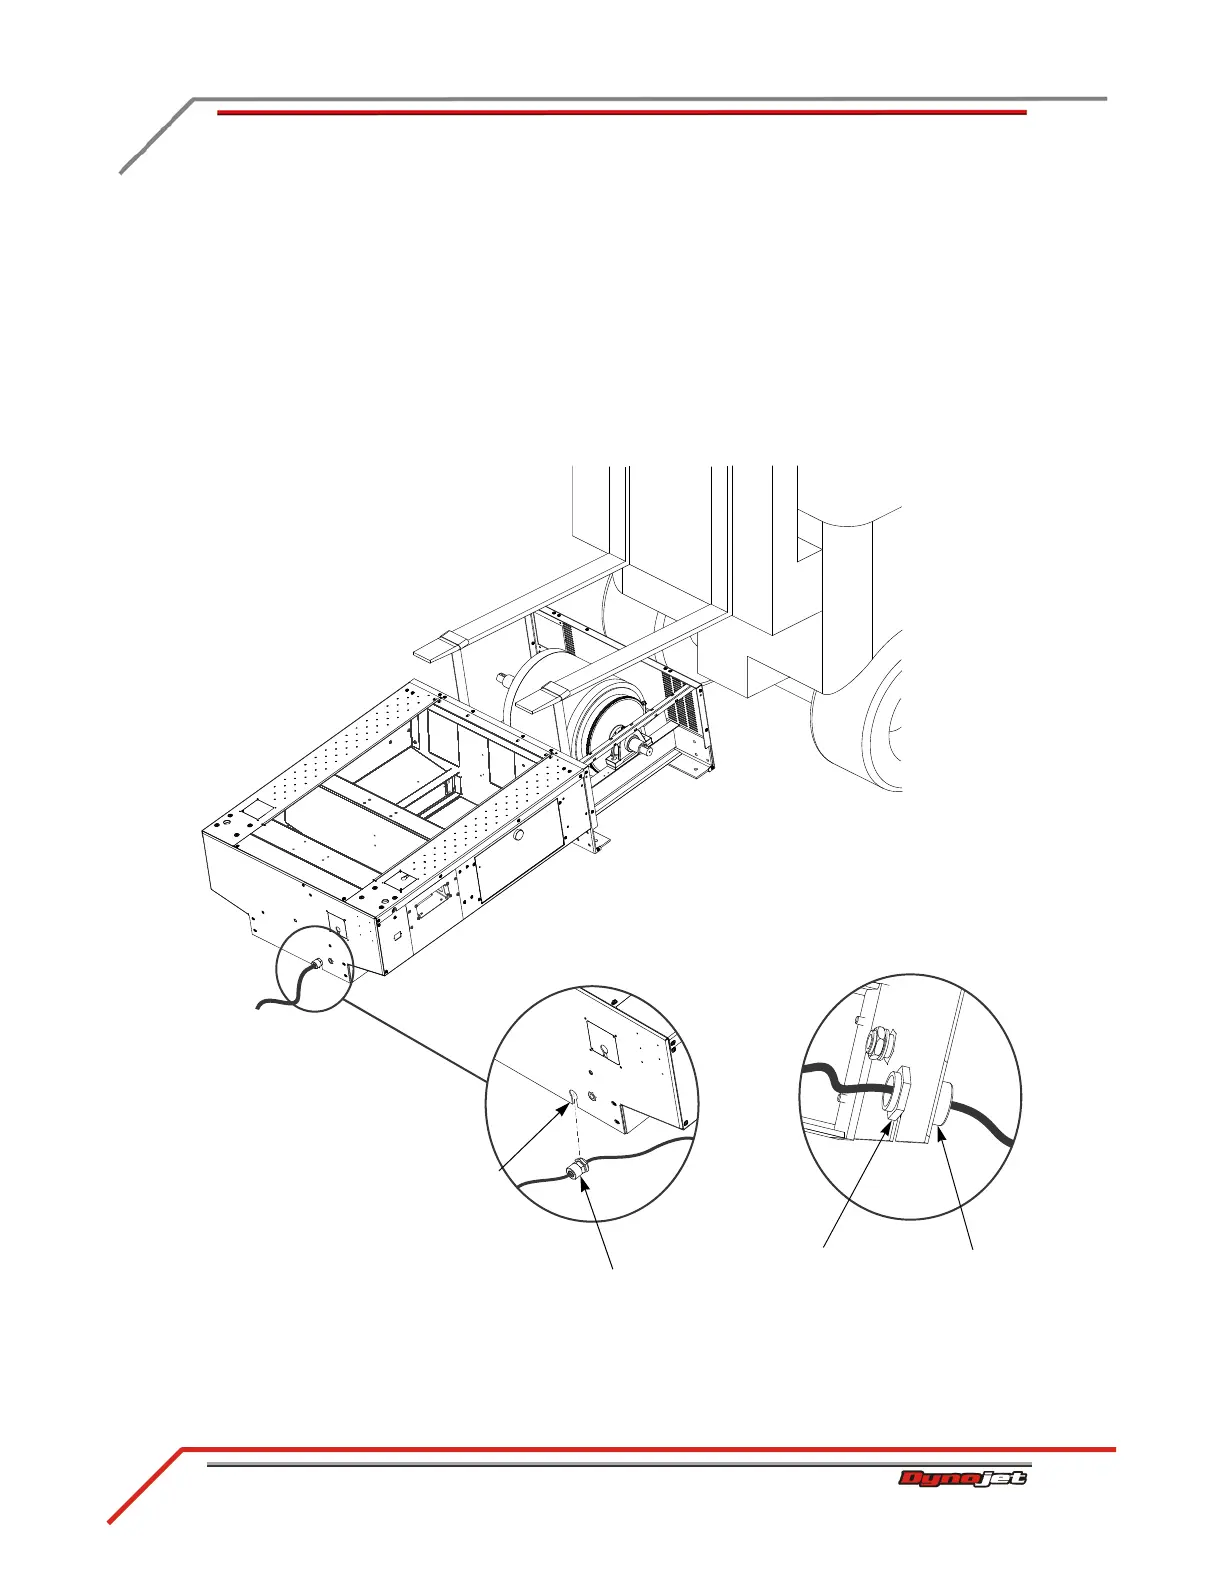
ROUTING THE POWER CABLE
1 Locate the power cable inside the dyno.
2 Slide the strain relief on the power cable through the opening in the dyno frame.
3Tighten the jam nut.
4 Hand tighten the knurled nut.
5 Gently lower the dyno into position. Be sure the location you have chosen for your
dyno has enough room in front of the dyno for the maximum extension of the
carriage. Refer to “Dynamometer Specifications and Requirements” on page 1-5
for more information.
Figure 2-8: Route the Power Cable
strain relief around
power cord
jam nut
inside dyno
opening in
dyno frame
knurled nut
outside dyno
cut away view from
inside dyno