3-21
ACCESSORIES
Extended Carriage
Version 2 Above Ground Model 200iX/250iX Motorcycle Dynamometer Installation Guide
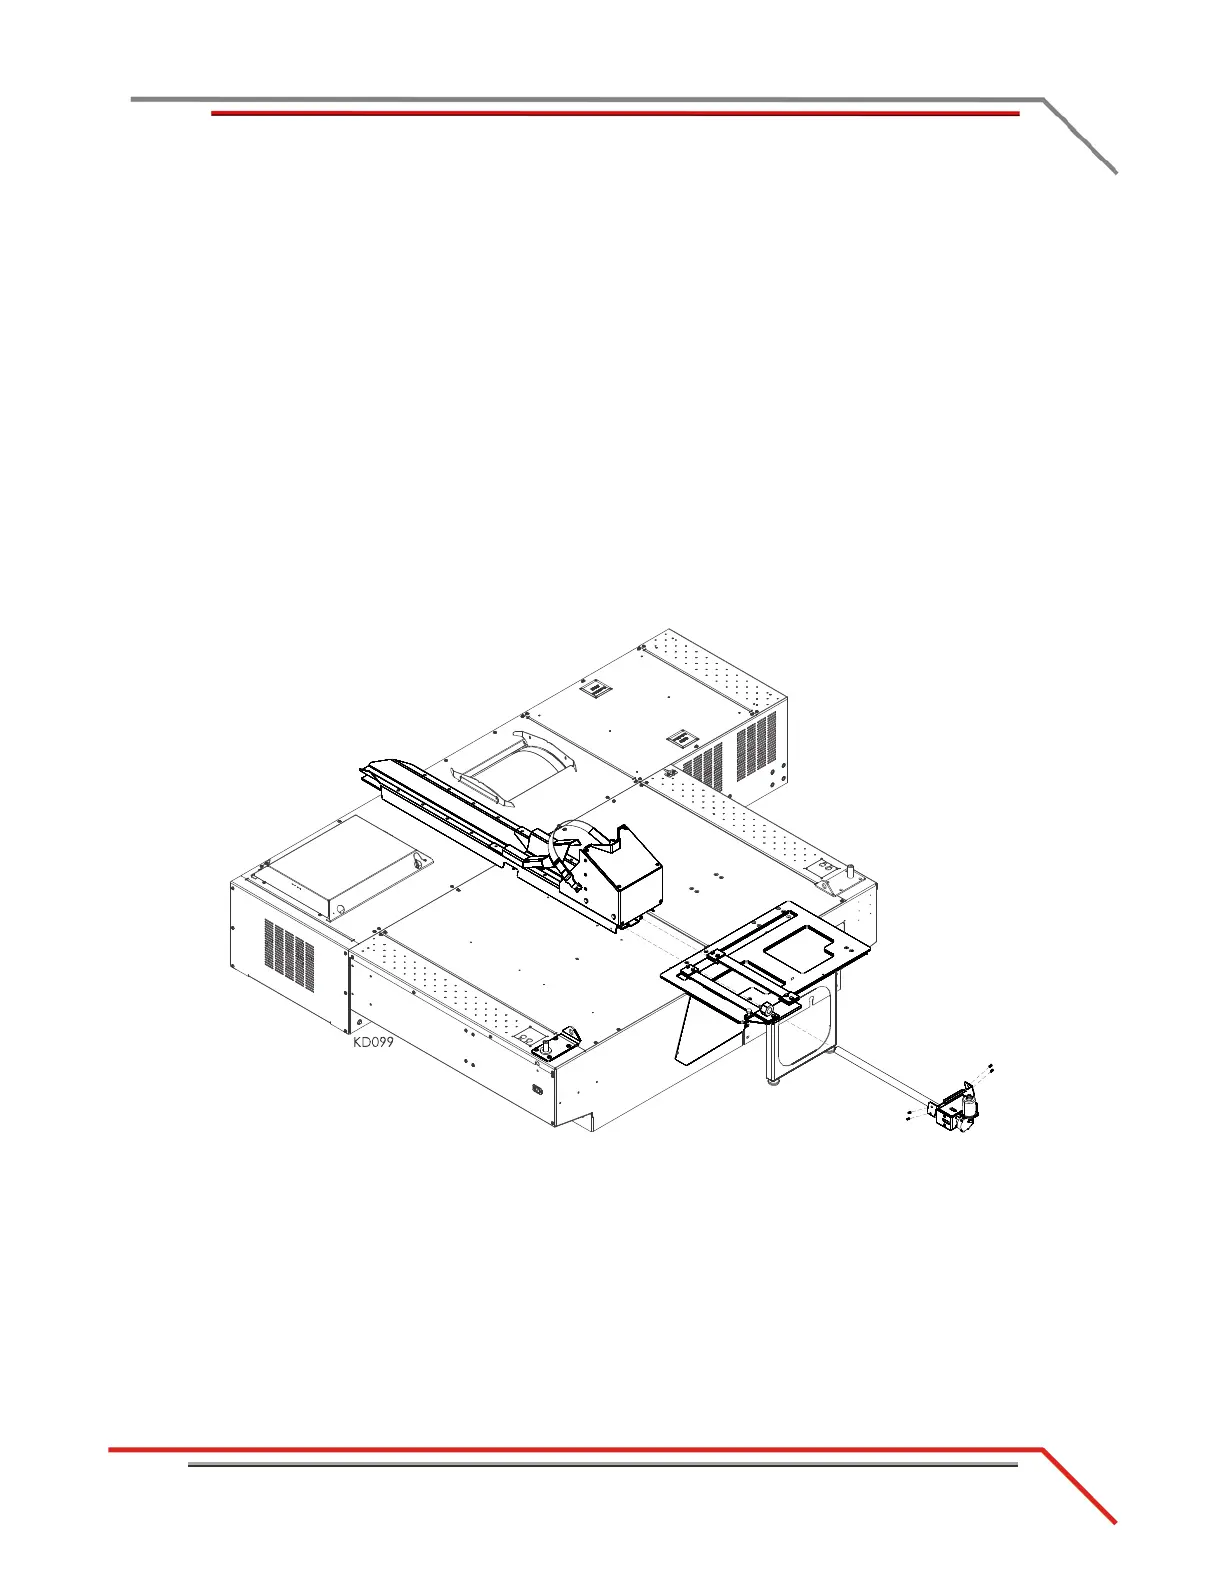
INSTALLING THE EXTENDED CARRIAGE ASSEMBLY
1 If not already removed, remove the carriage screw from the extended carriage
assembly by removing the four 1/4-20 x 1/2-inch button-head screws securing the
bearing bracket and set aside.
2 Place the carriage screw with the bearing bracket into the nut block.
3 Using the hand crank, or the control panel to run the power carriage, run the
carriage screw through the nut block until the screw is all the way in the nut block.
4 Starting from the back of the dyno, slide the extended carriage under the carriage
clamps.
5 Verify the carriage screw is seated into the screw support bracket on the extended
carriage assembly.
6 Secure the bearing bracket to the extended carriage assembly using the four
1/4-20 x 1/2-inch button-head screws removed earlier.
7 Run the extended carriage assembly through the full range of motion and verify
there is no binding.
Figure 3-22: Installing the Extended Carriage Assembly