2-55
Version 2 Above Ground Model 200iX/250iX Motorcycle Dynamometer Installation Guide
ZIP TUBE
The zip tube encases the multiple cables running to the control panel.
You will need the following parts:
• 16510001 Cable Wrap Tool
• 43431060 Zip Tube
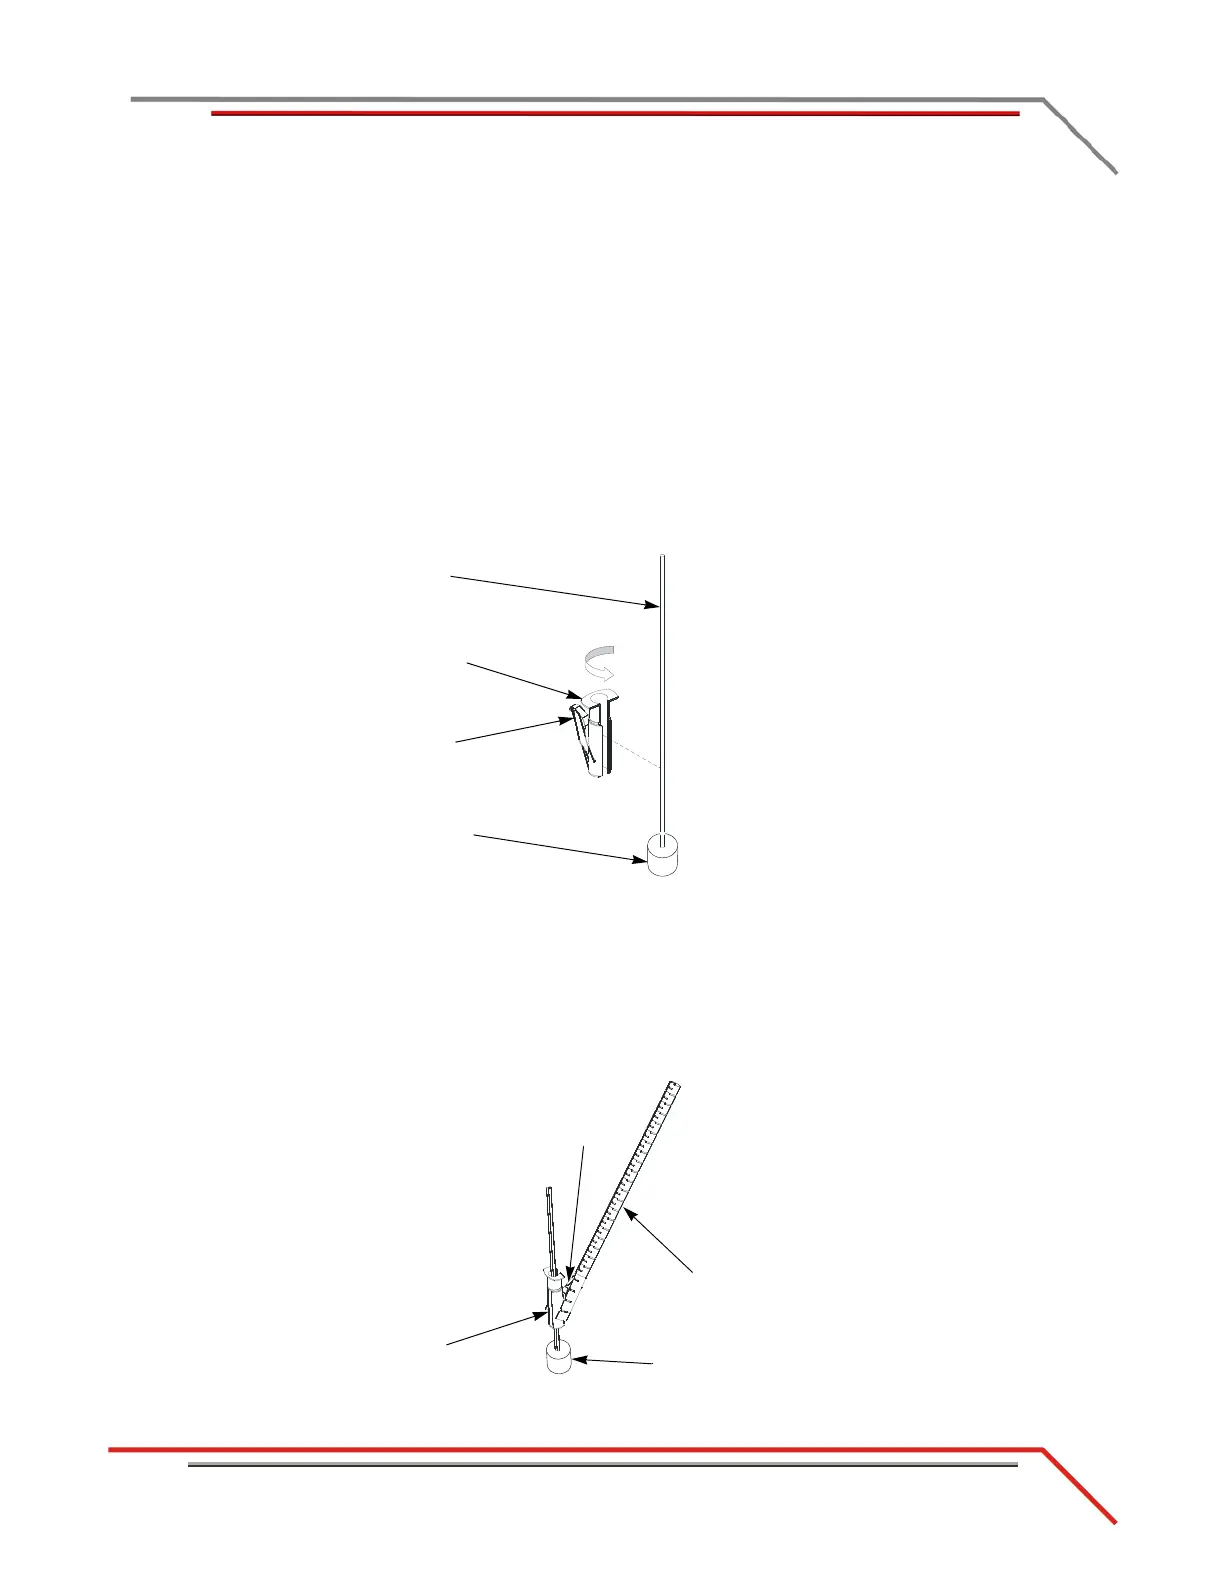
1 Rotate the cable holder to the open position.
2 Insert the cable(s) into the cable holder.
•Pendant Cable
• Control Panel Cable
•RPM cable(s)
• Additional cables, if desired
Figure 2-47: Insert the Cable(s) Into the Cable Holder
3 Rotate the cable holder closed.
4 Insert the guide body into the zip tube.
Note: Make sure you start the cable wrap tool close to the end of the cables. This
will make it easier to pull the tool along the length of the cables.
5 Pull the cable wrap tool through the zip tube along the length of the cables.
Figure 2-48: Secure the Cable(s) Into the Zip Tube
cable(s)
cable holder
guide body
end of cables
guide body
zip tube
end of cables
cable wrap tool