2-41
INSTALLATION
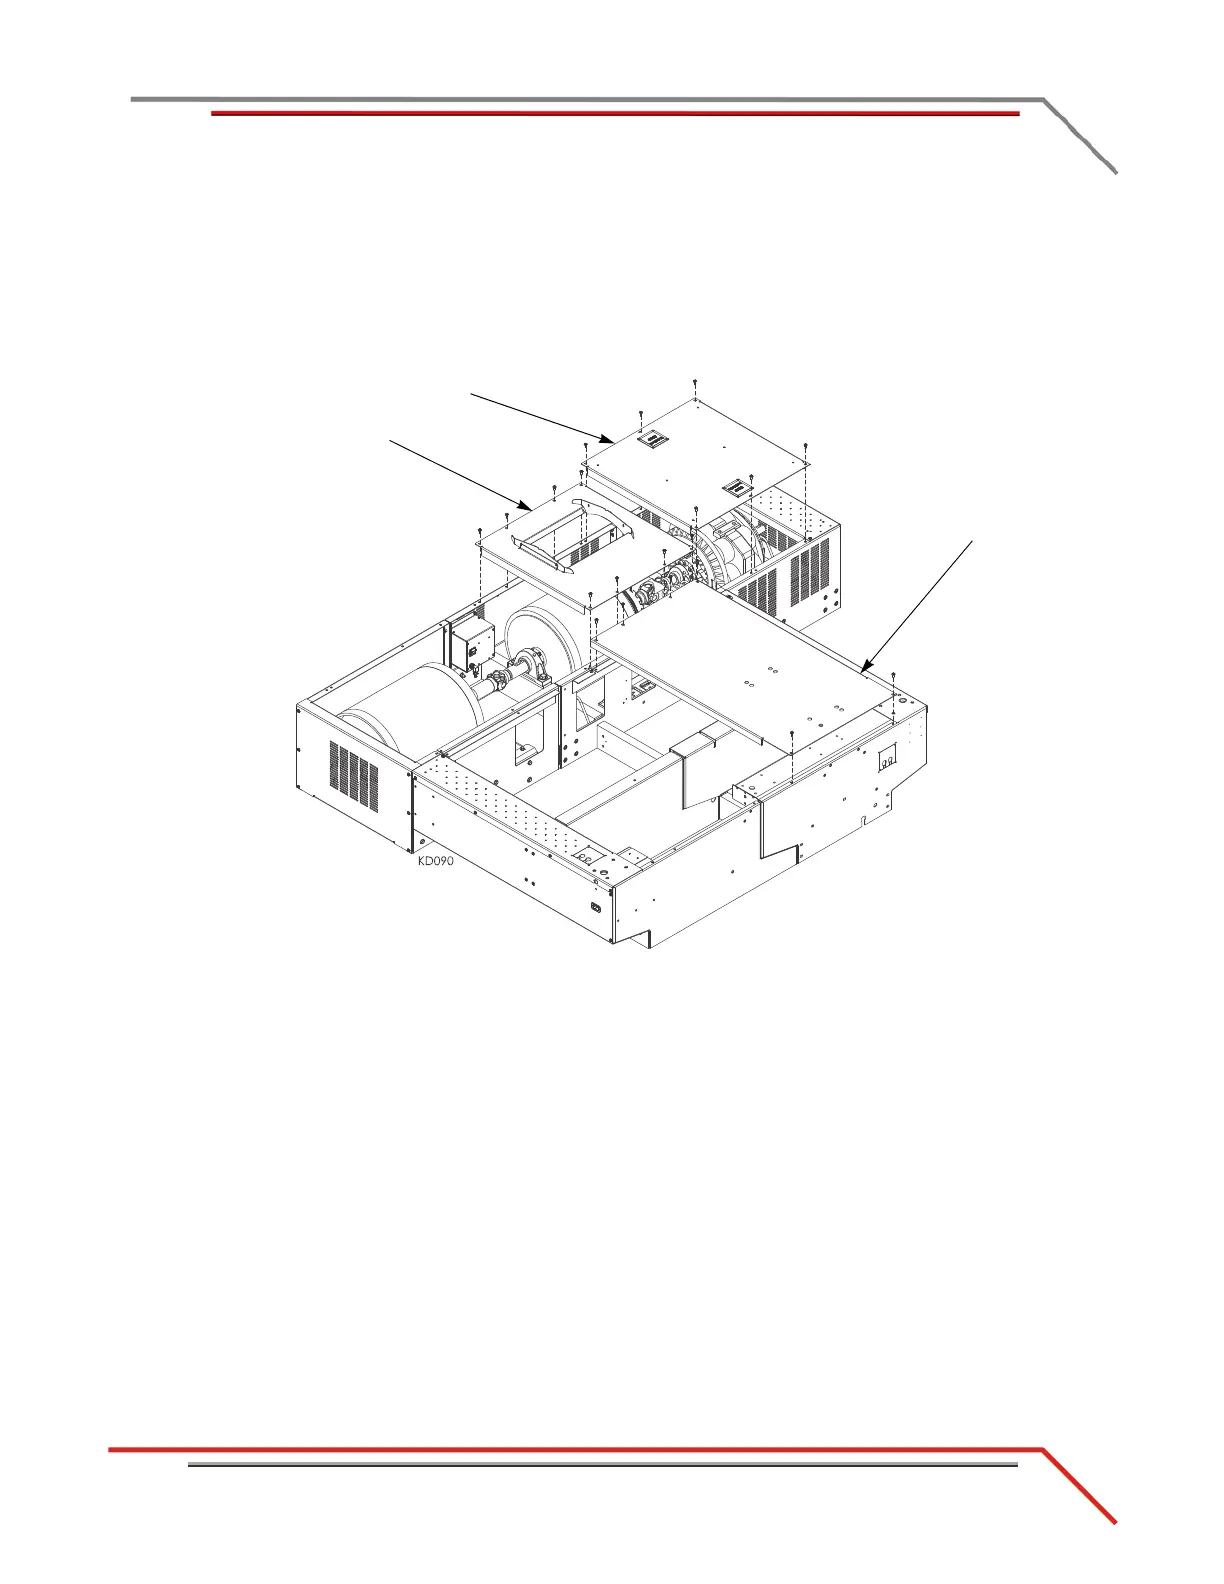
Side and Top Covers
Version 2 Above Ground Model 200iX/250iX Motorcycle Dynamometer Installation Guide
2 Secure the eddy current brake top cover to the eddy current brake six
1/4-20 x 5/8-inch screws removed earlier.
3 Secure the drum top cover to the drum using the eight 1/4-20 x 5/8-inch screws
removed earlier.
4 Secure the center cover to the dyno using the six 1/4-20 x 5/8-inch screws
removed earlier.
Figure 2-33: Securing the Eddy Current Brake, Drum, and Dyno Covers
drum top cover
eddy current brake top cover
dyno center cover