Analyzer User Guide
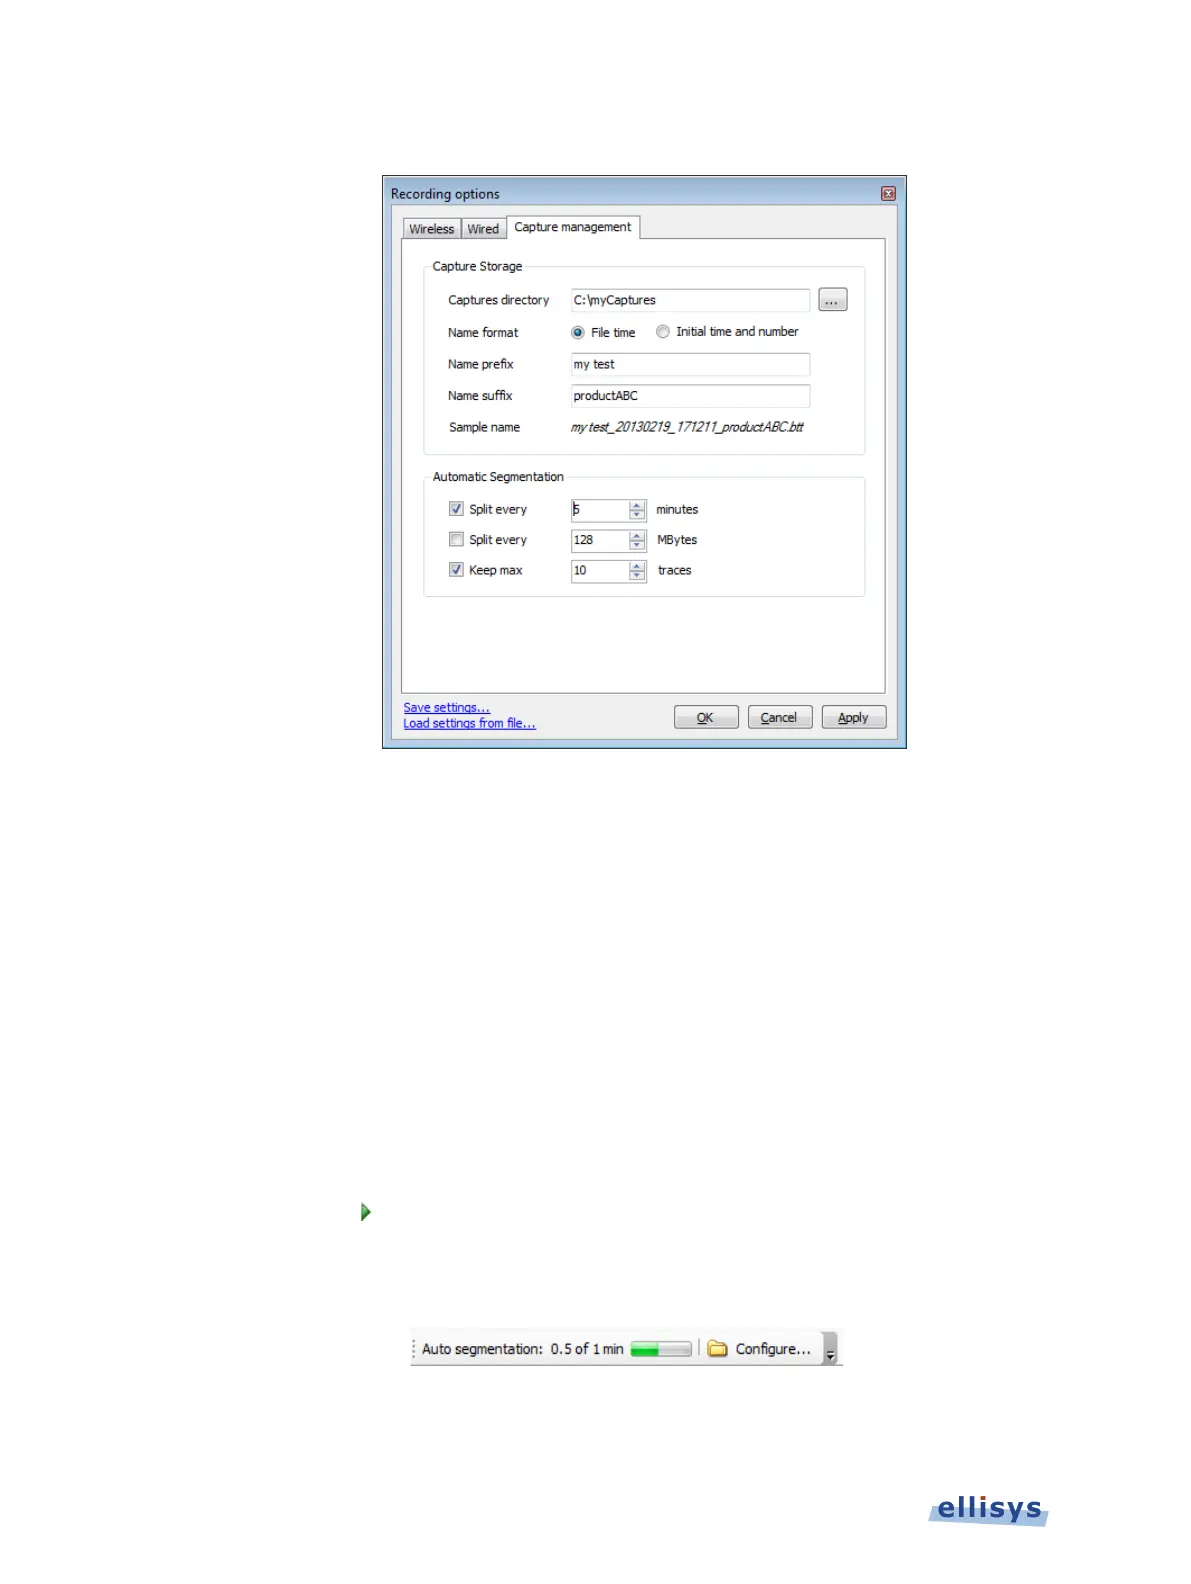
The Capture Management tab appears:
3. Specify a Captures Directory for storage of the captures.
4. Select a Name Format: Select File Time to name each capture file with a time/date
stamp as it is saved to disk, or select Initial Time and Number to name each capture with
a time/date stamp based on capture start (along with a serialized/incremental number for
each capture).
5. Optionally, add a Name Prefix and/or Name Suffix (these will be prepended/appended to
each capture file name).
6. Select a method for the segmentation to split, Minutes or Mbytes.
7. Optionally, select a finite number of traces to store, using Keep Max.
8. Click OK.
9. Click on Record
on the toolbar.
As captures progress, an indicator on the toolbar provides status information (based on minutes
or Mbytes, as selected in Recording Options):
70 of 201 | Capturing Traffic