C4 Maintenance 8. Joint #4
114 C Series Maintenance Manual Rev.2
11. Install the bearing to the Joint #4 reduction gear unit flange and insert
it to the cylinder of the circular spline.
Hexagon socket head cap bolts: 3-M3×8
Tightening torque: 2.5 N·m (25 kgf·cm)
Be careful of the direction of the flange's cutout.
12. Install the Joint #4 output pulley.
Hexagon socket set screws: 2-M3×8 (with a brass bushing)
13. Install the bearing.
Hexagon socket head cap bolts: 3-M3×6
(with a spring washer and a plain bushing)
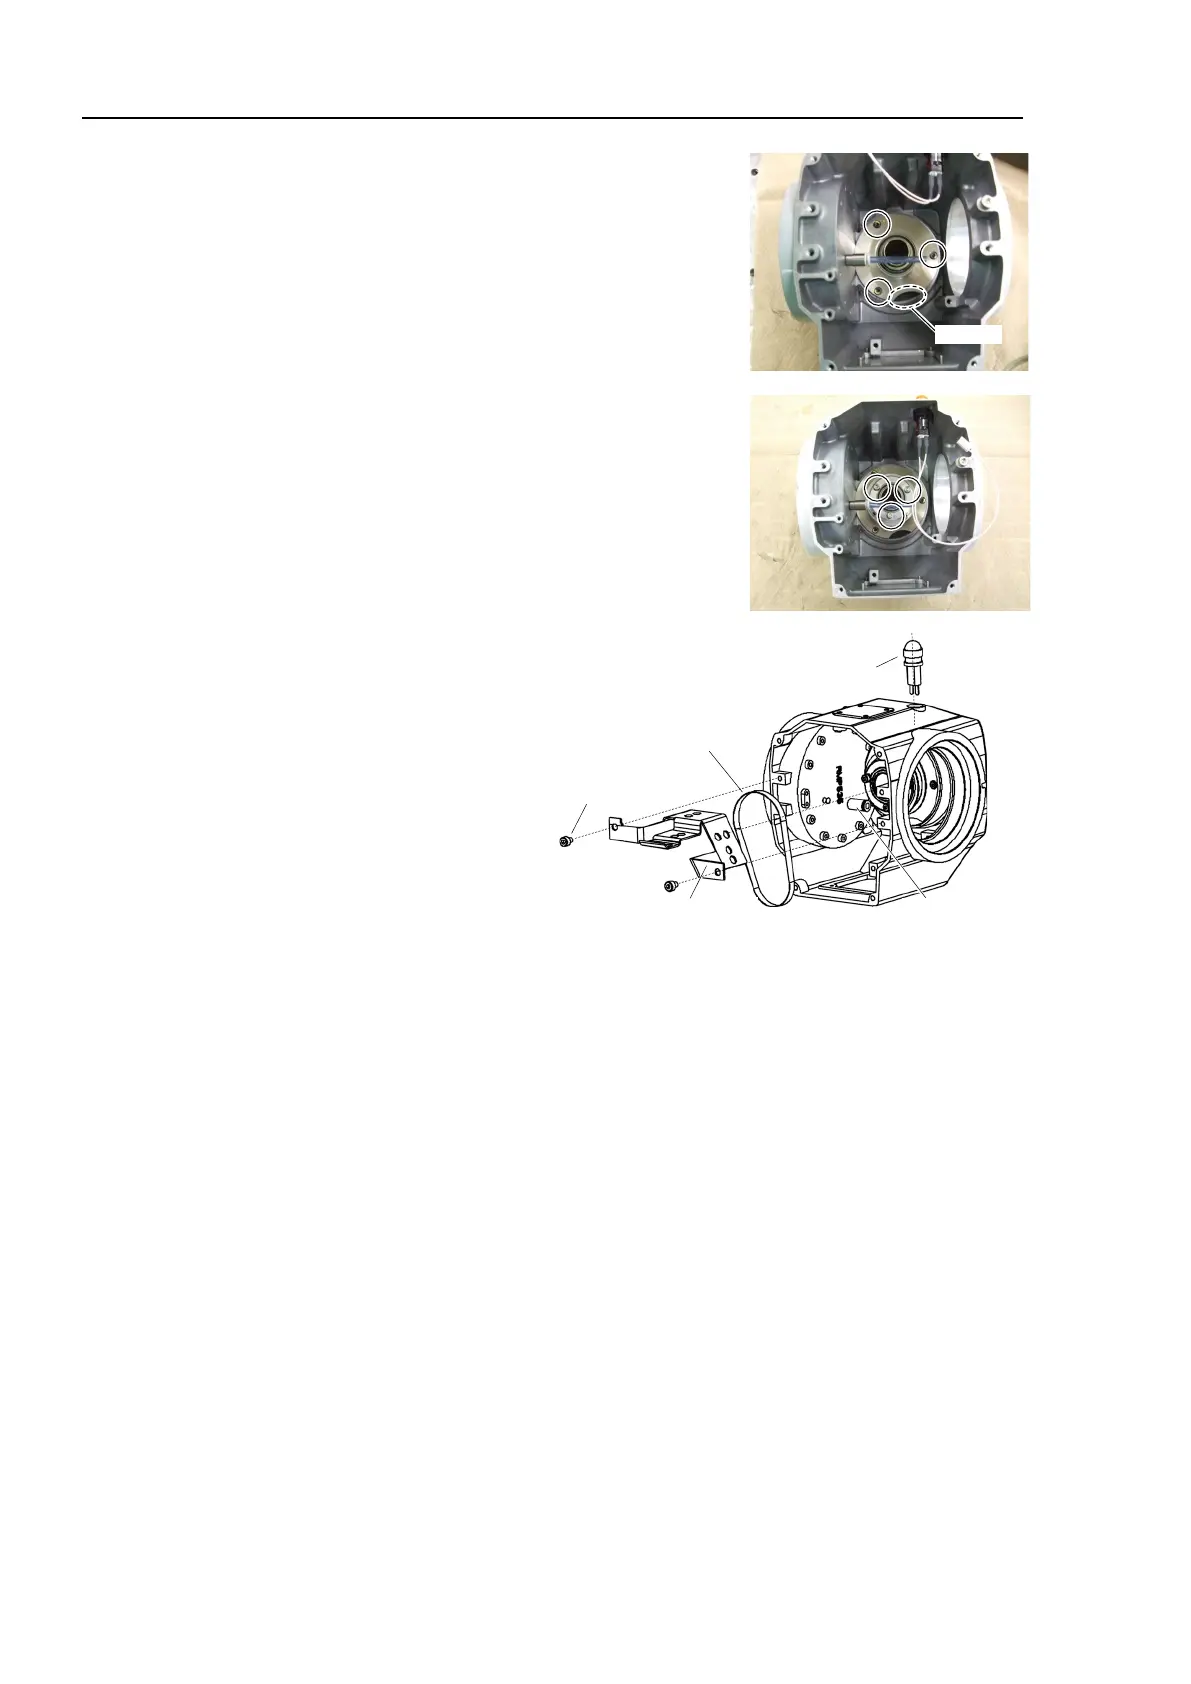
14. Install he LED lamp.
15. Install the Joint #4 fitting.
16. Install the Joint #4 timing belt.
Joint #4 fittings
LED lamp
Joint #4 cable fixing plate
Joint #4 timing belt
2-M4×5
17. Install the Joint #4 motor unit.
For details, refer to C4 Maintenance: 8.1 Joint #4 – Replacing the Motor, Installation step (6).
18. Install the Joint #5 motor unit.
For details, refer to C4 Maintenance: 9.1 Joint #5 – Replacing the Motor, Installation steps (4) through (5).
19. Install the Joint #6 motor unit.
For details, refer to C4 Maintenance: 10.1 Joint #6 – Replacing the Motor, Installation steps (4) through
(5).
20. Install the cable unit of the Arm #4.
For details, refer to C4 Maintenance: 4.1 Replacing the Cable Unit, Installation steps (4) through (9) and
(14) through (38).
21. Apply tension to the Joint #5 motor unit and fix it.
For details, refer to C4 Maintenance: 9.1 Joint #5 – Replacing the Motor, Installation step (6).
22. Apply tension to the Joint #6 motor unit and fix it.
For details, refer to C4 Maintenance: 10.1 Joint #6 – Replacing the Motor, Installation step (6).
 Loading...


