C8 Maintenance 6. Joint #2
C Series Maintenance Manual Rev.2 319
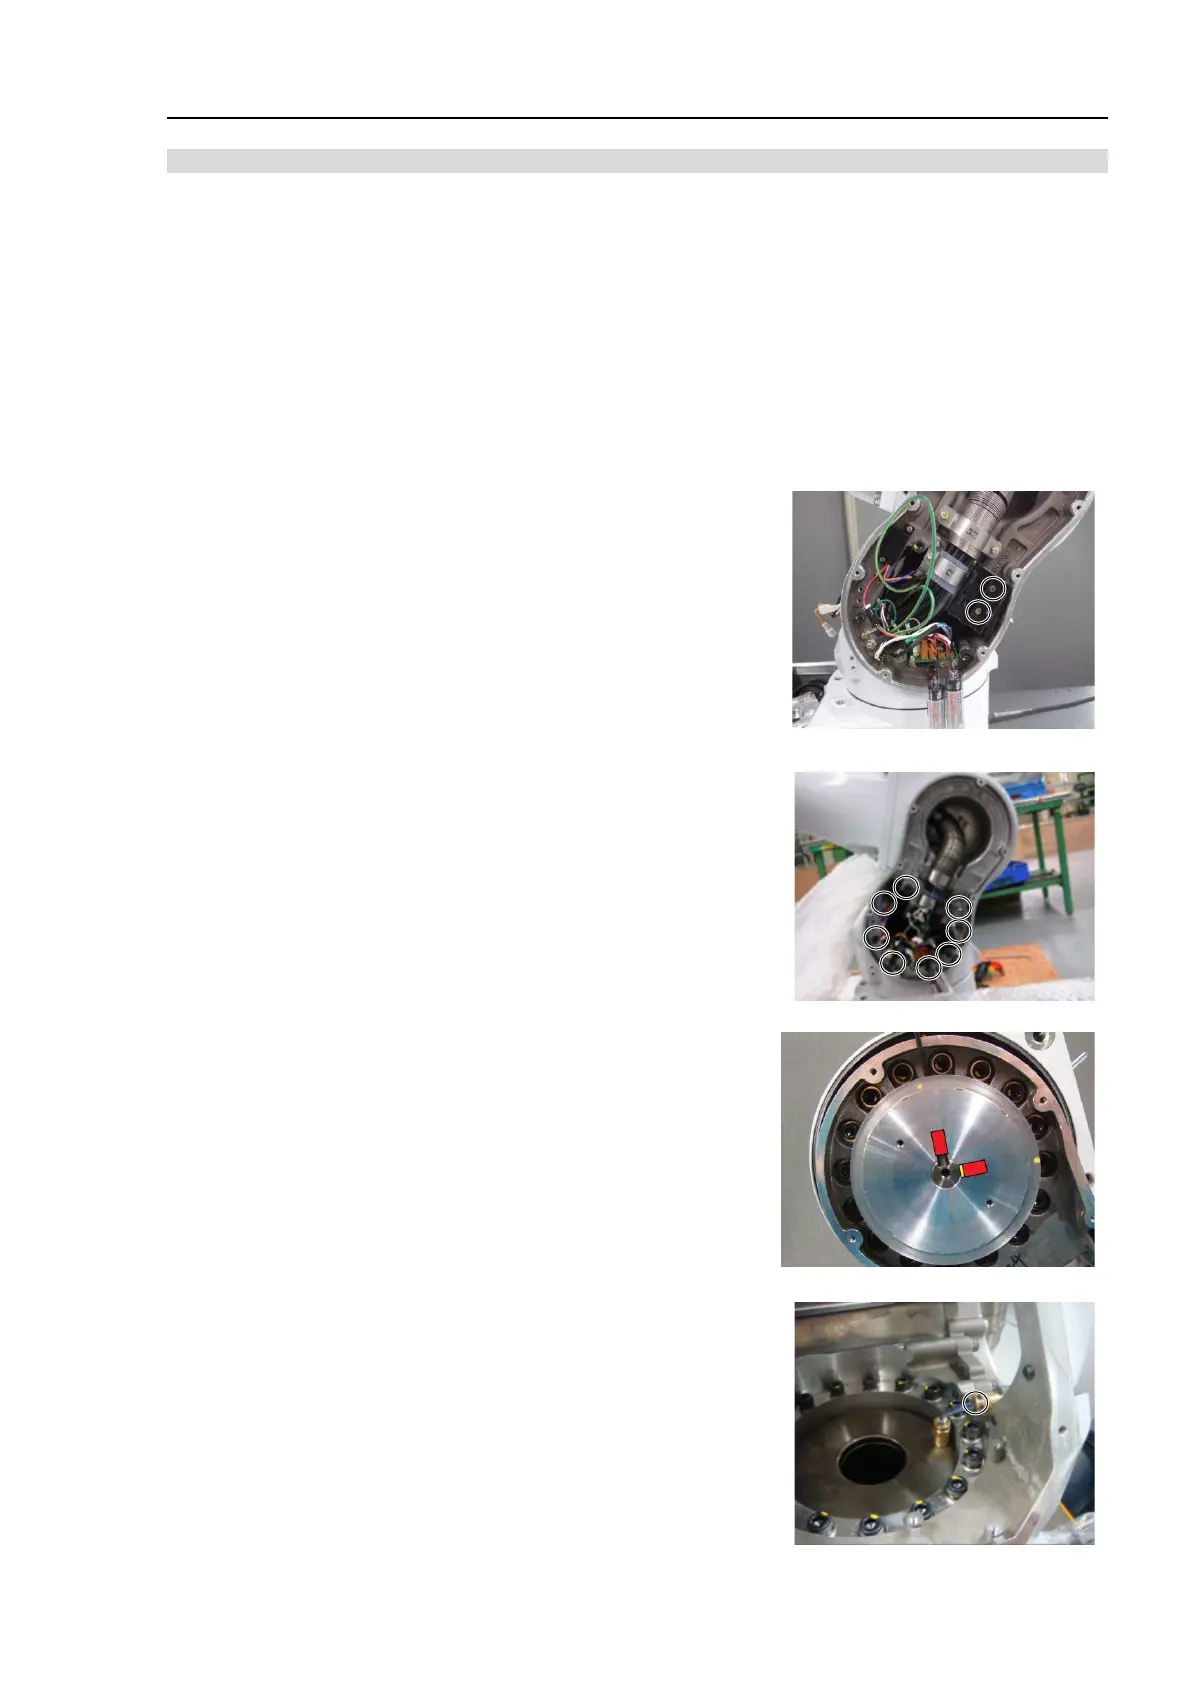
Removal: Joint #2 Reduction gear unit
1. Remove the Joint #2 timing belt.
For details, refer to C8 Maintenance 6.3 Joint #2 - Replacing the Timing Belt, Removal steps (1) to (3).
2. Remove the following parts.
Battery
Battery board
Battery connector
For details, refer to C8 Maintenance 11.2 Replacing the Battery Board, Removal steps (3) to (6).
3. Remove the battery box.
Countersunk screws: 2-M3×8
4. Arm #1 side arm fixing bolts.
Hexagon socket head cap bolts: 8-M6×25 (with a plain washer)
5. Remove the Joint #2 pulley 2 from the Joint #2 shaft.
Hexagon socket set screws: 2-M5×10
There is a brass bushing on one of the set screws.
Be careful not to lose it.
C8XL:
Remove the key from the shaft. The key will be used
again. Be careful not to lose it.
6. Pull out the grease tube on the Arm #1 side from the fitting.
The grease tube connects between the base and the Arm #1.
 Loading...


