C8 Maintenance 9. Joint #5
374 C Series Maintenance Manual Rev.2
Removal: Joints #5, #6 Reduction gear unit set
1. Turn OFF the Controller power.
2. Remove the Arm #4 side cover and Arm #3 cover.
For details, refer to C8 Maintenance 3. Covers.
3. Remove the Joints #5 and #6 motors.
For details, refer to the Removal steps in C8 Maintenance 9.1 Joint #5 - Replacing the Motor and C8
Maintenance 10.1 Joint #6 - Replacing the Motor.
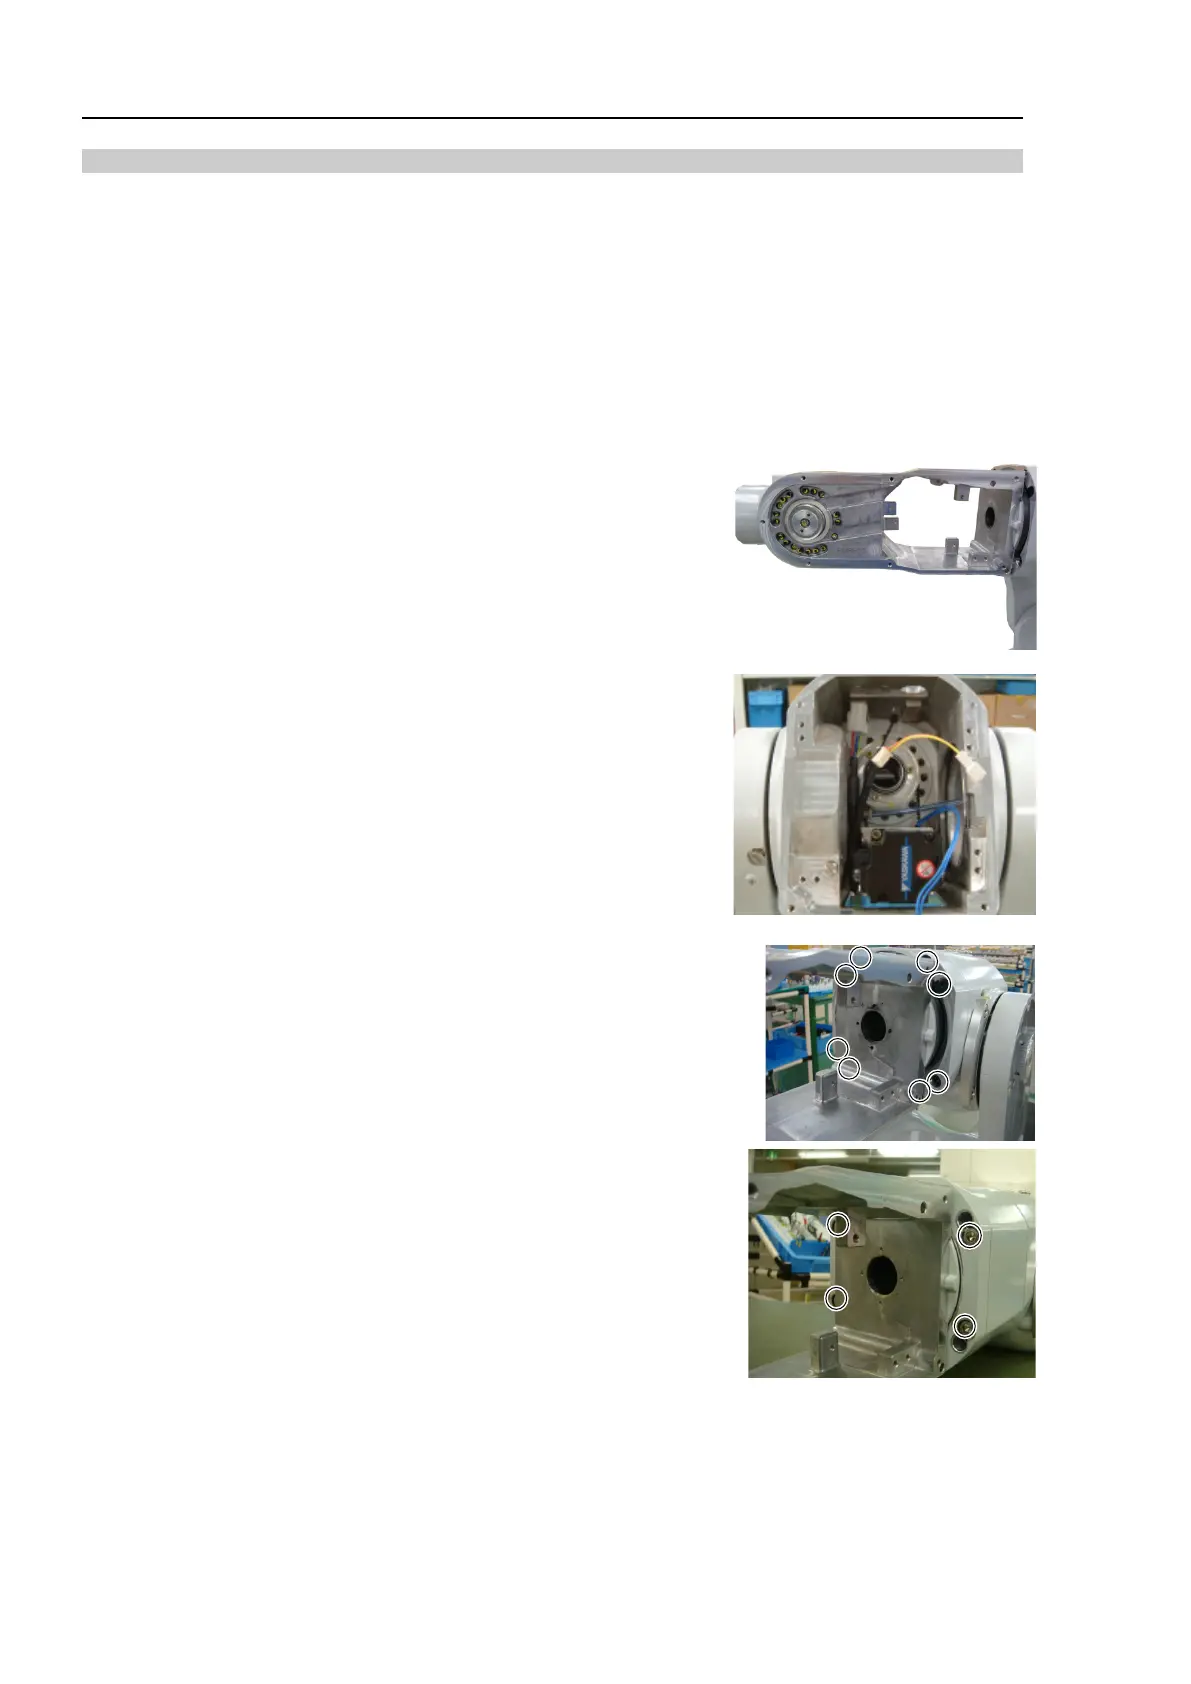
4.
Remove the cables passing through the Arm #4 as shown in the
photo.
For details, refer to the Removal steps in C8 Maintenance 4.1 Cable
Unit.
5. Remove the Joints #5, #6 reduction gear unit.
C8:
Loosen the fixing bolts of the Joint #4 motor plate and remove the
belt. (Do not remove the Joint #4 motor.)
Hexagon socket head cap bolts: 2-M4×15
(with a small plain washer)
Remove the bolts fixing the J4 flange, and remove the Joints #5 and
#6 reduction gear unit (with the Joint #4 reduction gear unit) from
the Arm #3.
Hexagon socket head cap bolts: 8-M5×30
C8L, C8XL:
Remove the bolts fixing the Arm #4 extension flange, and remove
the Joints #5 and #6 reduction gear unit from the Arm #4 extension
part.
Hexagon socket head cap bolts: 4-M6×20