SC-F2000 Revision C
DISASSEMBLY & ASSEMBLY Disassembly and Assembly Procedure 174
Confidential
3.4.6.6 TABLE ASSY
1. Remove the FRONT SUB COVER. (p80)
2. Remove the PLATEN. (p71)
3. Remove the BELLOWS ASSY. (p173)
4. Remove the LEFT FRONT COVER. (p81)
5. Remove the RIGHT FRONT COVER. (p81)
6. Remove the FIXING LEVER. (p167)
7. Remove the PARALLEL ADJUSTMENT PLATE. (p168)
8. Remove the PG SWITCH LEVER ASSY. (p169)
9. Remove the TRAY BOTTOM FRAME ASSY. (p171)
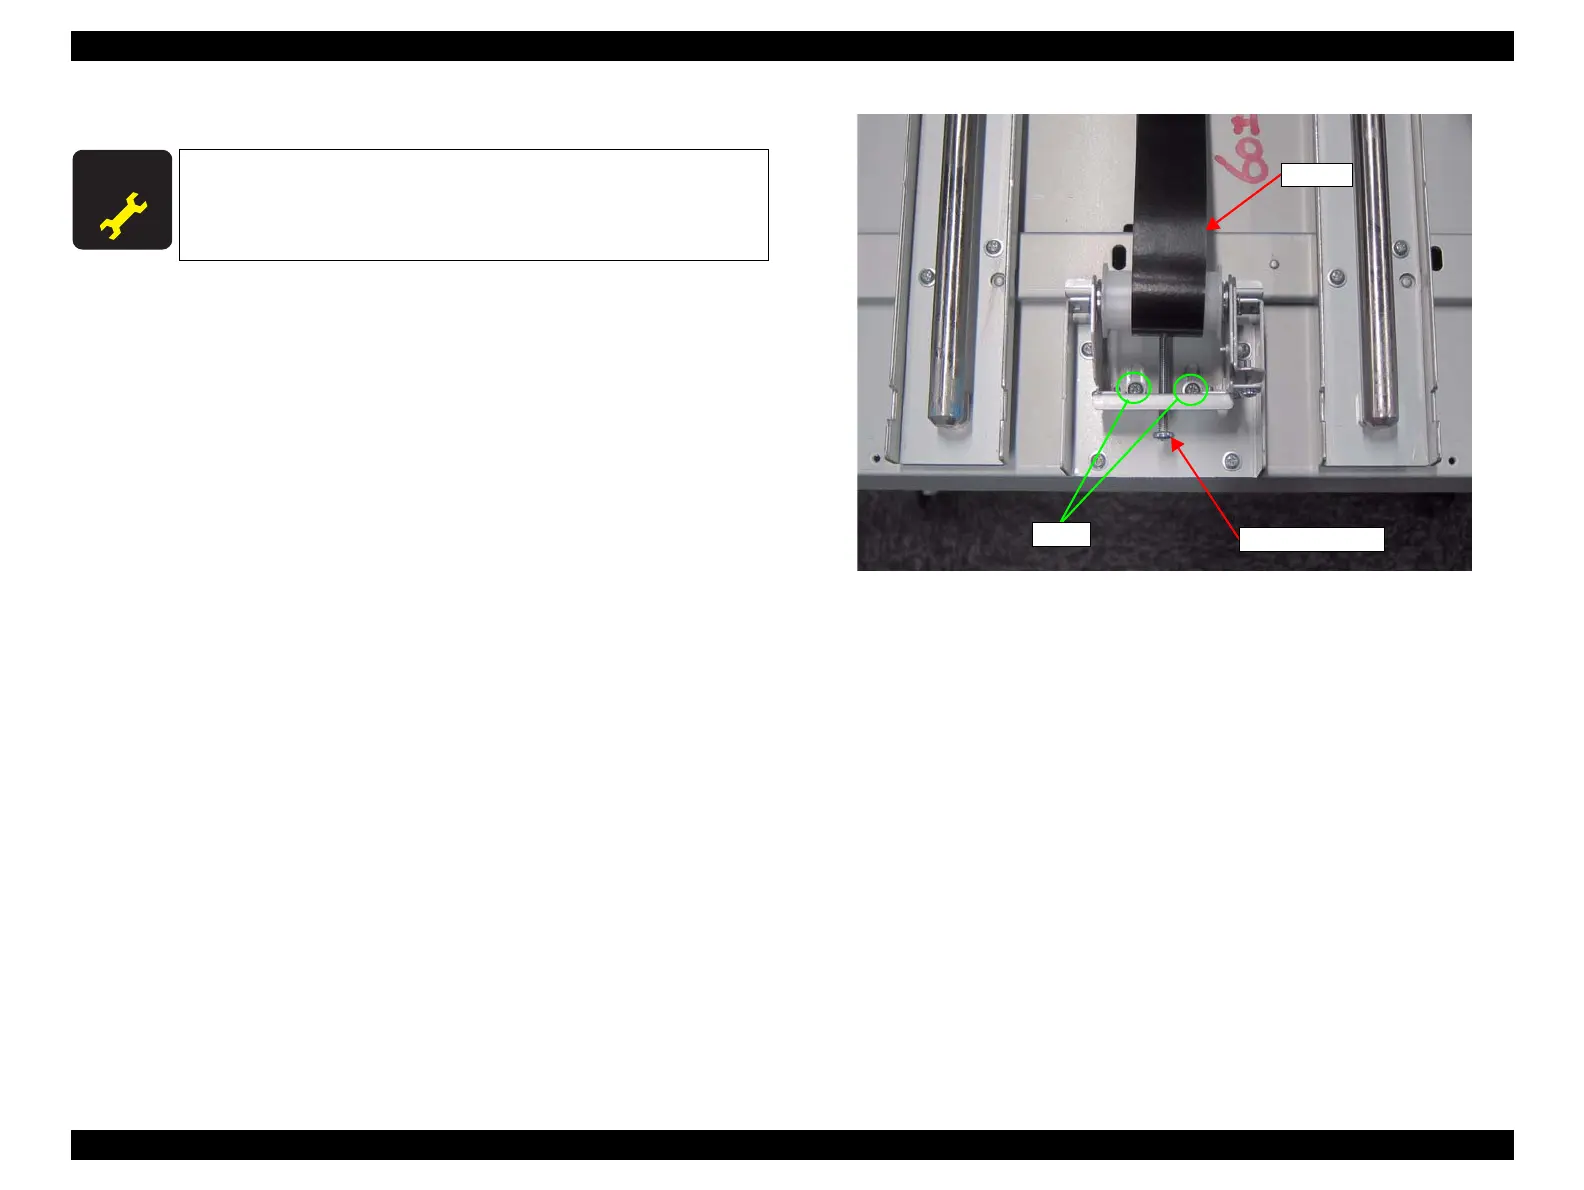
10. Loosen the Belt Tension Screw and the two screws to loosen the tension of the TF
Belt.
Figure 3-136. Loosing the tension of the TF Belt
A D J U S T M E N T
R E Q U I R E D
When replacing/removing this part, refer to “4.1.2 Adjustment
Items and the Order by Repaired Part” (p194) and make sure to
perform the specified operations including required adjustment.
Belt Tension Screw
Screws
TF Belt
 Loading...


