6-6 Using the Printer Software for Macintosh
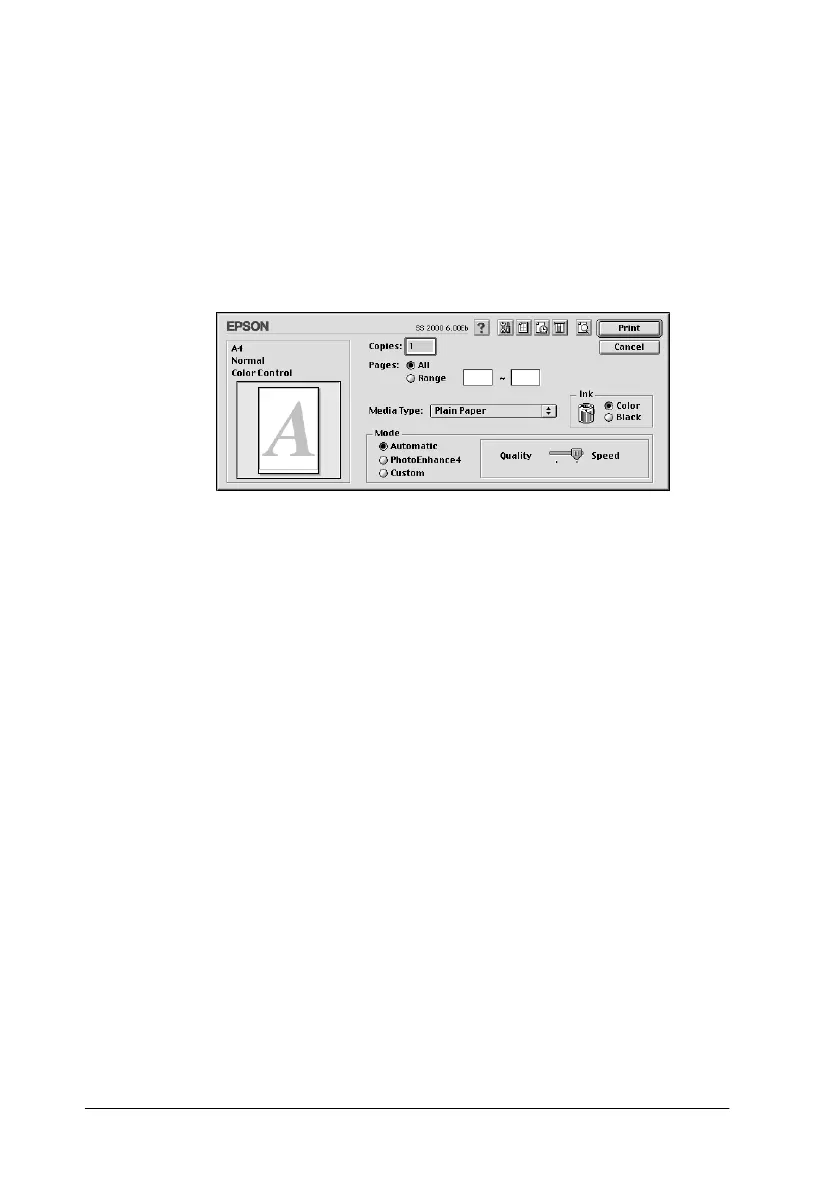
Using the Automatic settings
When Automatic is selected as the Mode setting in the Print
dialog box, the printer driver takes care of all detailed settings
based on the current Media Type and Ink settings. To make the
Ink setting, click Color to print in color, or Black to print in black-
and-white or grayscale. To make the Media Type setting, see
“Making the Media Type settings” on page 6-4.
Note:
Depending on the media you choose in the Media Type list while
Automatic is selected, a slide bar appears in the Mode box that lets
you choose Quality or Speed. Select Quality when print quality is
more important than speed.
Using the Photo Enhance setting
Selecting Photo Enhance allows you to make a variety of image-
correction settings to your photo images before printing. Photo
Enhance does not affect your original data.
If you are printing photos taken with a digital camera, you can
also select the Digital Camera Correction check box to give your
printed images the smooth, natural appearance of photographs
taken with a film camera.
Note:
❏ This setting is available only when you are printing in color.