Replacing Ink Cartridges 10-7
Replacing a black ink cartridge
1. Lower the output tray on the front of the EPSON Stylus Scan,
and then open the front cover.
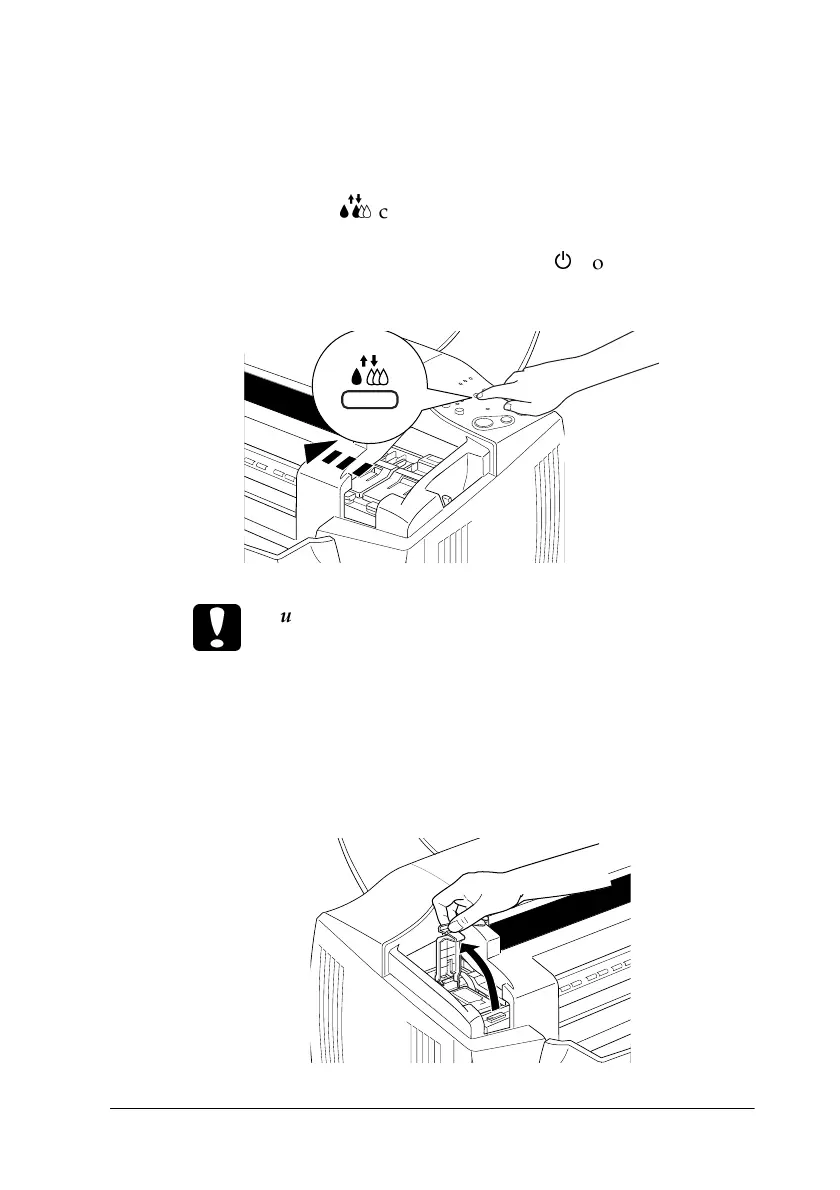
2. Hold down the
R
cleaning button for three seconds, then
release it. The print head moves to the cartridge replacement
position for the black ink cartridge. The
P
power light begins
flashing.
c
Caution:
Do not move the print head by hand, as doing so may damage
the mechanism.
3. Lift up the clamp over the black ink cartridge as far as it will
go. The cartridge rises partly out of the cartridge holder. Then
lift the cartridge out of the Stylus Scan and dispose of it
properly. Do not take the used cartridge apart or try to refill it.