Appendix A Assembly Instructions
A-18 ER1 User Guide
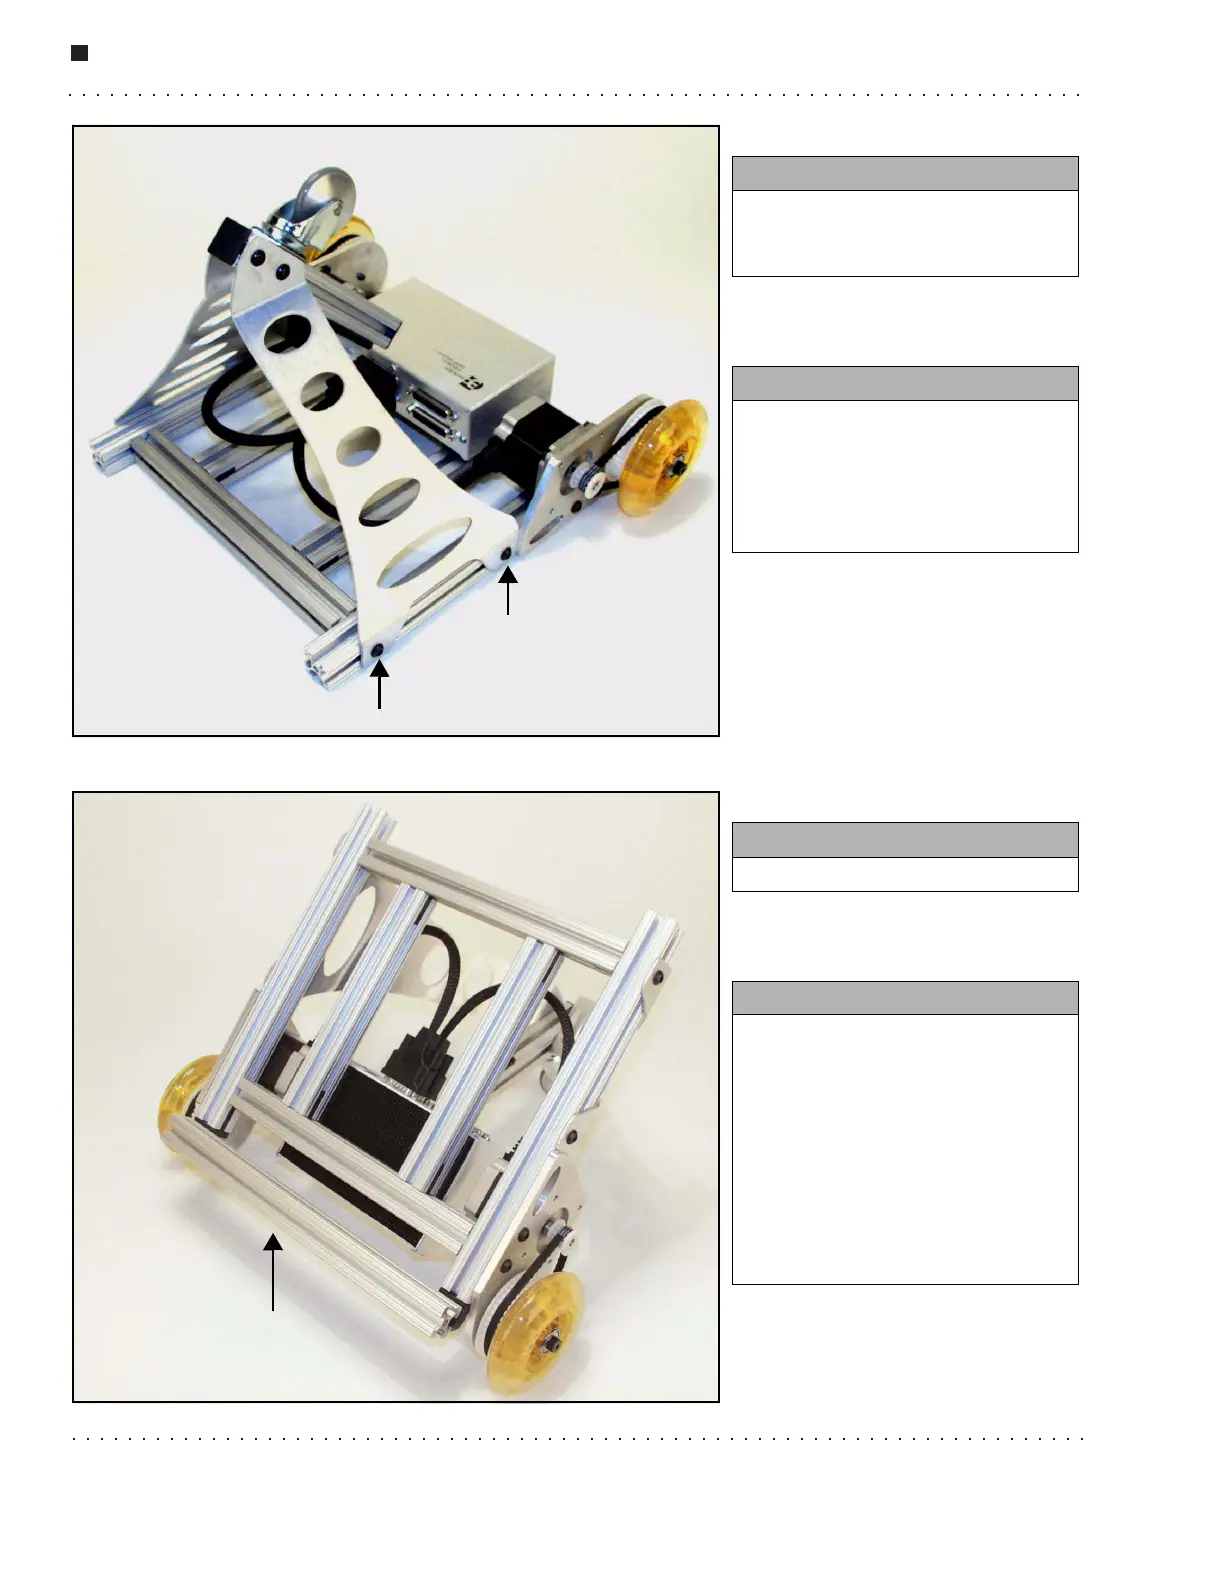
Step 14.
Step 15.
You need:
• 4 Allen screws with 2 one-holed
T-nuts already attached to the
struts.
Instructions:
• Slide the T-nuts at the top of the
struts down the tracks of the 12''
beams on both sides to the end.
• Tighten the screws (see arrows -
only one side shown).
You need:
• 1 12'' beam
Instructions:
• Attach the 12'' beam to the
bottom front of the robot by
sliding the screw heads in the
hinges halves through the
XBeams channel.
• Slide the XBeam on until
centered on the robot.
• Tighten the thumbnuts - pliers
are helpful here.