Appendix A Assembly Instructions
A-24 ER1 User Guide
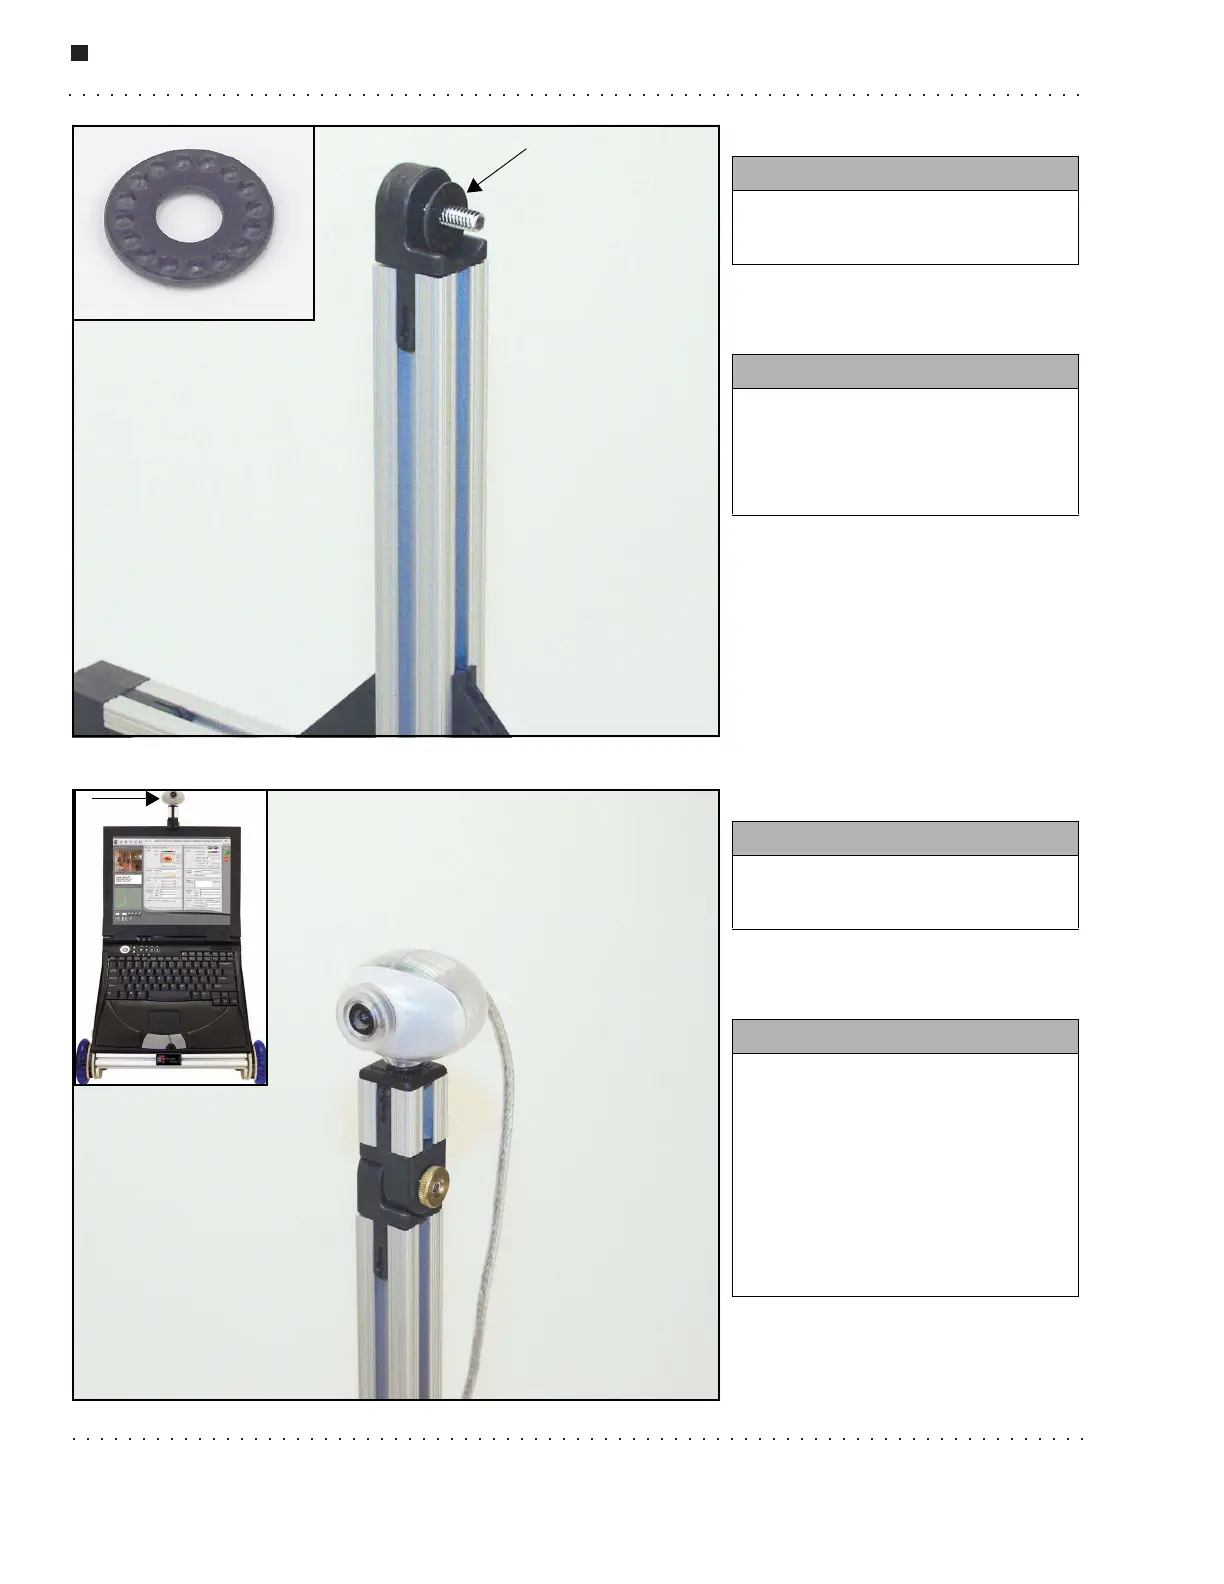
Step 26.
Step 27.
You need:
• 1 Philips screw
• 1 locking washer
Instructions:
• Thread a Philips screw through
the hole in the hinge half.
• Place the locking washer on the
screw as shown (see arrow).
You need:
• 1 camera subassembly
• 1 thumbnut
Instructions:
• Slide the hinge half on the
bottom of the camera
subassembly onto the screw post.
• Make sure to position camera
subassembly facing forward (see
picture in upper left).
• Screw the thumbnut onto the
screw post and tighten.