Page 12 Copyright FlyThisSim LLC 2013
TouchTrainer® Computer
1) Place the computer into the large slot on the back of the TouchTrainer® base.
Note: Do not power on the computer yet.
2) If you have a TouchTrainer® with a VisX system skip to step 3. For a TouchTrainer® without a VisX system,
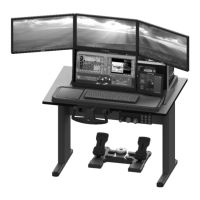
connect all cables to the back of the computer as shown in Figure 6.
Figure 6: Attaching cables to the back of the computer
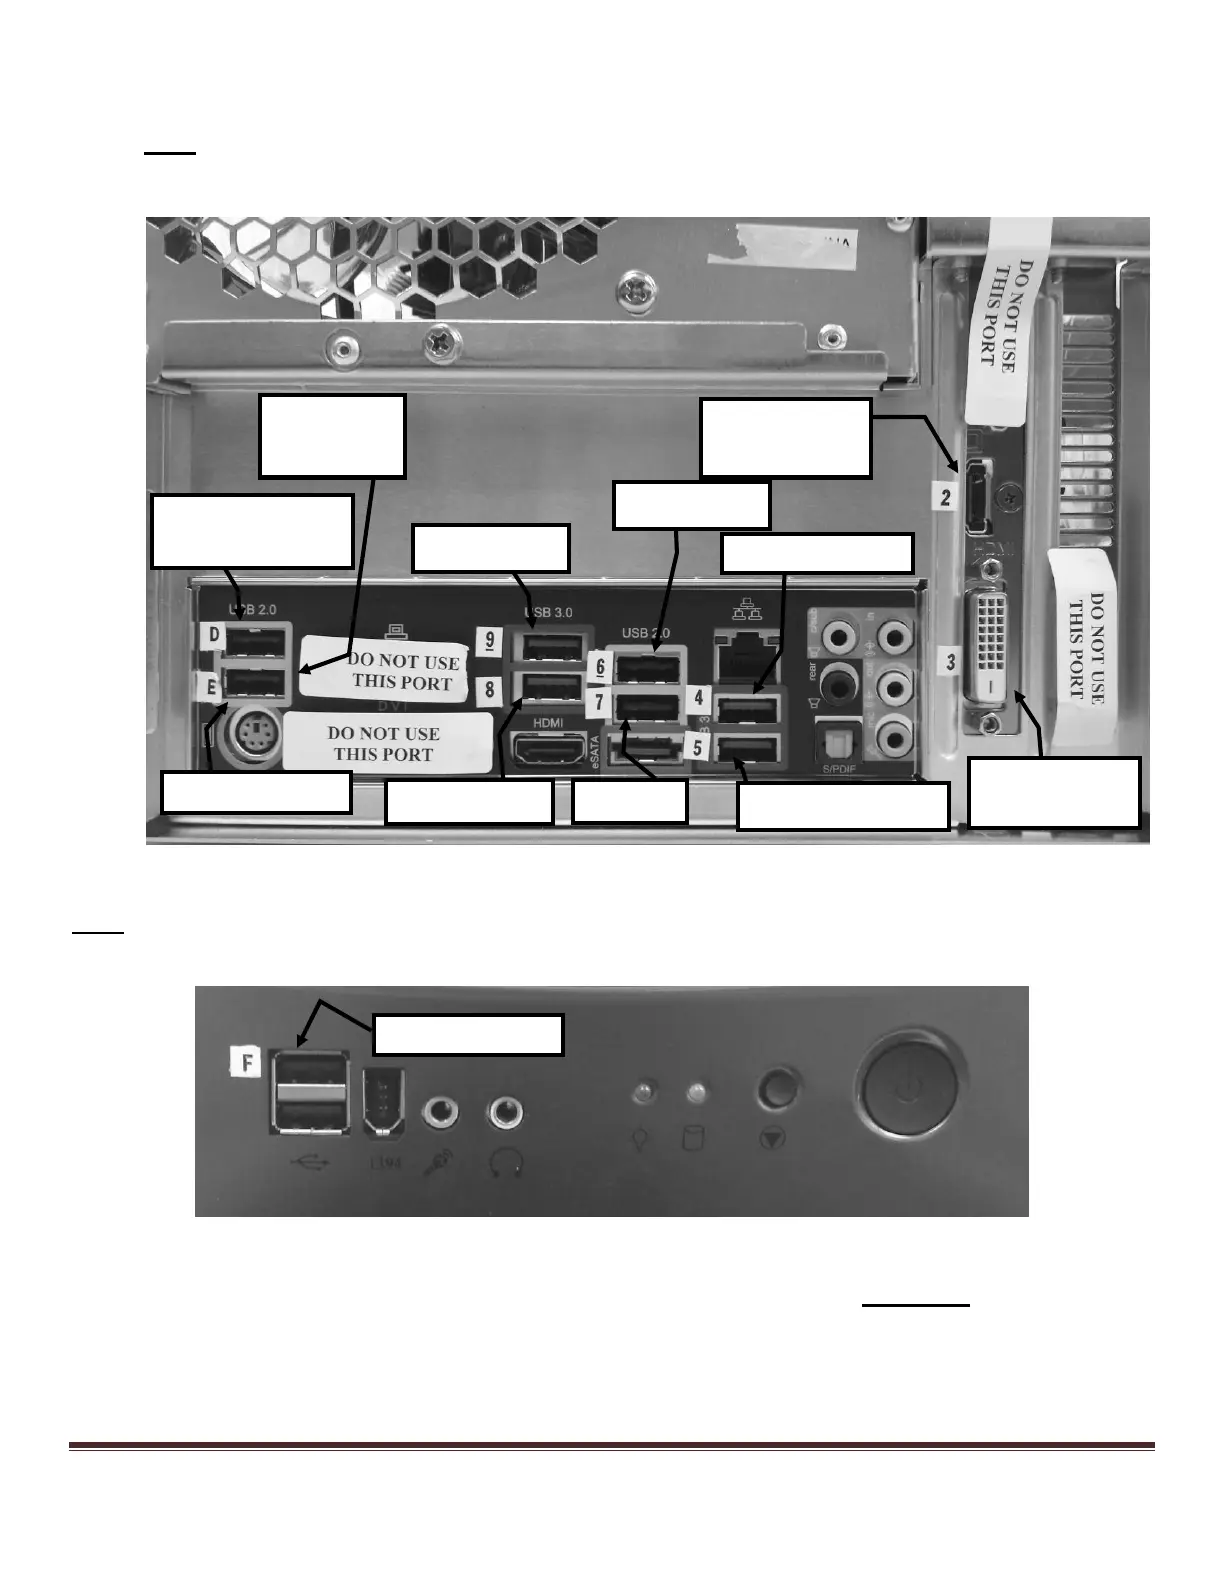
Note: If you purchased the TouchTrainer® Commercial edition, the X-Plane Commercial USB Key will be plugged into
port E, and the Wi-Fi Adapter will move to the front of the computer in port F, as shown in Figure 7:
Figure 7: Plugging in Wi-Fi Adapter to Front of Computer for Commercial Edition
3) For the TouchTrainer® VisX system, plug all cables into the rear computer ports EXACTLY as shown in Figure
6, except now you have 3 more inputs coming from the 3 VisX monitors, which plug into the slots as shown in
Figure 8.