Copyright FlyThisSim LLC 2012 Version 2.8.1 [Type text]
6) Connect all wires from the central junction box into the appropriate plugs, as detailed in the TouchTrainer®
computer section.
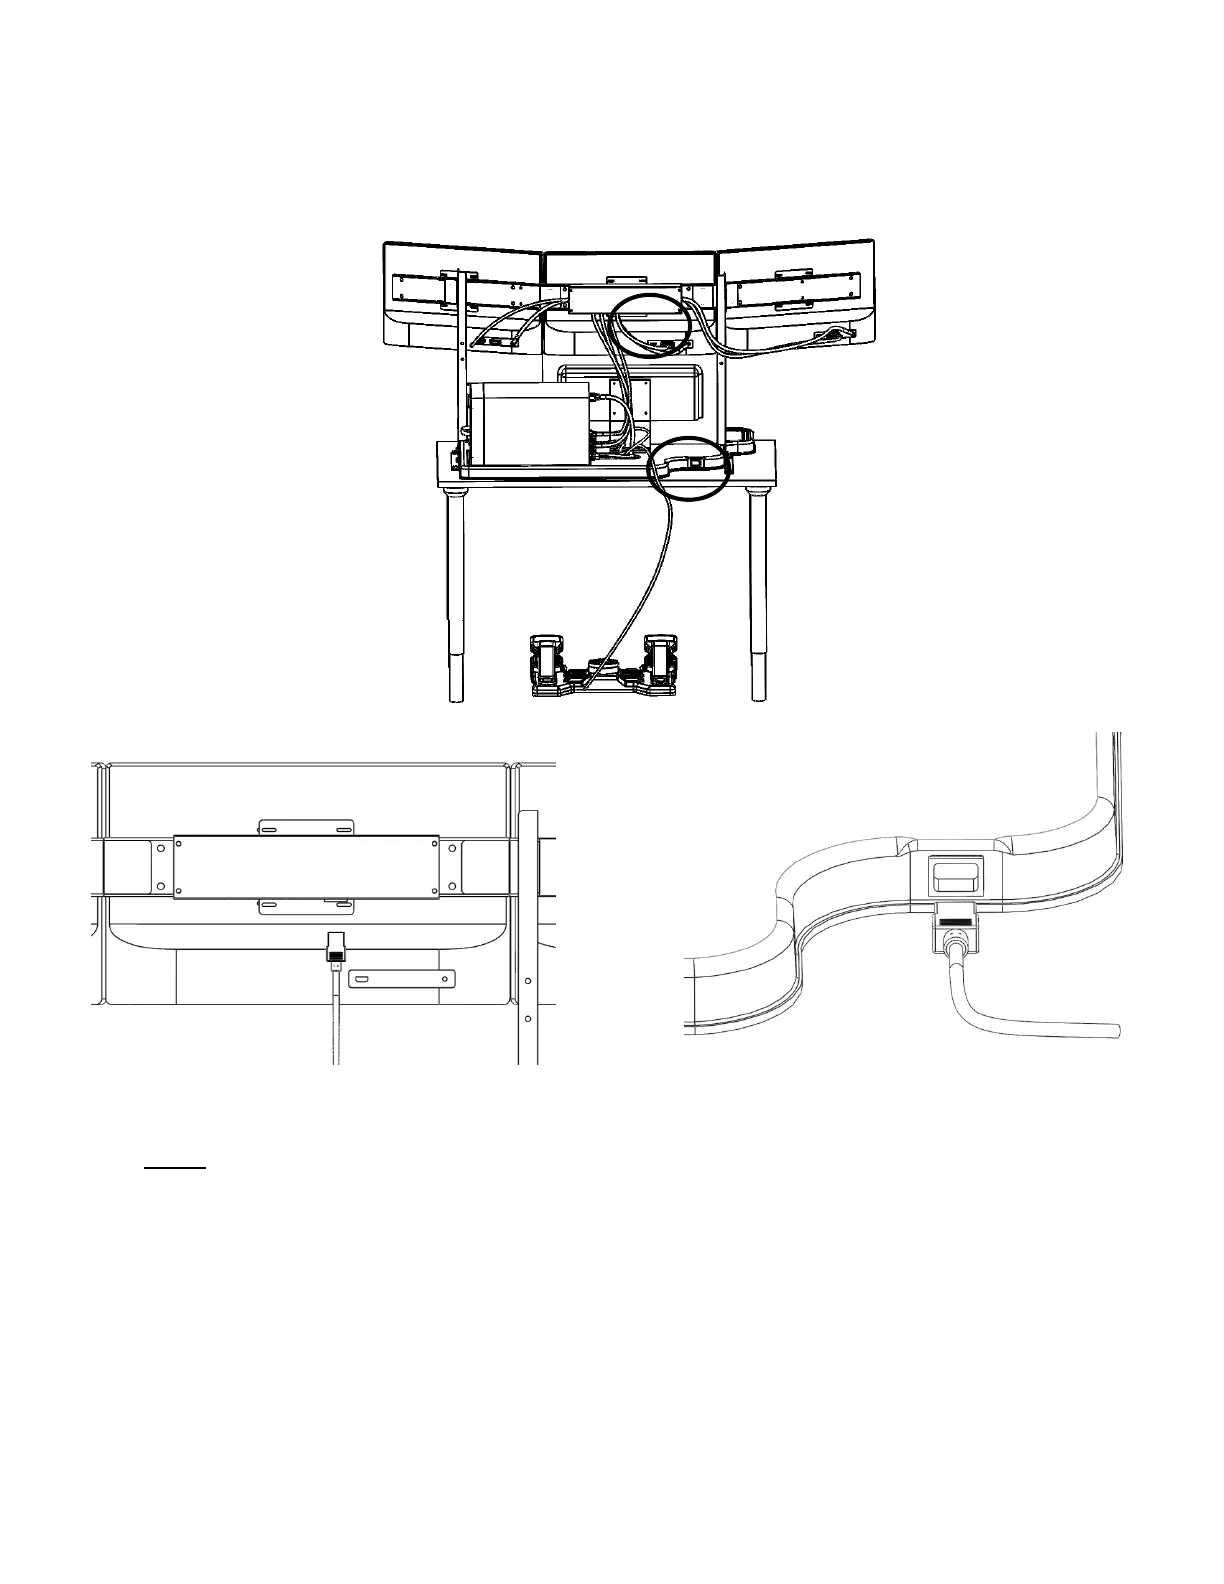
7) The last step is to connect the AC Power Cables into the outlets on the TouchTrainer®. One Power cable plugs
into the plastic base and if you have a VisX TouchTrainer® plug the second power cable into the outlet on the
center cross-member behind the center monitor.
Figure 36: VisX Power Plug Located Behind the Center Monitor
on the Underside of the Junction Box
Figure 37: TouchTrainer Power Plug Located at the Rear of the
Base of the Left VisX Upright
NOTE: YOU MUST PLUG BOTH POWER CABLES IN AND MAKE SURE ALL CABLES ARE
CONNECTED BEFORE POWERING ON THE TOUCHTRAINER®. FAILURE TO DO SO WILL RESULT
IN A RECONFIGURATION OF NVIDA SURROUND. (SEE TROUBLESHOOTING Pg.48)
Before powering up your TouchTrainer®, make sure your mouse is powered on. To verify this, turn it over and see if the
red laser is on. If it is not, turn your mouse on before turning on your computer. The mouse and keyboard are pre-
configured for use with your TouchTrainer®.
Congratulations, your TouchTrainer® is now completely assembled! You’re now ready to power up your TouchTrainer®
and start flying.