32
4. Press F4: [
OK] to save the setting.
NOTE:
◆ The point number that was read is displayed until the current JOB is changed or a new
point number is selected.
◆ If more than two points with the same point name exist in the current JOB, the
instrument finds the first recorded data only.
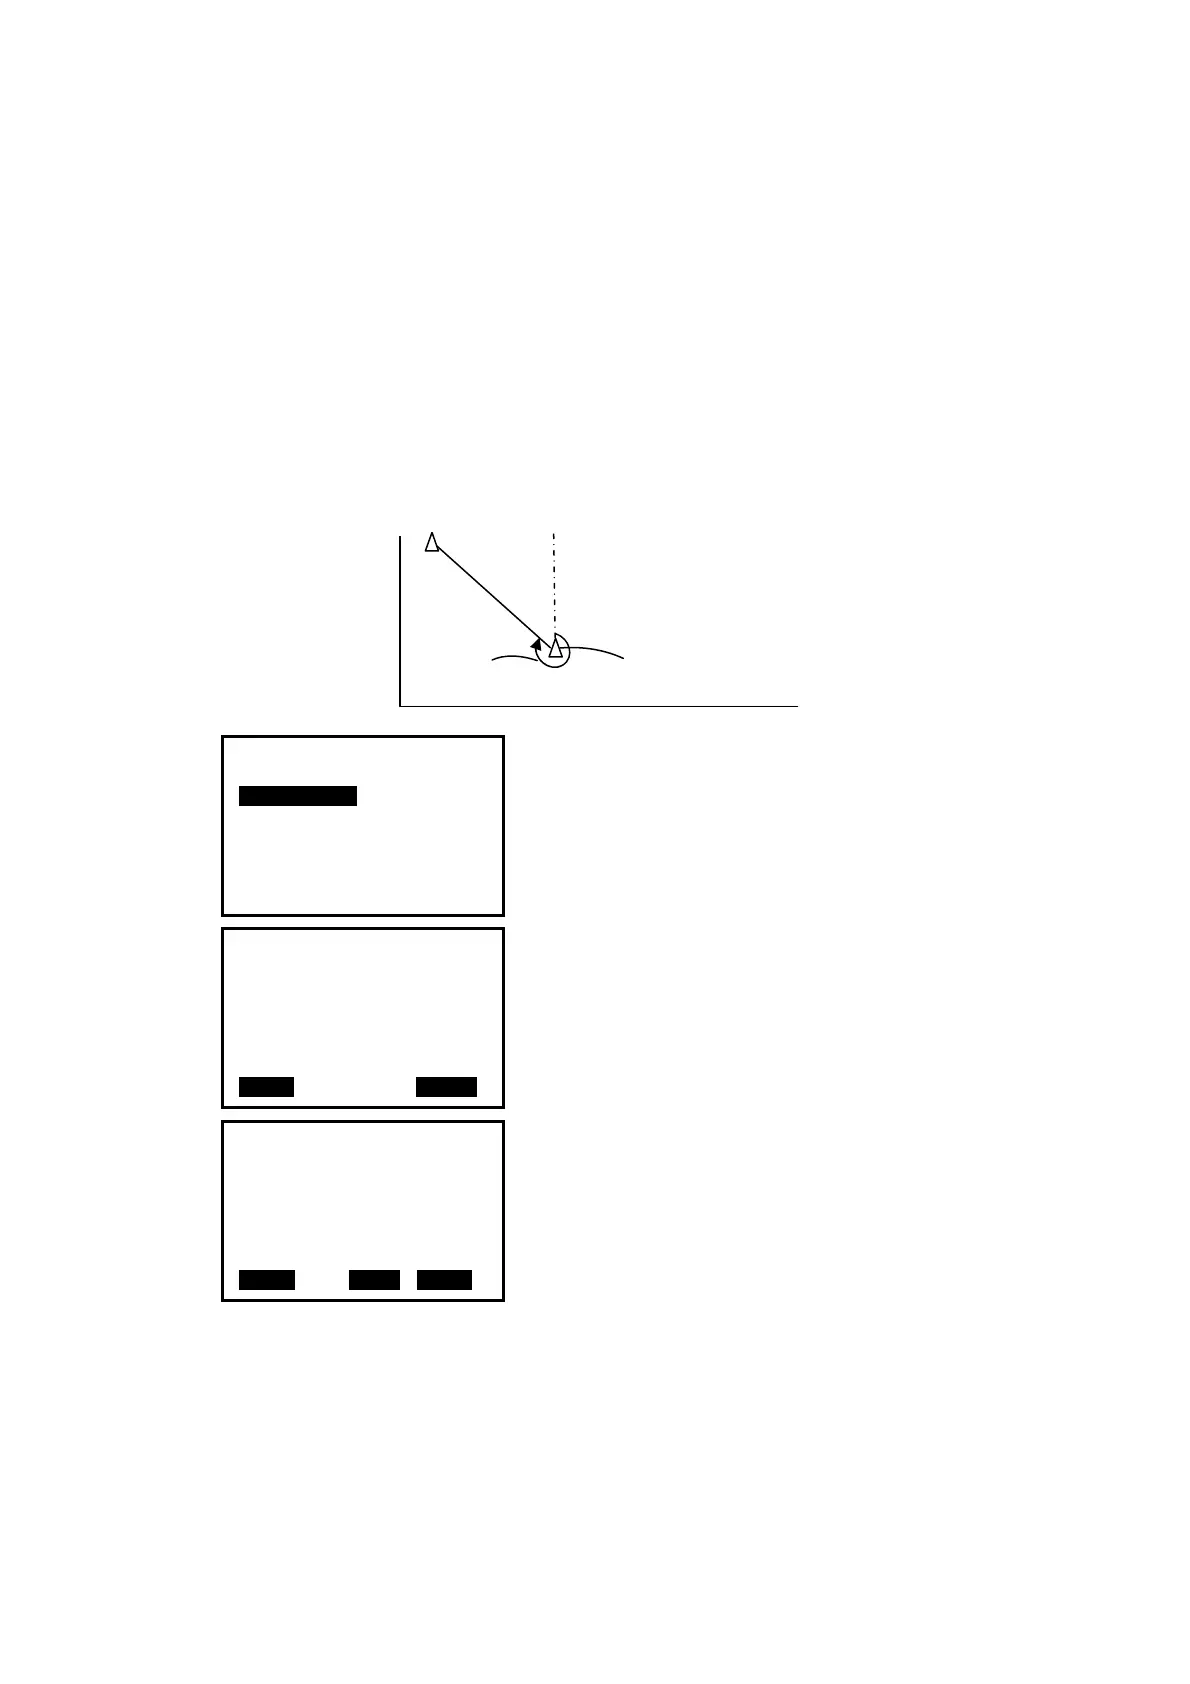
6.2 Azimuth Setting
The azimuth of backsight could be inverse calculated by the coordinates of occupied and
backsight.
1. Select “2. Set H angle”, see “§6.1 Input the
occupied point data”. Then select “
2. Backsight”.
2. Input the coordinate of backsight. You could also
press F1: [
READ] to select existed point data. If you
input the same coordinates with the occupied point, a
message “Same coordinates” will appear and
disappear in 5sec,please re-input the data.
3. Press F4: [OK] to accept the inputted occupied and
backsight coordinates, the calculated azimuth angle
will display.
4. Aim at the backsight point, and then press
F1:[
MEAS] to check the backsight, or press F3: [REC]
to record and set the station, then back to the
previous mode. You could also press F4: [
OK] to set
the station, but the data will not be recorded.
0
N
Azimuth
Angle
Instrument Station
E
Set H angle
1.Azimuth
2.Backsight
Set H angle/BS
NBS: 20.000
EBS: 20.000
ZBS: 20.000
Pt# P20
READ 0O K0
Set H angle/BS
Azimuth 450000
Tgt.H 0.000m
Pt#
MEAS REC OK
 Loading...