7
2.2 Setting Up the Instrument
Mount the battery in the instrument before performing this operation because the
instrument will tilt slightly if the battery is mounted after leveling.
I. Set up the tripod first: extend the extension legs to suitable lengths and tighten
the screws on the midsections. Make sure the legs are spaced at equal intervals
and the head is approximately level. Set the tripod so that the head is positioned
over the surveying point. Make sure the tripod shoes are firmly fixed in the
ground.
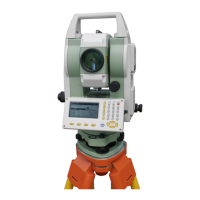
II. Mount the instrument on the tripod head. Supporting it with one hand, tighten
the centering screw on the bottom of the unit to make sure it is secured to the
tripod.
2.3 Centering and Levelling-Up
1. Position tripod legs so that the plummet is aimed to the ground mark point.
Turn the focusing ring of the optical plummet to focus.
2. Turn three footscrews of the tribrach till the center of reticle exactly coincides
with the surveying point in any position.
3. Move the tripod legs to centre the circular level. The instrument is now
roughly leveled-up.
4. Center the bubble in the circular level
Loosen the horizontal motion clamp, and
turn the instrument till the plate level is
parallel to a line shaped with screws A
and B. Adjust the screws A and B to make
the bubble in the center of the level.
Screw B
Screw A
Plate level
Screw C
 Loading...