Contents
3
About this Reference Guide _____________________________________2
1 For your safety ________________________________________________8
2 PostBase Vision mailing system – Short profile ____________________10
2.1 Things worth knowing about the PostBase Vision ______________10
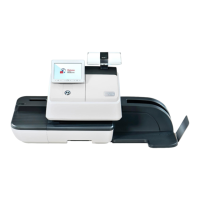
2.2 PostBase Vision postage meter ____________________________13
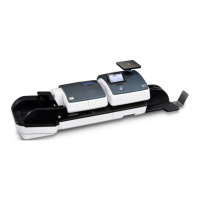
2.3 PostBase Vision Feeder (optional) ___________________________15
3 Installation and commissioning _________________________________17
Step 1: Unpacking and checking the contents of the package _________17
Step 2: Assembling the PostBase Vision _________________________20
Step 3: Assembling the sealer (optional) ___________________________22
Step 4: Connecting the PostBase Vision _________________________23
Step 5: Turning on the PostBase Vision __________________________25
Step 6: Installing the PostBase Vision ___________________________25
Step 7: Installing the PostBase Vision Feeder (optional) _______________31
4 The basics of operation ________________________________________37
4.1 Turning the PostBase Vision on / off ________________________37
4.2 Standby (Sleep mode) ___________________________________38
4.3 Screen elements and operation philosophy ___________________39
4.3.1 The touch screen _______________________________________39
4.3.2 The Home screen ______________________________________42
4.3.3 The menu bar __________________________________________43
4.3.4 The menu _____________________________________________43
4.3.5 Selection lists __________________________________________44
4.3.6 Setting menus _________________________________________44
4.3.7 On-screen keyboard ____________________________________45
4.3.8 Pop-up windows ________________________________________46
4.3.9 Procedures / wizards ____________________________________46
4.4 Setting the display angle _________________________________47
4.5 Setting the display brightness _____________________________47
4.6 Setting the volume ______________________________________48
4.7 Inserting labels _________________________________________49
4.8 Setting up the catch tray _________________________________50
4.9 Using the Drop Stacker (optional) ____________________________50