Rev 4/2018
71
Knotter Settings
Knotter Settings
The following instructions will help you understand
the twine knotter and the adjustments necessary to
maintain and keep the system tying at the optimum
level of performance. Periodic checks of these
adjustments will help alleviate tying problems and
reduce the risk of equipment damage.
NOTE: Adjustments may vary for different
crops.
Needle
NOTE: Before timing the needles, be sure
the needles are in adjustment. For adjusting
the needles see "Twine Needle Adjustment"
on page 74.
To Check Needle Timing:
Trip the knotter clutch (see Figure 99) by raising
the trip bar (see Figure 101 on page 72) until the
notch is positioned over the knurl. Turn the flywheel
counterclockwise until the tips of the needles are
even with he bottom of the bale chamber (see
Figure 98).
Plunger
face
Gussets
Needle
Figure 98. Needle and Plunger
The leading edge of the plunger's gussets must
be 1/4" to 4" past the tips of the needles when the
plunger is on the compression stroke. The needles
are late if the leading edge of the plunger gussets
is more than 3" past the tips of the needles. The
needles are early if they are less than 1/4" past
the leading edge of the plunger gussets. Con sult
the decal on the left-hand side of the baler.
Needle Timing Adjustment
If the needles are late, retard the knotter drive chain
on the knotter sprocket one link. If the needles are
early, ad vance the chain one link.
Replace the chain on the sprocket and connect it.
Be sure that the clutch pawl roller (see Figure 99)
is seated in the notch in the clutch and that the
chain is connected on the idle side and on top of
the idler sprockets (see Figure 100).
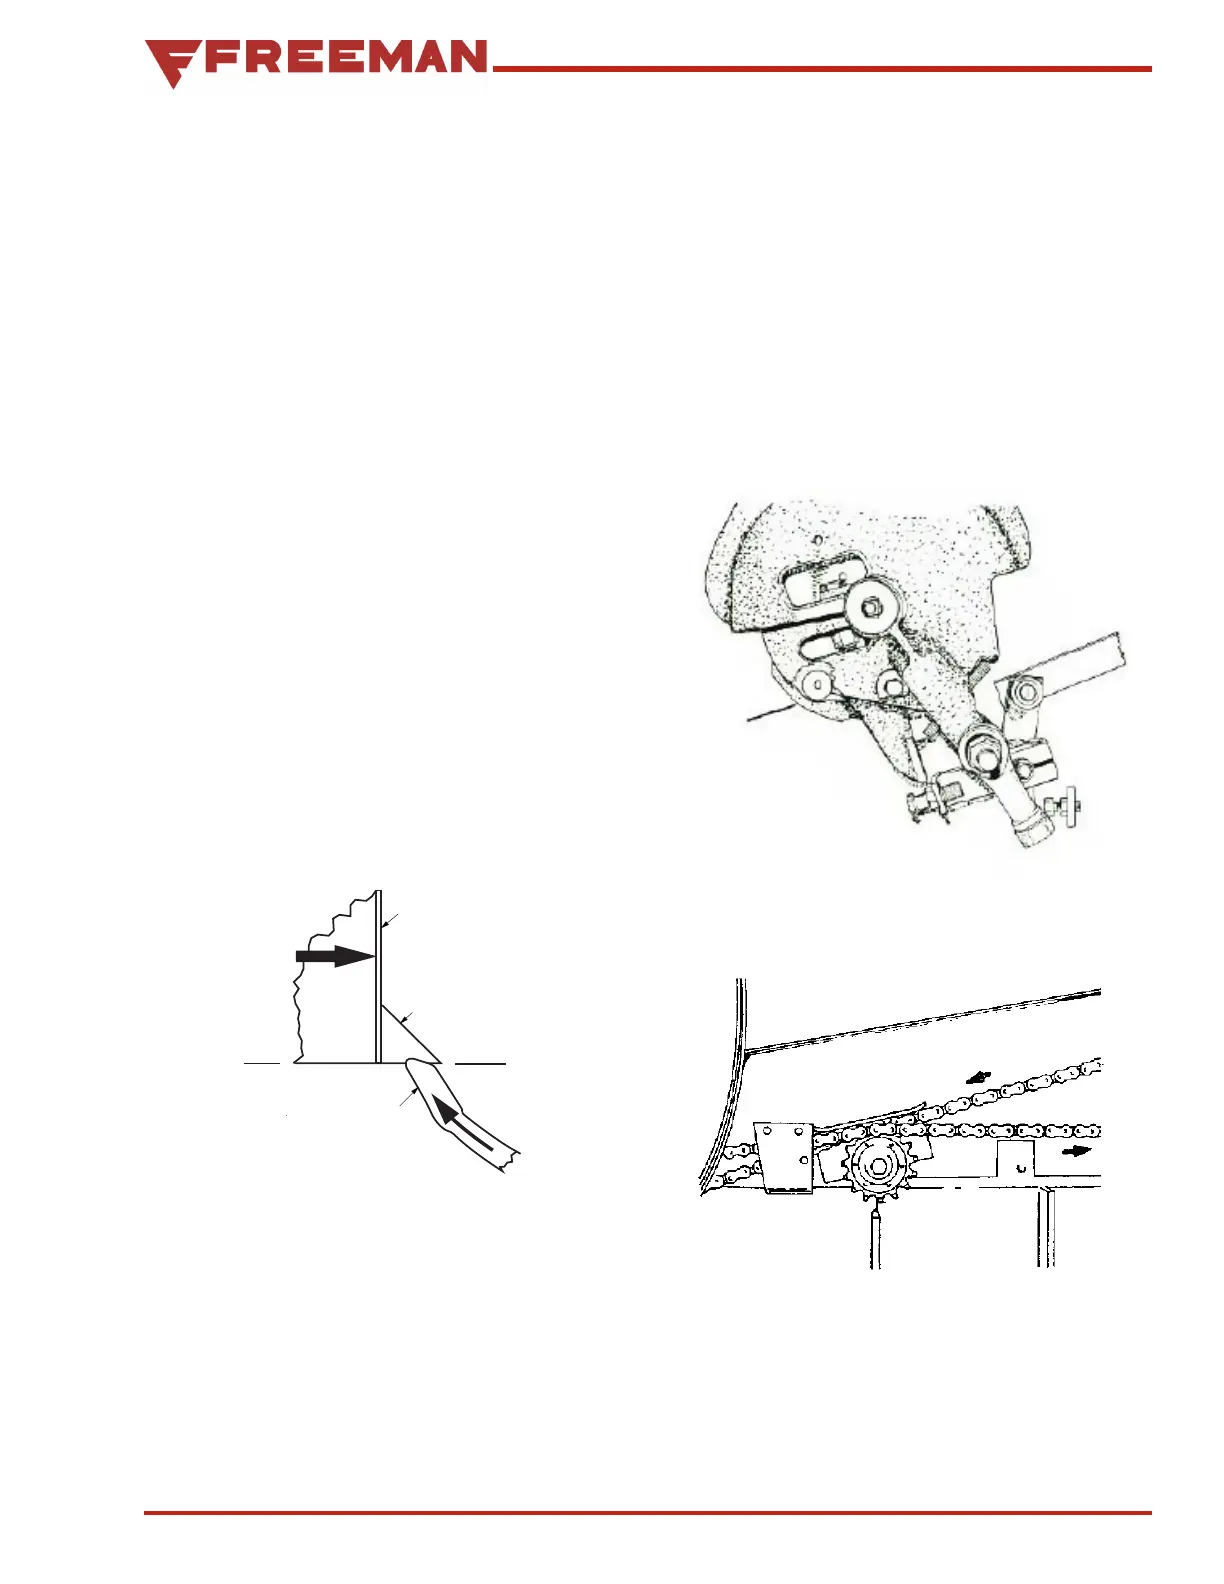
Clutch
Pawl
Roller
Figure 99. Knotter Clutch
Figure 100. Knotter Drive Chain
Trip the knotter clutch and turn the flywheel coun-
terclockwise. Recheck the timing. Repeat the above
procedures until adjustment is correct.