Rev 4/2018
75
SETTINGS AND ADJUSTMENTS
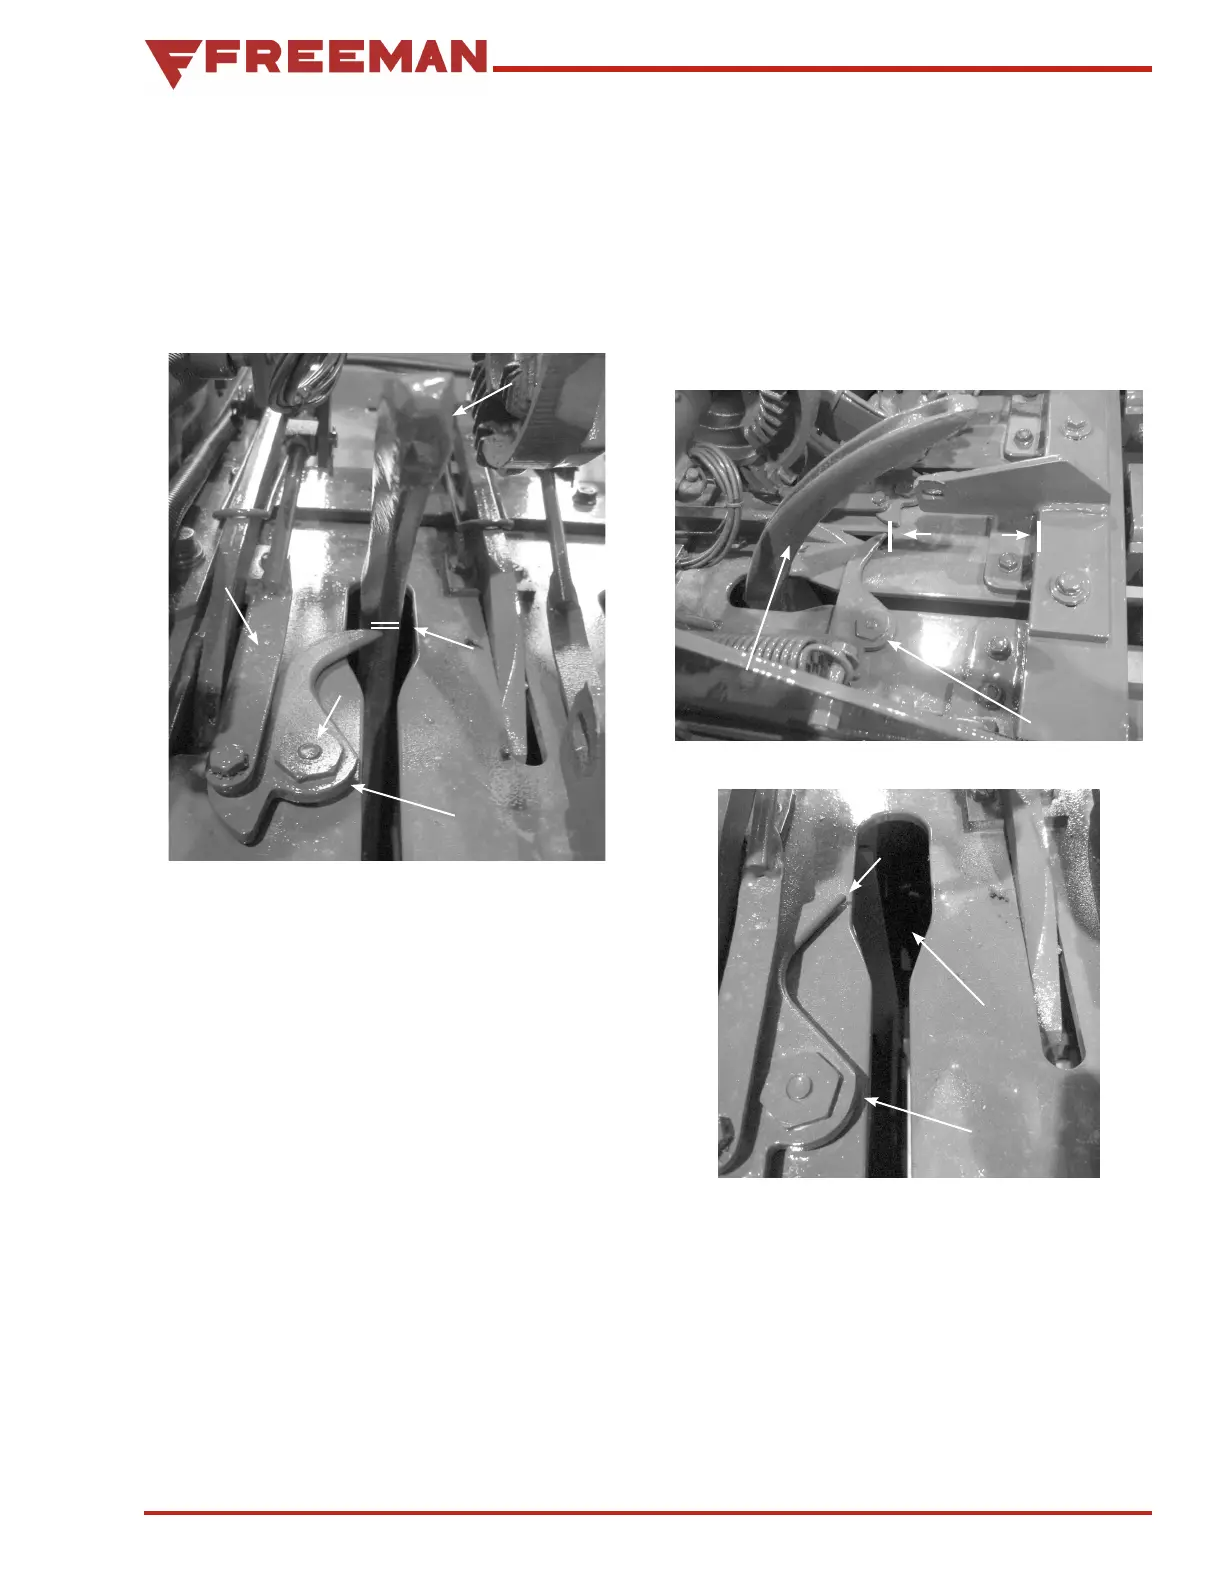
Twine Finger Adjustment
1. Trip the knotter and turn the flywheel counterclockwise
until the point of the twine finger is just passing the
inside edge of the needle. The point of the twine finger
should clear the needle by 1/8", (see Figure 111).
Needle
Twine
Finger
Minimum 1/8"
Max 3/16"
A
B
Figure 111. Needles In Home Position
Make this adjustment by loosening the twine finger
an chor bolts and sliding them to the front or back
in the slotted holes in the bale chamber top (A)
(see Figure 111).
2. Continue to turn the flywheel counterclockwise
until the twine fingers reach the far point of their
travel. Measure the distance from the tip of the
twine fingers back to the knotter support angle (see
Figure 112). This measurement should be 6 -1/2"
on the model 2 tie and 5 -1/2" on 3 tie balers. This
ad justment is made by lengthening or shortening
the twine finger drive rods (B) (see Figure 111).
After adjusting the twine fingers, turn the
flywheel coun terclockwise until the twine fingers
are in the returned posi tion. Check to see that
there is 1/8" from the tips of the twine fingers to
the edge of the needle slots (see Figure 113).
Needle
Twine
Finger
2 Tie
6 1/2"
3 Tie
5 1/2"
Figure 112. Adjusting Twine Fingers
Twine
Finger
Needle
Slot
1/8"
Figure 113. Twine Guide and Twine Finger
Extended
Adjust the position of the twine fingers at the
needle slots with the stop bolt (see Figure 114).