Rev 4/2018
87
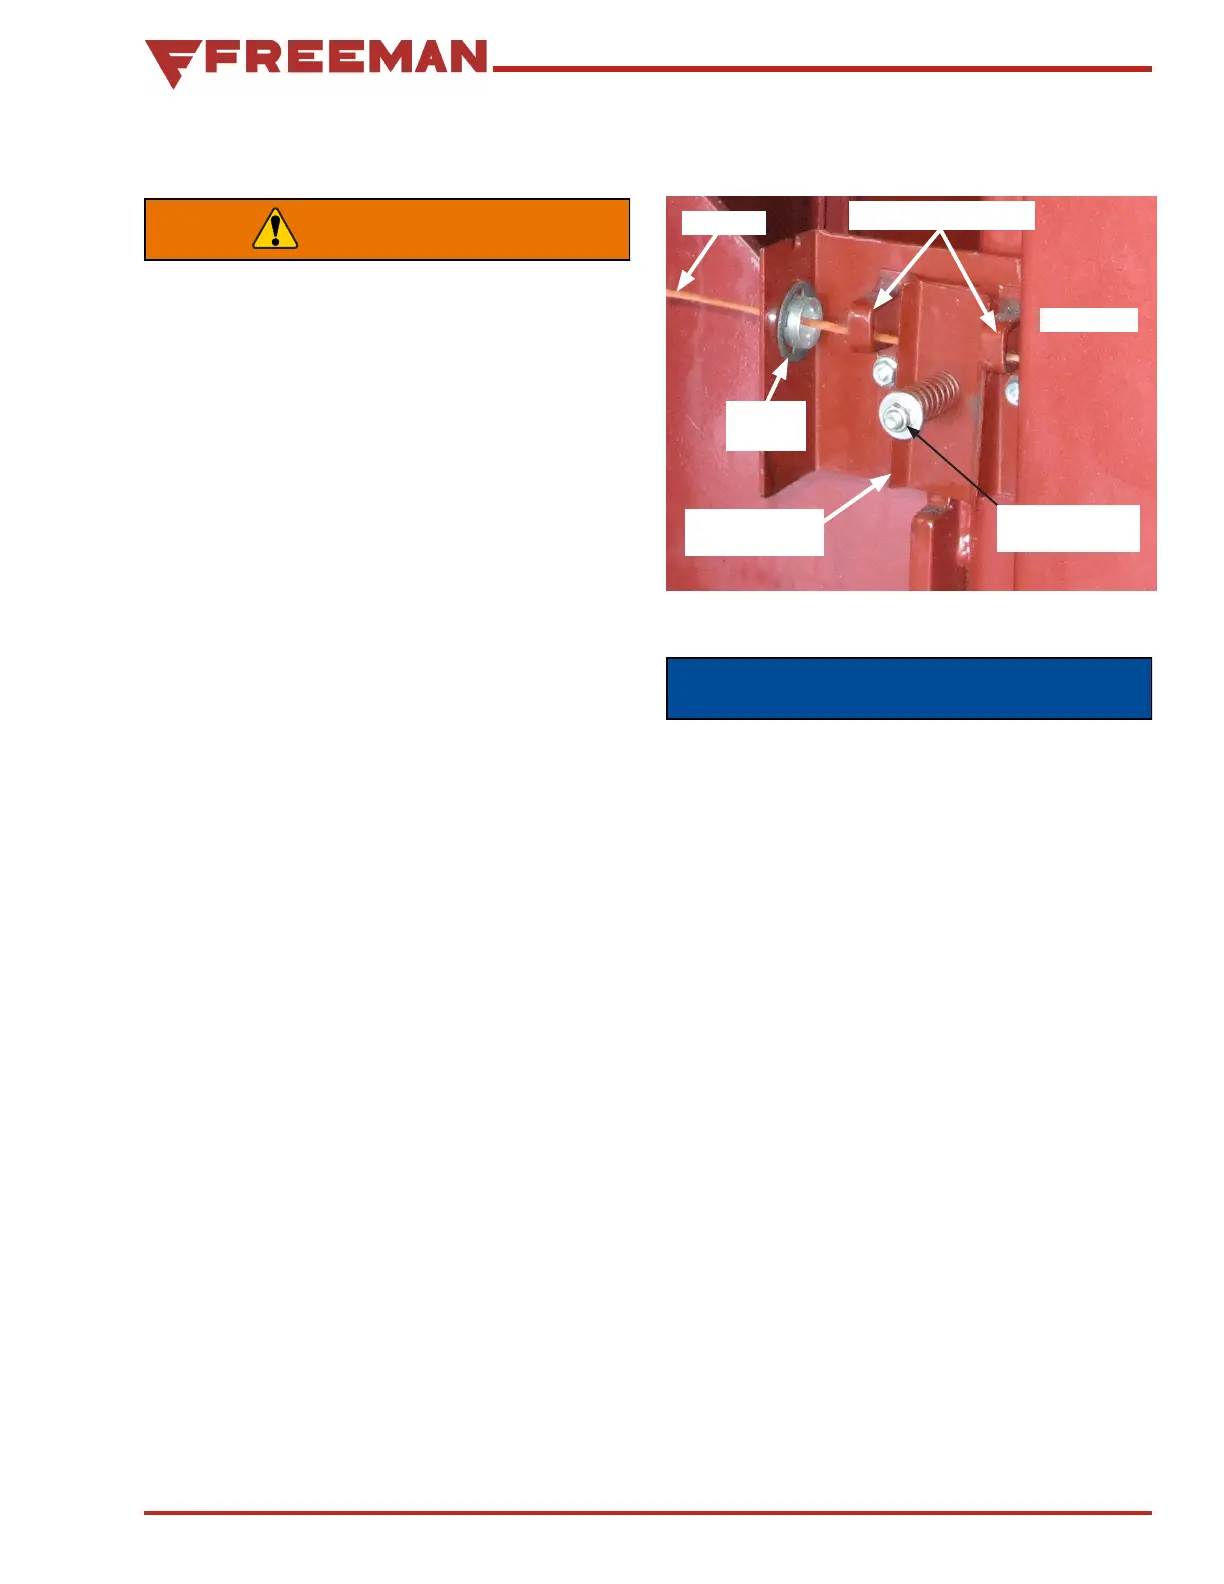
Twine Routing (3 tie shown)Twine Routing (3 tie shown)
Bottom Tension
Plate
Twine Guide Loops
Twine Box
Guide
Bushing
To Baler
Tension
Adjustment Nut
Figure 139. Twine Tensioners
NOTICE
The twine tension assemblies must be
adjusted so that there is a slight amount of
drag on the twine. If the twine tensioner is
too loose, the twine lashes out and the twine
fingers are not able to grasp the twine. If the
twine tensioner is too tight, the twine may
break or come out of the twine holder.
8. It should take 3-5 lbs of force to get the
twine to move through the tensioners. Turn
each tension adjustment nut clockwise to
increase tension on the twine or counterclock-
wise to decrease the tension on the twine.
9. Twine from the top tensioner threads through
the top guide in the bracket that is mounted to
the lower right side of the bale chamber. Twine
from the middle tensioner threads through
the middle guide, and twine from the bottom
tensioner to the bottom guide (See Figure 156).
WARNING
Always shut baler off and wait for all motion
to cease before threading twine.
1. Make sure the needles are in the home position
(fully retracted).
2. Place twine in twine box. It is normal to feel
some resistance when closing the doors after
loading new twine.
NOTE: The baler's twine box is designed to
hold twine in a ball, not in a box. Boxed twine
will not fit.
3. If using multiple balls of twine per knotter, tie
the successive units of twine together (consult
your twine manufacturer for recommended
knots).
4. Feed one strand of twine out through each
of the twine guide bushings in the side of the
twine box and through the first twine guide loop
(See Figure 1399).
5. Pull down/out on the bottom plate of the
twine tensioner and place one strand of twine
between the two plates, release the bottom
tensioner plate to hold the twine in place. Feed
the twine through the second guide loop, then
out through the guide bushing in the in the
tensioner bracket. Repeat for the remaining
strands.
6. It should take 3-5 lbs of force to get the twine to
move through the tensioners. Turn each tension
adjustment nut clockwise to increase tension
on the twine or counterclockwise to decrease
the tension on the twine.
7. It should take 3-5 lbs of force to get the twine to
move through the tensioners. Turn each tension
adjustment nut clockwise to increase tension
on the twine or counterclockwise to decrease
the tension on the twine.