Rev 4/2018
81
SETTINGS AND ADJUSTMENTS
Plunger Knife
WARNING
Always shut baler off when in specting,
adjusting, lubricating, or servicing the baler.
The baler should have sharp knives at all times.
When re placing worn knives with new or re-sharp-
ened knives, make sure they are adjusted as
described below to avoid serious equipment
damage.
Before adjusting the knife, adjust the plunger as
described in the Plunger section on page 79.
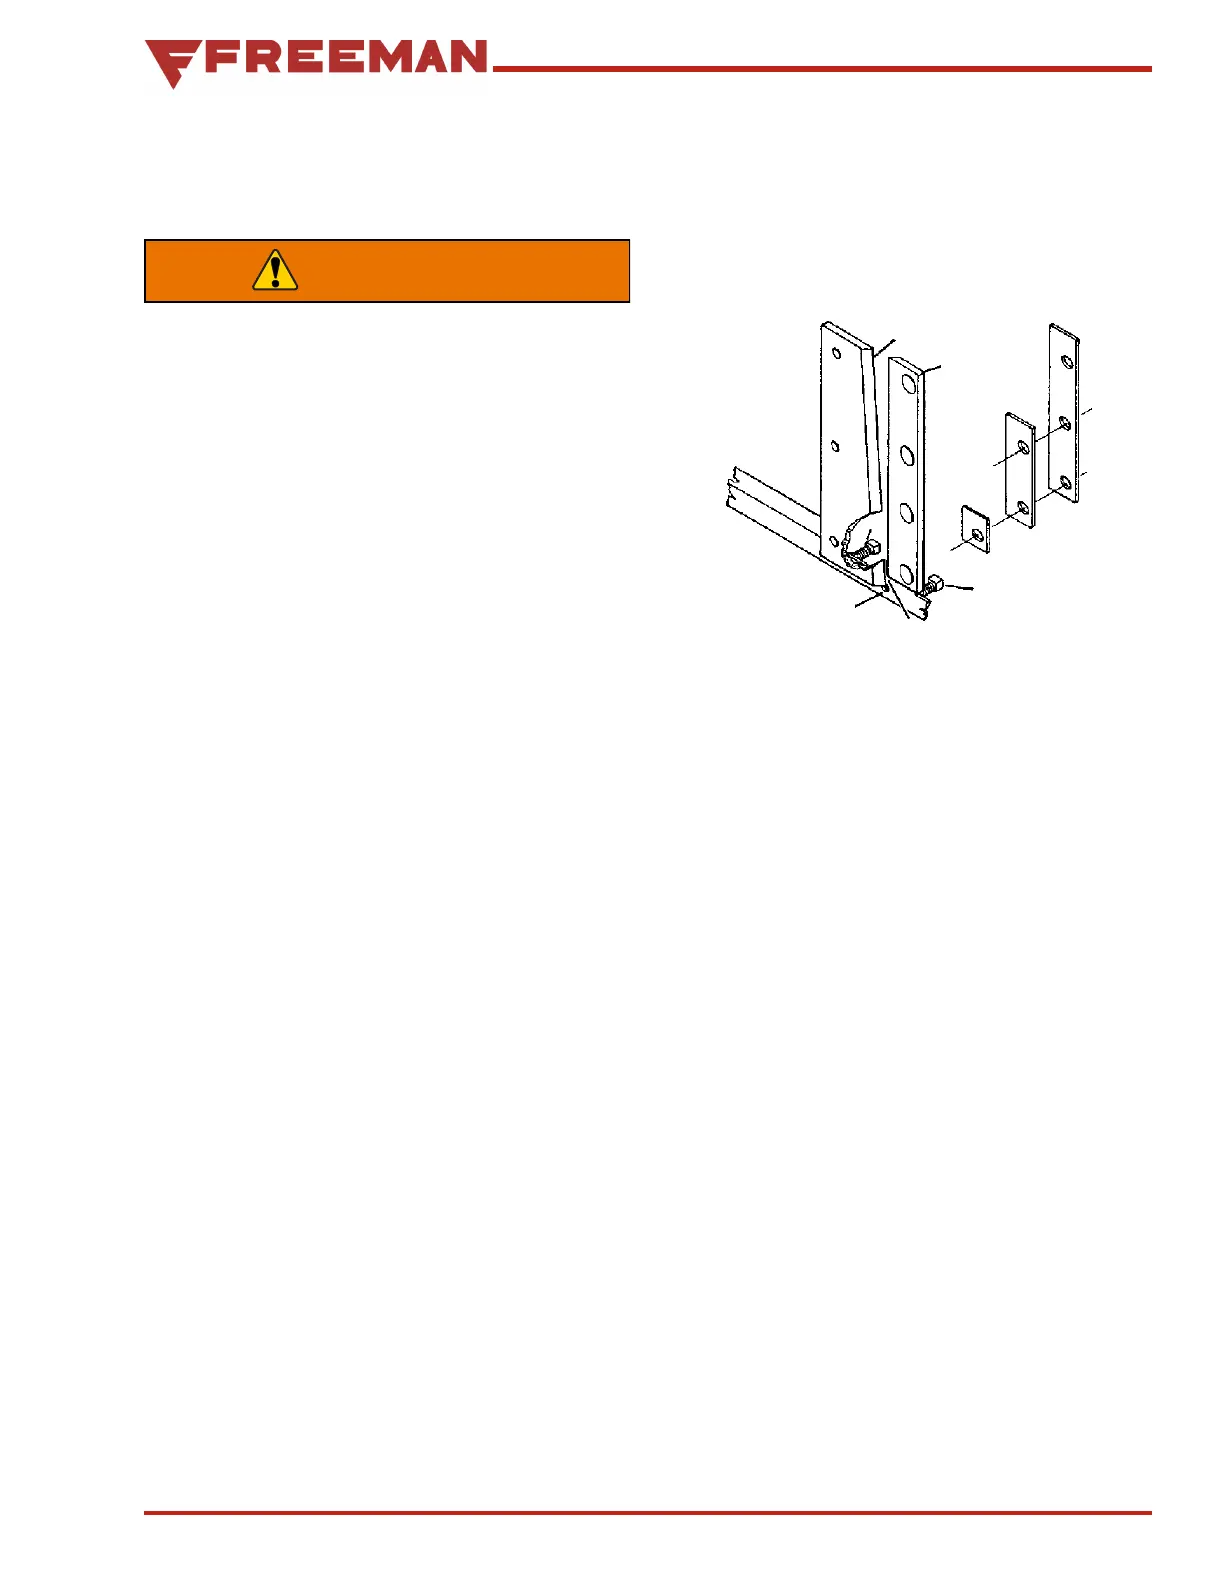
After adjusting the plunger, shim the stationary
knife (see Figure 126, D), so the two knives clear
each other by 1/16" at the top, (E). Do not attempt
to shim the plunger knife.
Rotate the flywheel until the knives are even. Use
a leverage bar to slide the plunger over to the right
side. Adjust the bottom of the knives so that they
have 1/32" clearance at (A). Do this by loosening
bolt (B), and adjusting set screw (C) which is under
the stationary knife bolts, and set screw (F) which
is about six inches forward under the feeder house.
If adjustment cannot be achieved with bolts (C) and
(F), re move or install shims behind the stationary
knife. It is im portant to feather any shims.
After adjusting the bottom of the knives, adjust the
top until there is 1/16" clearance between the two
knives. The top of the knives can only be adjusted
with shims.
A
B
C
D
E
F
Figure 126. Plunger Knife
Check these adjustments carefully and run the
plunger back and forth by hand to insure the knives
are properly ad justed. Use a leverage bar to force
the plunger to the right side of the chamber, with
great pressure to ensure the knives do not lock up.