○○○○○○○○○○○○○○○○○○○○○○
2•52 User Guide
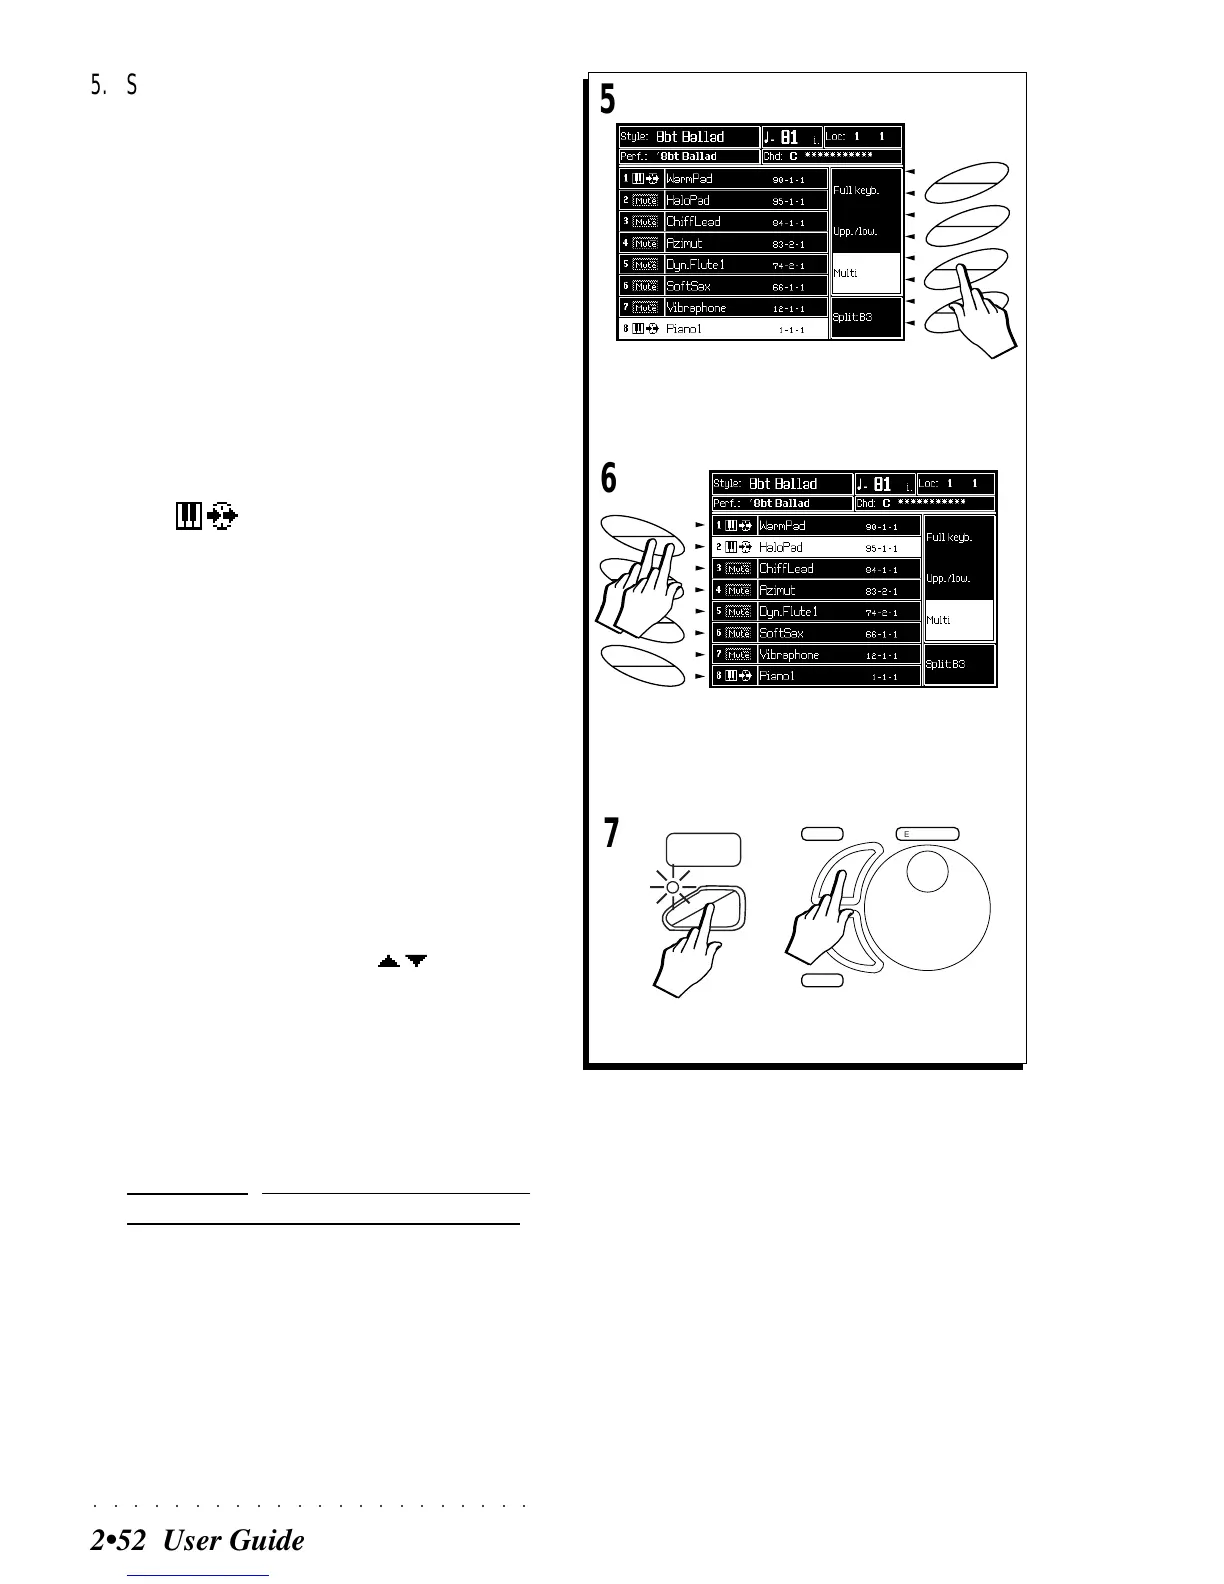
5
6
7
5. Select the preferred keyboard mode.
Full allows you to record one or two keyboard
sounds across the entire keyboard.
Upp/Low allows you to record up to two key-
board sounds on the left and two on the right
on a split keyboard.
Set Multi (as in the example) if you want to
view all 8 keyboard tracks of the Perform-
ance in order to set more than 4 sounds for
simultaneous recording.
The tracks already activated for the record-
ing are shown set for “key-play” (with a small
keyboard icon together with the MIDI status
icon [ ] - see page 1.7 of chapter 1).
6. Activate, if necessary, other tracks to record with.
Press the corresponding soft button repeat-
edly, first to select, then to activate a track.
The track status icon changes from “mute” to
“play”. In the example, track 2 is activated
by pressing soft button B twice.
If you don’t want to record with one or more
of the currently activated tracks, simply mute
them.
You can also change the sounds of one or
more tracks of both the keyboard sounds as
well as the accompaniment sounds. Use the
Track Scroll buttons (or the / buttons) to
view the accompaniment tracks.
7. If you have changed something (keyboard mode,
sound, track status, etc.), PRESS STORE PERF +
ENTER to store the changes to the current Per-
formance.
IMPORTANT: If you don’t store the changes,
they will be lost when to start the recording.
F8
F7
F6
F5
F4
F3
F2
F1
A
B
C
D
E
F
G
H
ST
ORE
PERF
.
ENTER
TEMPO
/DA
TA
ESCAPE