19
• Other models: Install the cable management brackets to the mounting brackets, and then install the
mounting brackets to the chassis. For more information, see “Installing the cable management
brac
kets on other models” and “Installing the mounting brackets.”
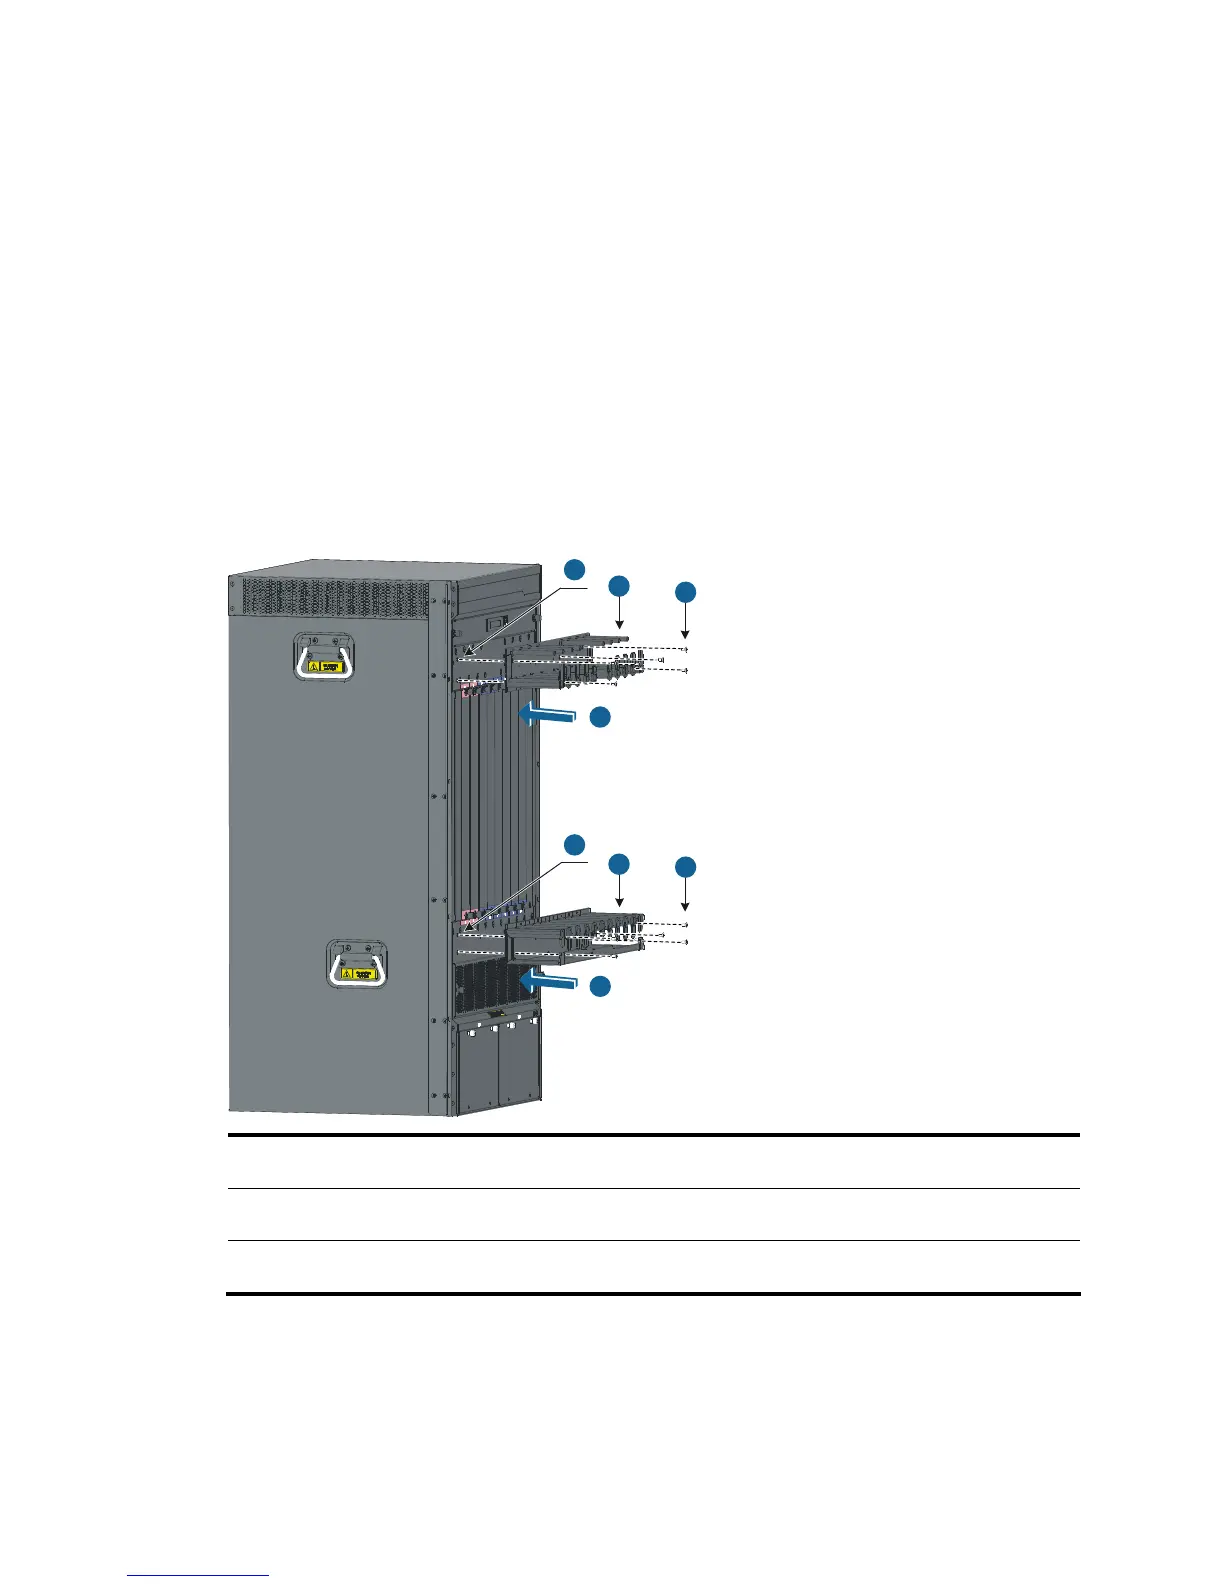
Installing the cable management brackets on the S7506E-V
The S7506E-V has two cable management brackets—the one with a tray is installed at the lower part of
the switch, and the one without a tray is installed at the upper part of the switch. They are installed in the
same way.
Follow these steps to install a cable management bracket:
Step1 Take out the cable management brackets from the package.
Step2 Attach the cable management bracket to the chassis, and align the screws with the screw holes on the
chassis, as shown in Figure 12.
Step3 Fasten the screws.
Figure 12 Install cable management brackets on an S7506E-V
1
2
3
3
2
1
5
4
1: Attach the cable management bracket to the
chassis
2: Screw holes for installing the cable management
bracket
3: Screws for fixing the cable management bracket to
the chassis
4: Cable management bracket without a tray
(installed at the upper part of the chassis)
5: Cable management bracket with a tray (installed at
the lower part of the chassis)
Installing the cable management brackets on other models
For the models except the S7506E-V, install the cable management bracket on the left mounting bracket,
as shown in Figure 13. The switch is supplied with two mounting brackets, and the one with the cable
management br
acket screw holes is the left mounting bracket.

 Loading...


