Operating Instructions • Thermal transfer printer TT431 • 03-2019 • 556-00400
Operation
11
GBDEFRESPTITNLDKNESEFIPLCZHUSIROTR
5.3 Connecting the device to a computer or
computer network
NOTE
Material damage caused by improper work!
Inadequate or no grounding of the components can cause
malfunctions during operation.
f Only connect the device to a properly installed and
standardised socket with grounding.
Proceed as follows:
1 Connect the device to a computer or computer network.
Æ Configuration instructions
; The device is connected to a computer or computer
network.
5.4 Switching the device on and off
Proceed as follows:
1 Ensure that all connections have been made.
2 Switch the device on using the power switch.
; The device automatically performs a system test and
shows the system status READY on the display.
- or -
3 Rectify error, if applicable.
Æ Section 8
6 Operation
6.1 Inserting the roll material
5
7
8
6
9
2
1
3
4
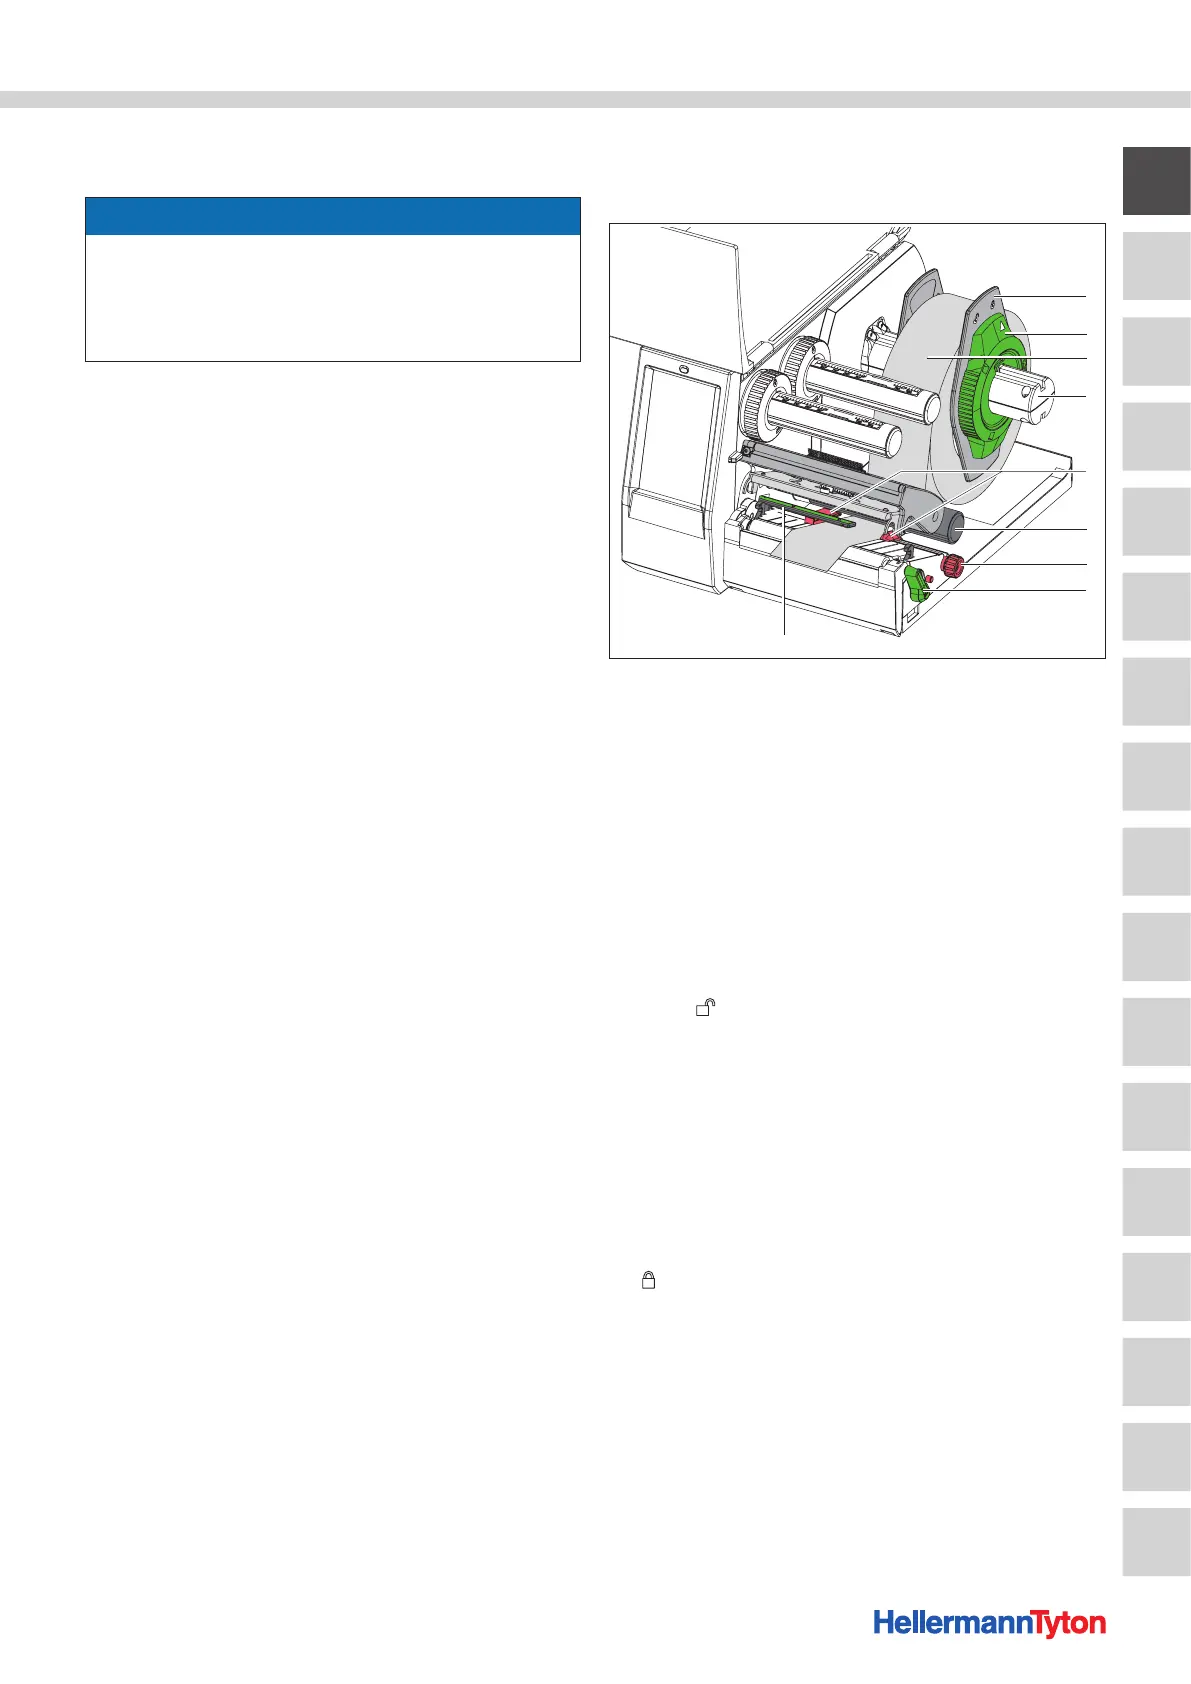
Insert the roll material.
1 Margin stops
2 Ring
3 Material roll
4 Roll retainer
5 Margin stops
6 Guide roller
7 Knurled knob
8 Printhead locking lever
9 Light barrier
1 Open the cover.
2 Turn the ring counterclockwise, so that the arrow points
to the symbol and the margin stop is released.
3 Remove the margin stop from the roll holder.
4 Load the material roll onto the roll holder so that the
printed side of the material faces up.
5 Push the margin stop onto the roll holder.
6 Push the margin stops until both margin stops rest
against the material roll and noticeable resistance can be
felt when pushing.
7 Turn the ring clockwise, so that the arrow points to the
symbol and the margin stop clamps onto the roll
holder.
8 Turn the lever counterclockwise to open the printhead.
9 Adjust the margin stops using the knurled knob so that
the material fits between the two margin stops.
 Loading...