● A NIC needs to be replaced with a new model.
Prerequisites
Conditions
You have powered o the RH8100 V3. For details, see 6.2 Powering O the
RH8100 V3. Then you have removed all power cables from the server.
Data
● You have obtained the cabinet number and chassis number of the RH8100 V3.
● You have located the RH8100 V3 based on the preceding information, and
labeled its panel to prevent misoperations.
● You have determined the position on the RH8100 V3 for installing a NIC.
Tools
● ESD gloves
● Packaging materials, for example, an ESD bag
Hardware
Spare NIC
Procedure
Step 1 Wear an ESD wrist strap or ESD gloves. For details, see 1 Safety Instructions.
Step 2 Take the spare NIC out of its ESD bag.
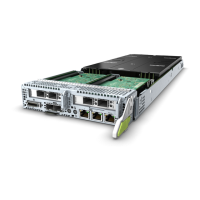
Step 3 Push the NIC into the High-performance Fusion Console (HFC) as far as it will go.
See Figure 5-144.
Figure 5-144 Installing a NIC
RH8100 V3 Server
User Guide 5 Removing and Installing Parts of the RH8100 V3
Issue 30 (2019-12-19) Copyright © Huawei Technologies Co., Ltd. 271

 Loading...


