Model 250
Printer Applicator
Operators/Technical Manual Section Three
Section 3 Page 11 of 19
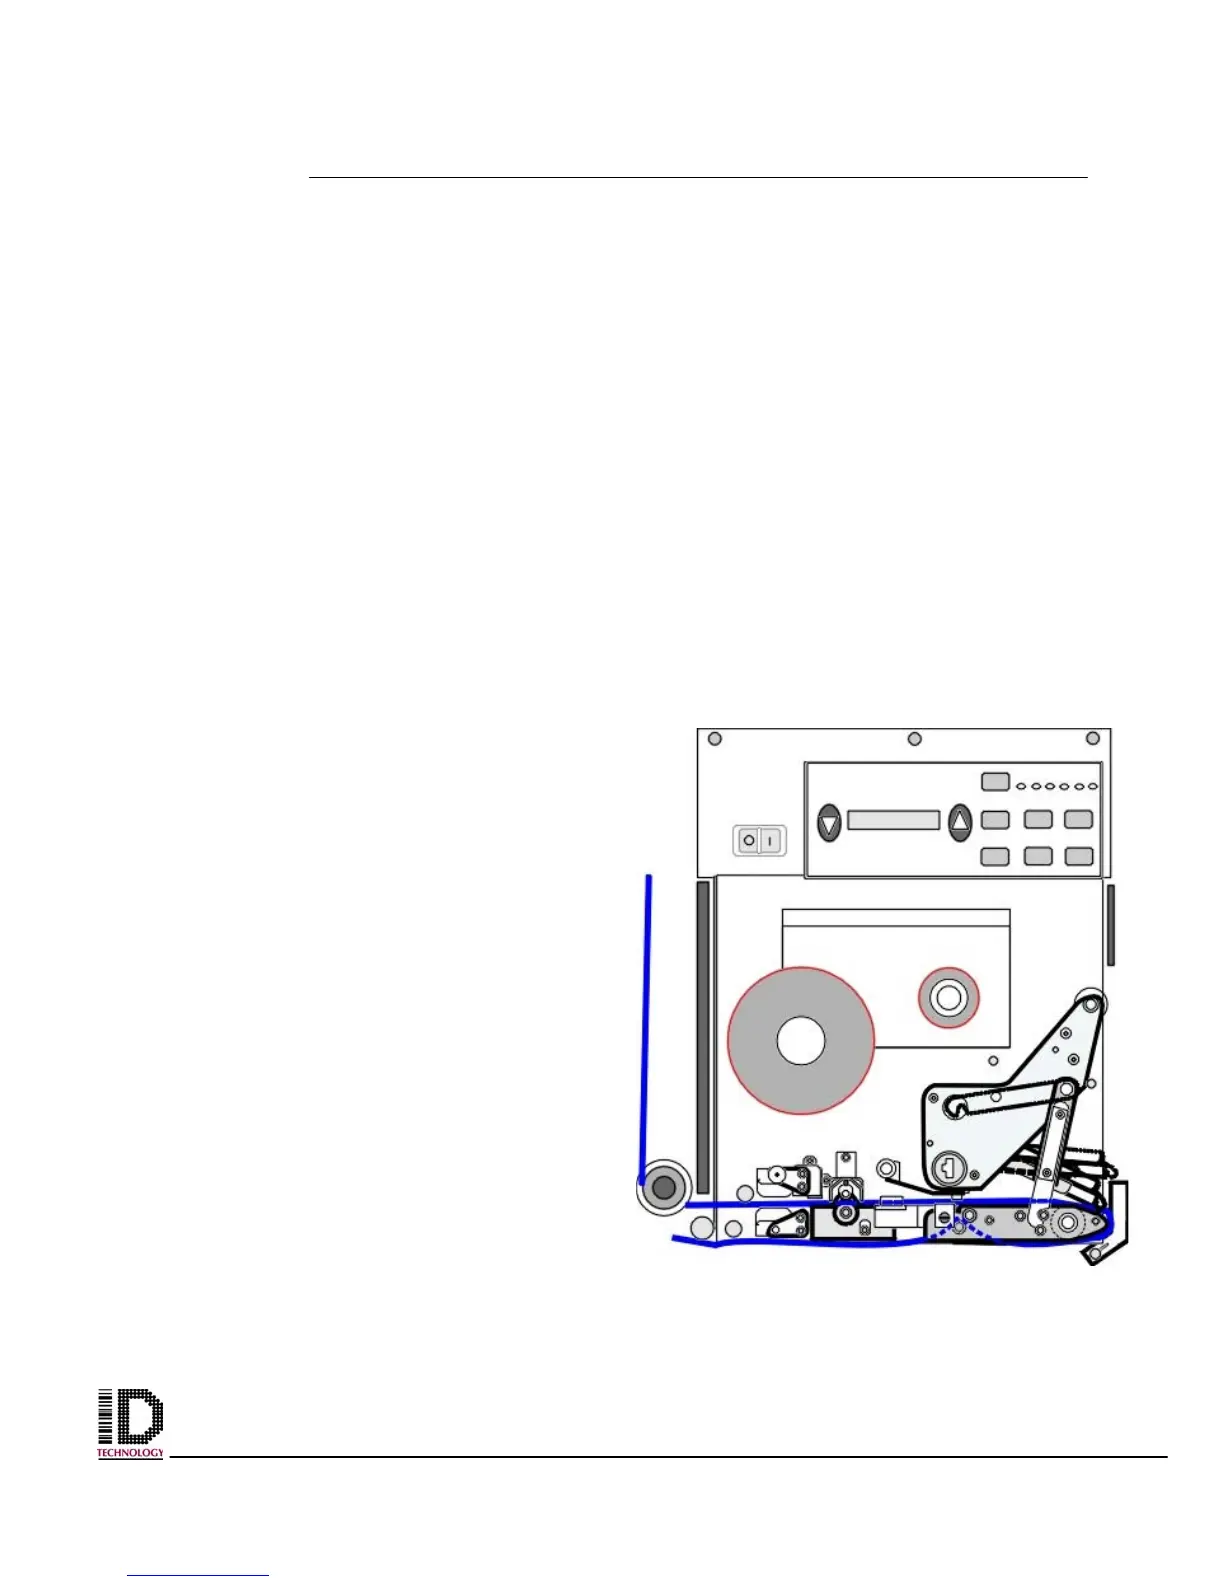
To Load Labels through the Zebra Printer Engine
(refer to Figures 3-16 and 3-17 with the following procedure)
1. Grasp the thumbnut (A) and slide the outer media edge guide (B) as far out
from the printer frame as possible. (The thumbnut does not have to be
loosened.)
2. Open the printhead assembly (C) by unlatching the printhead lock lever (D)
from the locking pin (E).
3. Raise the pinch roller (F) by pressing down on the pinch roller assembly latch
(G). Thread the media under the upper guide post (H), between the pinch roller
and the associated rubber pinch roller, and under the printhead assembly (C)
until approximately 30” (75cm) of media extends out of the print engine.
4. Ensure the media is aligned within the print path then close the printhead
assembly (C) by rotating the printhead lock lever (D) until it latches onto the
locking pin (E).
5. Secure the pinch roller (F) in position by pressing down on the top of the pinch
roller latch (G) until the assembly snaps closed.
6. Position the outer media edge
guide (B) so it just touches the
outer edge of the media.
7. Raise the peel roller latch (I) and
the peel roller assembly (J) will
pivot down to a vertical position.
8. Thread the backing material
around the peel bar (K), under the
platen roller (L), and through the
peel roller assembly (J). (see
Detail in figure 3-17.)
9. Ensure you route the media
between the air assist tube and
the print engine frame. (DO NOT
thread the media over the air
assist tube.)
10. Rotate the peel roller assembly
(J) up until it latches closed.
11. Thread the backing material
under the lower guidepost (M)
and around the take-up spindle
of the applicator.
Figure 3-18 Front view of label web threaded
through Zebra engine