- 192 - - 193 -
Setting the network from the web browser Setting the network from the web browser
5
1
2
4
3
5
1
2
4
3
Convenient print
functions
Appendix Index
Checking and
Changing Printer
Settings Using
the Control Panel
Network
Setup
Matching
Colors
Using Utility
Software
Convenient print
functions
Appendix Index
Checking and
Changing Printer
Settings Using
the Control Panel
Network
Setup
Matching
Colors
Using Utility
Software
Encrypting
communications (IPSec)
Manipulation prevention and encryption between
the PC (client) and printer are possible at the
network level.
Memo
z
The IKE protocol supported by the device is "IKEv1".
The communications mode supported by the device is
"Transport mode". "Tunnel mode" is not operational.
If IPSec is enabled, printer response may be slow
depending on the network communications status.
Note
z
IPSec cannot operate with mail sending functions and
SNMP Trap functions.
Setup ow
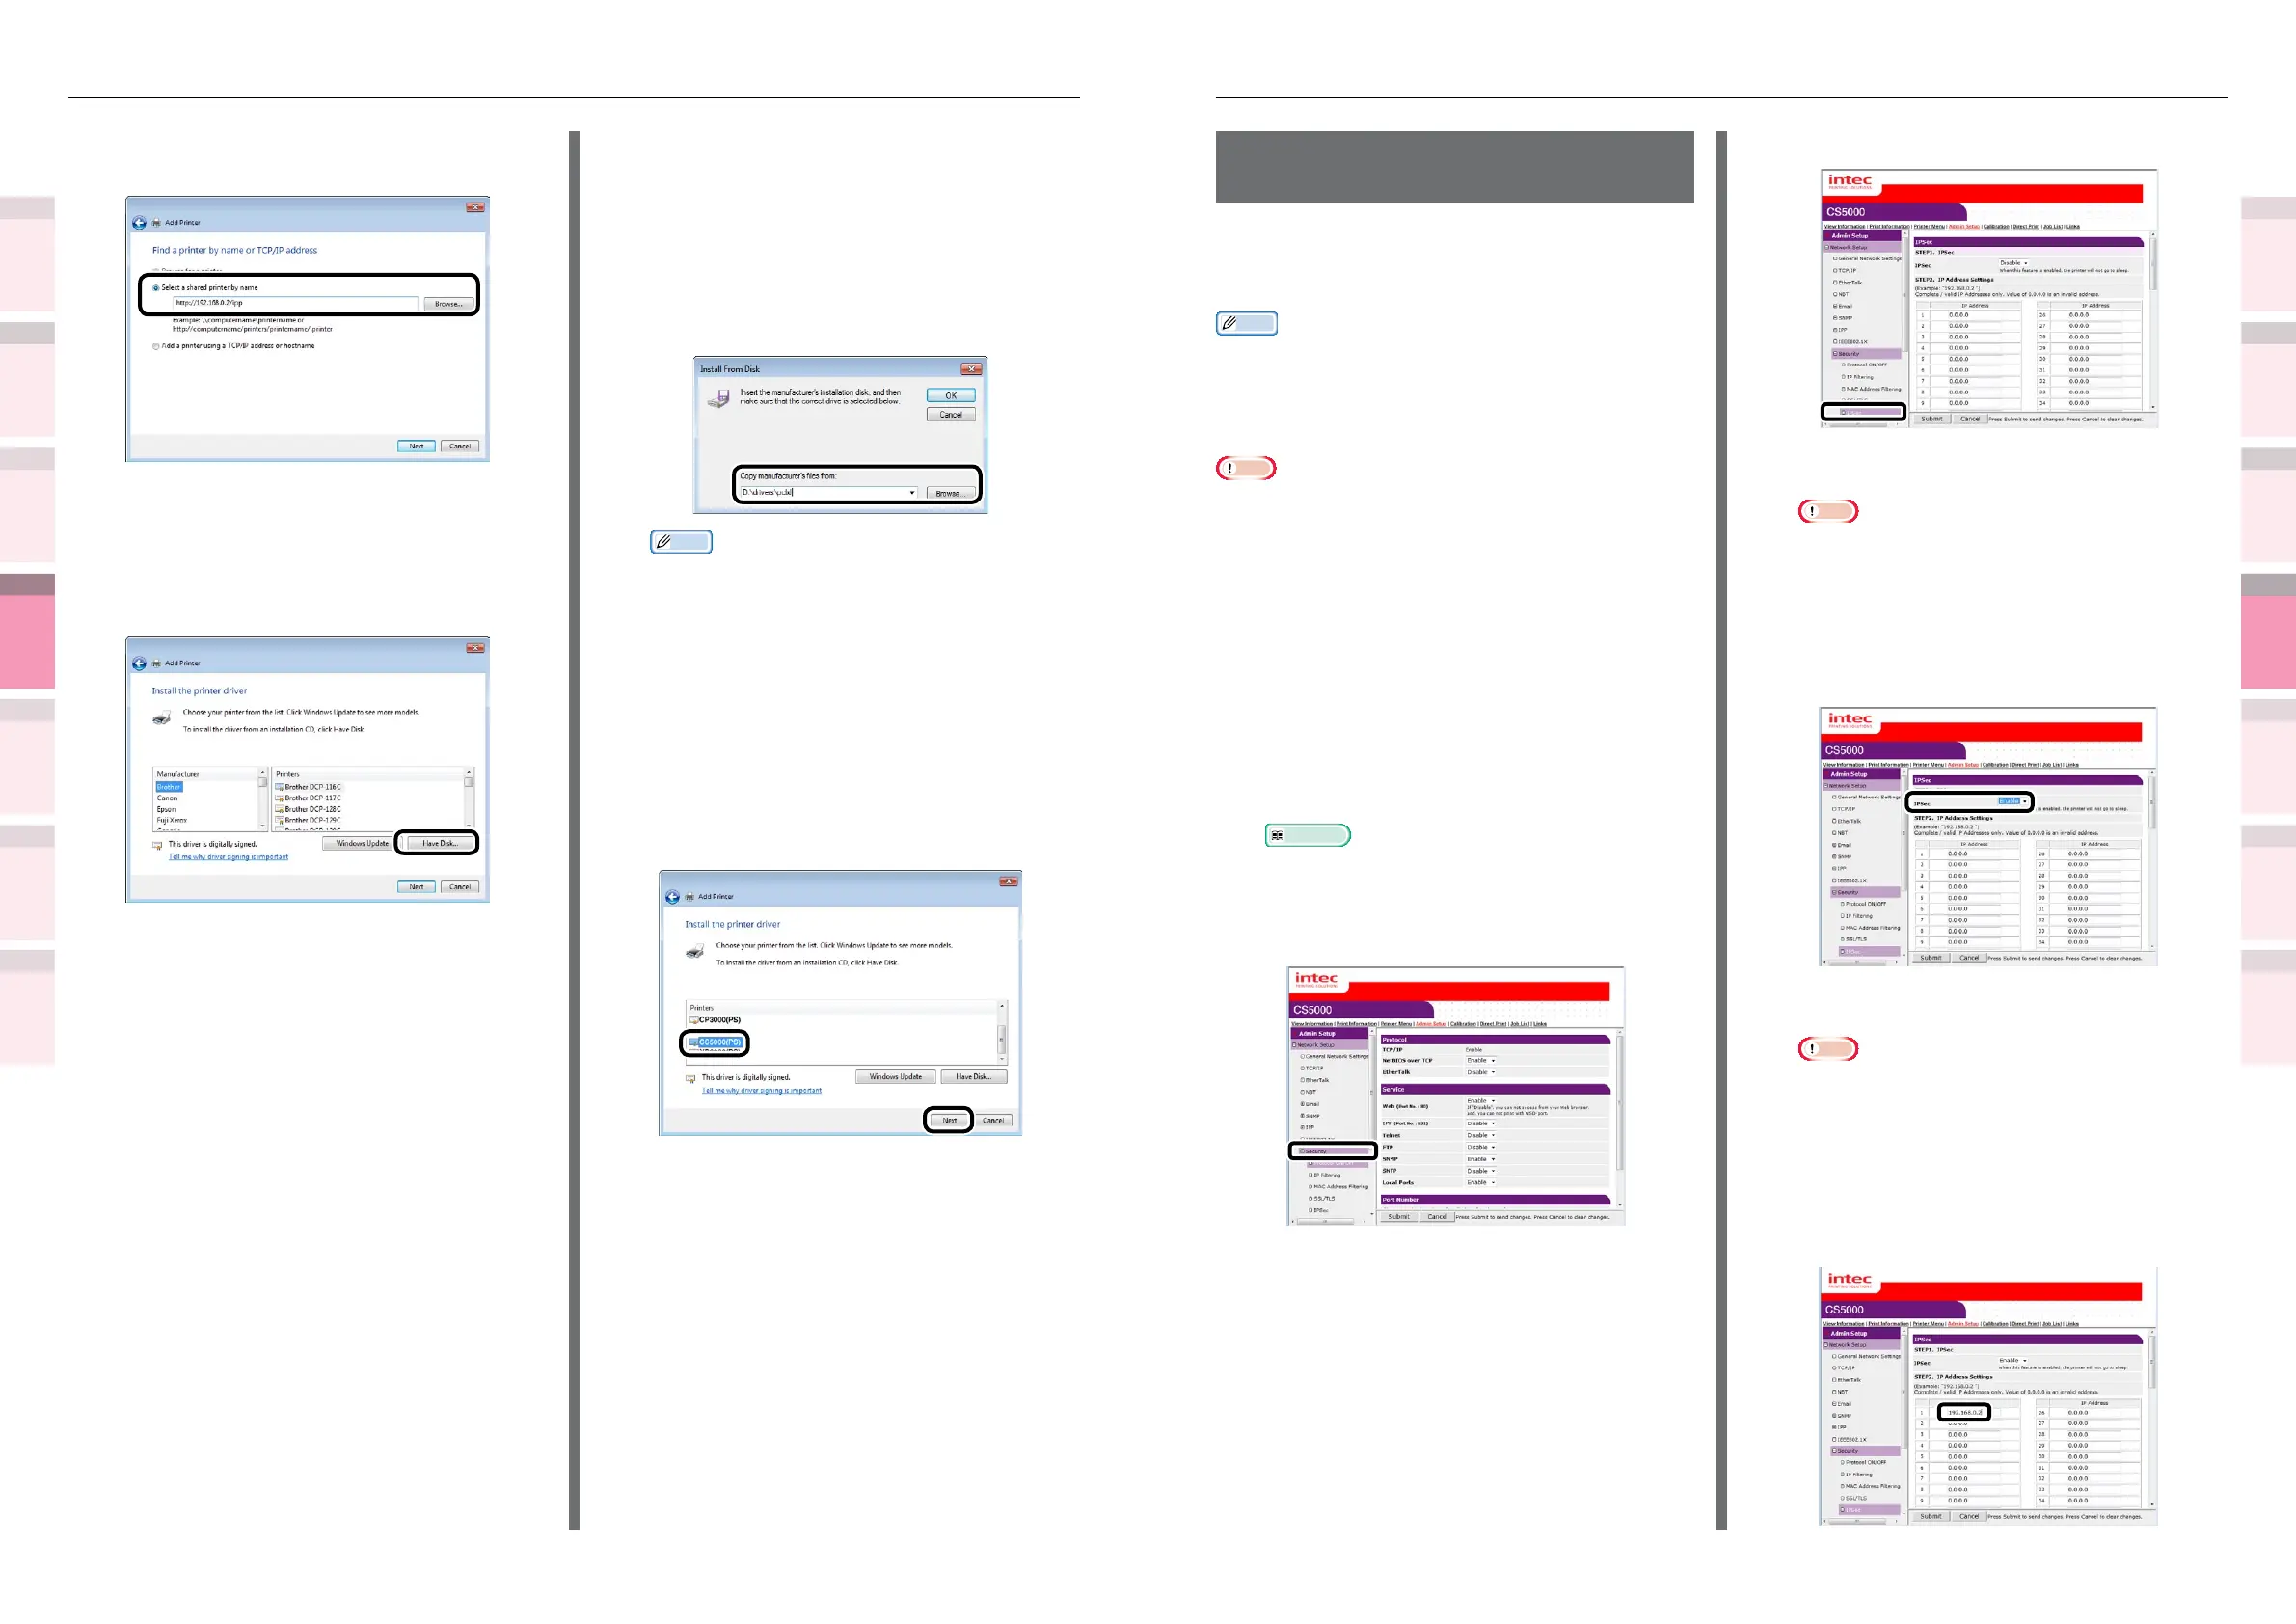
Set up the printer before setting the PC.
Printer setup
Use the web, and follow the procedure to enable
IPSec.
1
Log in as an administrator.
Reference
z
See “Logging in as an administrator” (P.184).
2
Click [Admin Setup]>[Network
Setup]>[Security] tab.
3
Click the [IPSec] tab.
4
Enable [IPSec] in "STEP1".
Note
z
When IPSec is "Enable", communications from
the PC with the IP address set in "STEP2" will be
encrypted.
z
If IPSec settings fail because the set parameters and
PC do not match, etc., opening the web page will be
disabled. In this case, either disable [IPSec] in the
network settings from the device control panel, or
disable IPSec by implementing network initialization.
5
Enter the host IP address in "STEP2".
Note
z
Use the IP address to specify the host that
authorizes the printing and setup.
z
For the IPv4 address, use single-byte numbers
separated by "."
z
For the IPv6 global address, use single-byte
alphanumerics separated by "." Abbreviated
notations cannot be used.
z
Disabled if the IP address entered is 0.0.0.0.
4
Select [Select a shared printer by
name].
5
Enter "http://printer IP address/ipp" or
"http://printer IP address/ipp/lp", and
click [Next].
6
Click [Have Disk].
7
Insert the "Software DVD-ROM" into the
computer.
8
Enter the following values in [Copy
manufacturer’s les from], and click
[Find].
z
PCL drivers:
"D:\Drivers\PCLXL"
z
PS drivers: "D:\Drivers\PS"
Memo
z
The described values are examples where drive D is
the DVD-ROM drive.
z
Select PS if printing from an application (Adobe
Illustrator, etc.) compatible with PostScript. If
printing from another application, select any one.
9
Select the INF le, and click [Open].
10
Click [OK].
11
Select the printer name, and click the
[Next] button.
12
Click [Next].
13
Click [Finish].
14
When the installation has nished, print
a test page.