- 68 - - 69 -
Printing print results so that people cannot see them Printing print results so that people cannot see them
4
1
2
3
5
4
1
2
3
5
Convenient print
functions
Appendix Index
Checking and
Changing Printer
Settings Using
the Control Panel
Network
Setup
Matching
Colors
Using Utility
Software
Convenient print
functions
Appendix Index
Checking and
Changing Printer
Settings Using
the Control Panel
Network
Setup
Matching
Colors
Using Utility
Software
(5)
Select [Print], and press the [OK]
button.
Print Secure Job
Encrypted Job
Stored Job
Stored Job 1/1 Page
Print
Memo
z
Select [Delete], and press the [OK] button to
delete a job.
(6)
Use 10-key pad or the scroll
buttons
or to enter the print
quantity, and press the [OK]
button.
Reference
z
You can use the Conguration Tool to delete the secure
print job. For details, see “Deleting unnecessary jobs from
the HDD” (P.146).
Printing secret text
(encrypted secure print)
The print job is encrypted before being sent
to the device. Consequently, leaks regarding
the print details can still be prevented even if
print data is stolen from the HDD or the device
communications process. Further, to strengthen
security even more, print jobs spooled on the
HDD are either printed, or deleted after a xed
period of time has elapsed.
To print, it is necessary to enter the password
using the control panel, so theft of the printed
matter can also be prevented.
To use this function, it is necessary to mount the
(optional) HDD to the device.
Note
z
Cannot be used with Mac OS X printer drivers.
z
If using Windows PCL printer drivers to create a print
server on a shared network, and printing uses encrypted
secure print from the client, printing posters and booklets
will be disabled.
z
If there is insufcient space on the built-in HDD storing
the print jobs, "File system is full" will be displayed, and
printing will be disabled.
z
If using Encrypted Secure Print, disable "Job Spool". For
details, see “Using the printer buffer” (P.90).
z
The [Print only encrypted secure print jobs] from the
[Device Settings] tab in Windows 8/Windows 7/Windows
Vista/Windows Server 2012/Windows Server 2008 R2/
Windows Server 2008 with Windows PS printer drivers will
be disabled.
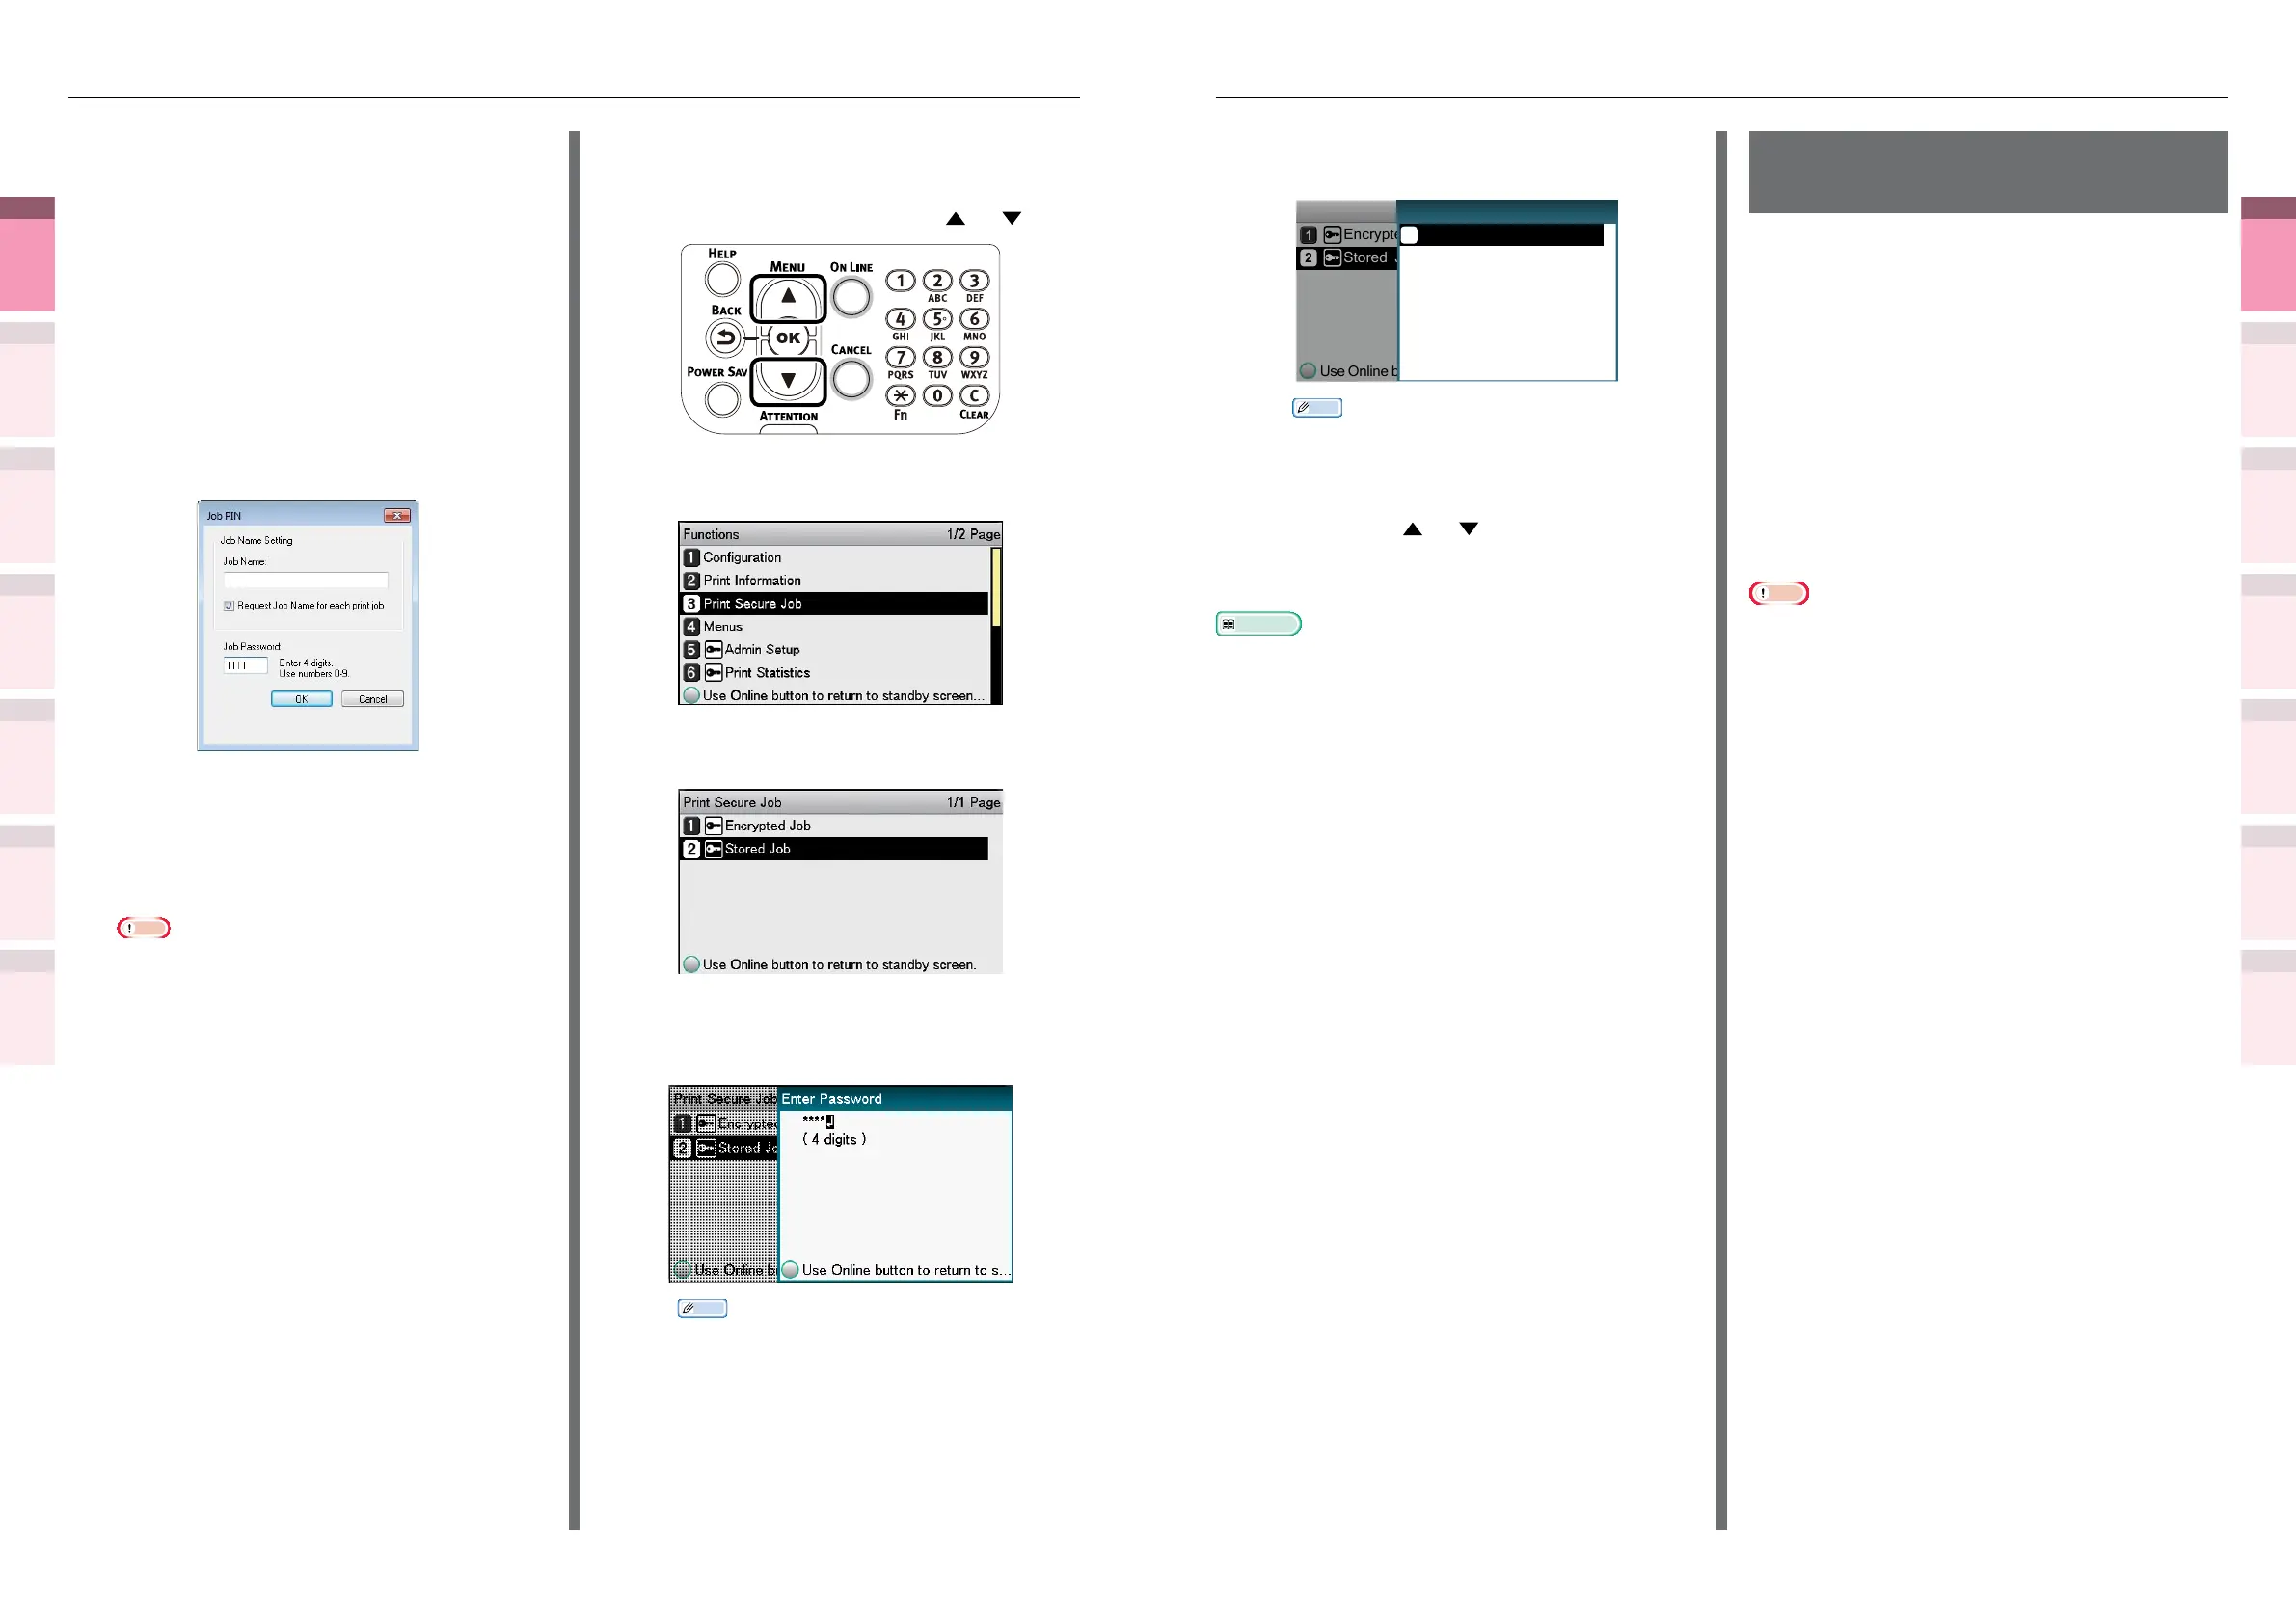
(5)
Input the "Job Name" and "Job
Password" in the
"
JOB PIN
"
screen,
and click [OK].
z
Request Job Name for each print job
When implementing printing, the
screen to enter the job name will be
displayed.
z
Job Password
Set using 4-digit gures.
z
Job Name
Set using up to 16 single-byte
alphanumeric characters.
(6)
Printing will be implemented.
If [Request Job Name for each print
job] is enabled, enter the "Job Name"
in the "Enter Job Name" screen, and
click [OK].
Note
z
If the user who started the secure print job has
forgotten that the job exists, or has forgotten the
password, the job will remain stored on the device
HDD. Use the Conguration Tool to delete secure
print jobs that have been left on the HDD. For
details, see “Deleting unnecessary jobs from the
HDD” (P.146).
2
Enter the password from the control
panel to print.
(1)
Press the scroll button or .
(2)
Select [Print Secure Job], and
press the [OK] button.
(3)
Select [Stored Job], and press the
[OK] button.
(4)
Use the 10-key pad to enter the
4-digit password for the job to be
printed to start the search.
Memo
z
If the password is entered incorrectly, press the
[BACK] button, and reset.
z
Press the [CANCEL] button to cancel the search.