- 146 - - 147 -
Windows utilities Windows utilities
4
5
1
3
2
4
5
1
2
3
Convenient print
functions
Appendix Index
Checking and
Changing Printer
Settings Using
the Control Panel
Network
Setup
Matching
Colors
Using Utility
Software
Convenient print
functions
Appendix Index
Checking and
Changing Printer
Settings Using
the Control Panel
Network
Setup
Matching
Colors
Using Utility
Software
PDF Print Direct
Operations environment
PCs running Windows 8.1/Windows 8.1 (64-bit
version)/Windows 8/Windows 7/Windows Vista/
Windows XP/ Windows Server 2012 R2/Windows
Server 2012/Windows Server 2008 R2/Windows
Server 2008/Windows Server 2003 versions
Note
z
PC administrator privileges are required for the setup.
z
Some PDF les may not print correctly. If printing is
incorrect, print from an application such as Adobe Acrobat
Reader.
z
This function is not compatible with multi-page printing.
z
PDF les encrypted at 128bit-RC4 level cannot be printed.
z
If printing PDF les that the viewer is not authorized to
print, specify the master password.
z
If job restrictions mod is enabled (encrypted jobs only),
printing using this utility is disabled. For job restrictions
mode, see “[Admin Setup]” (P.250).
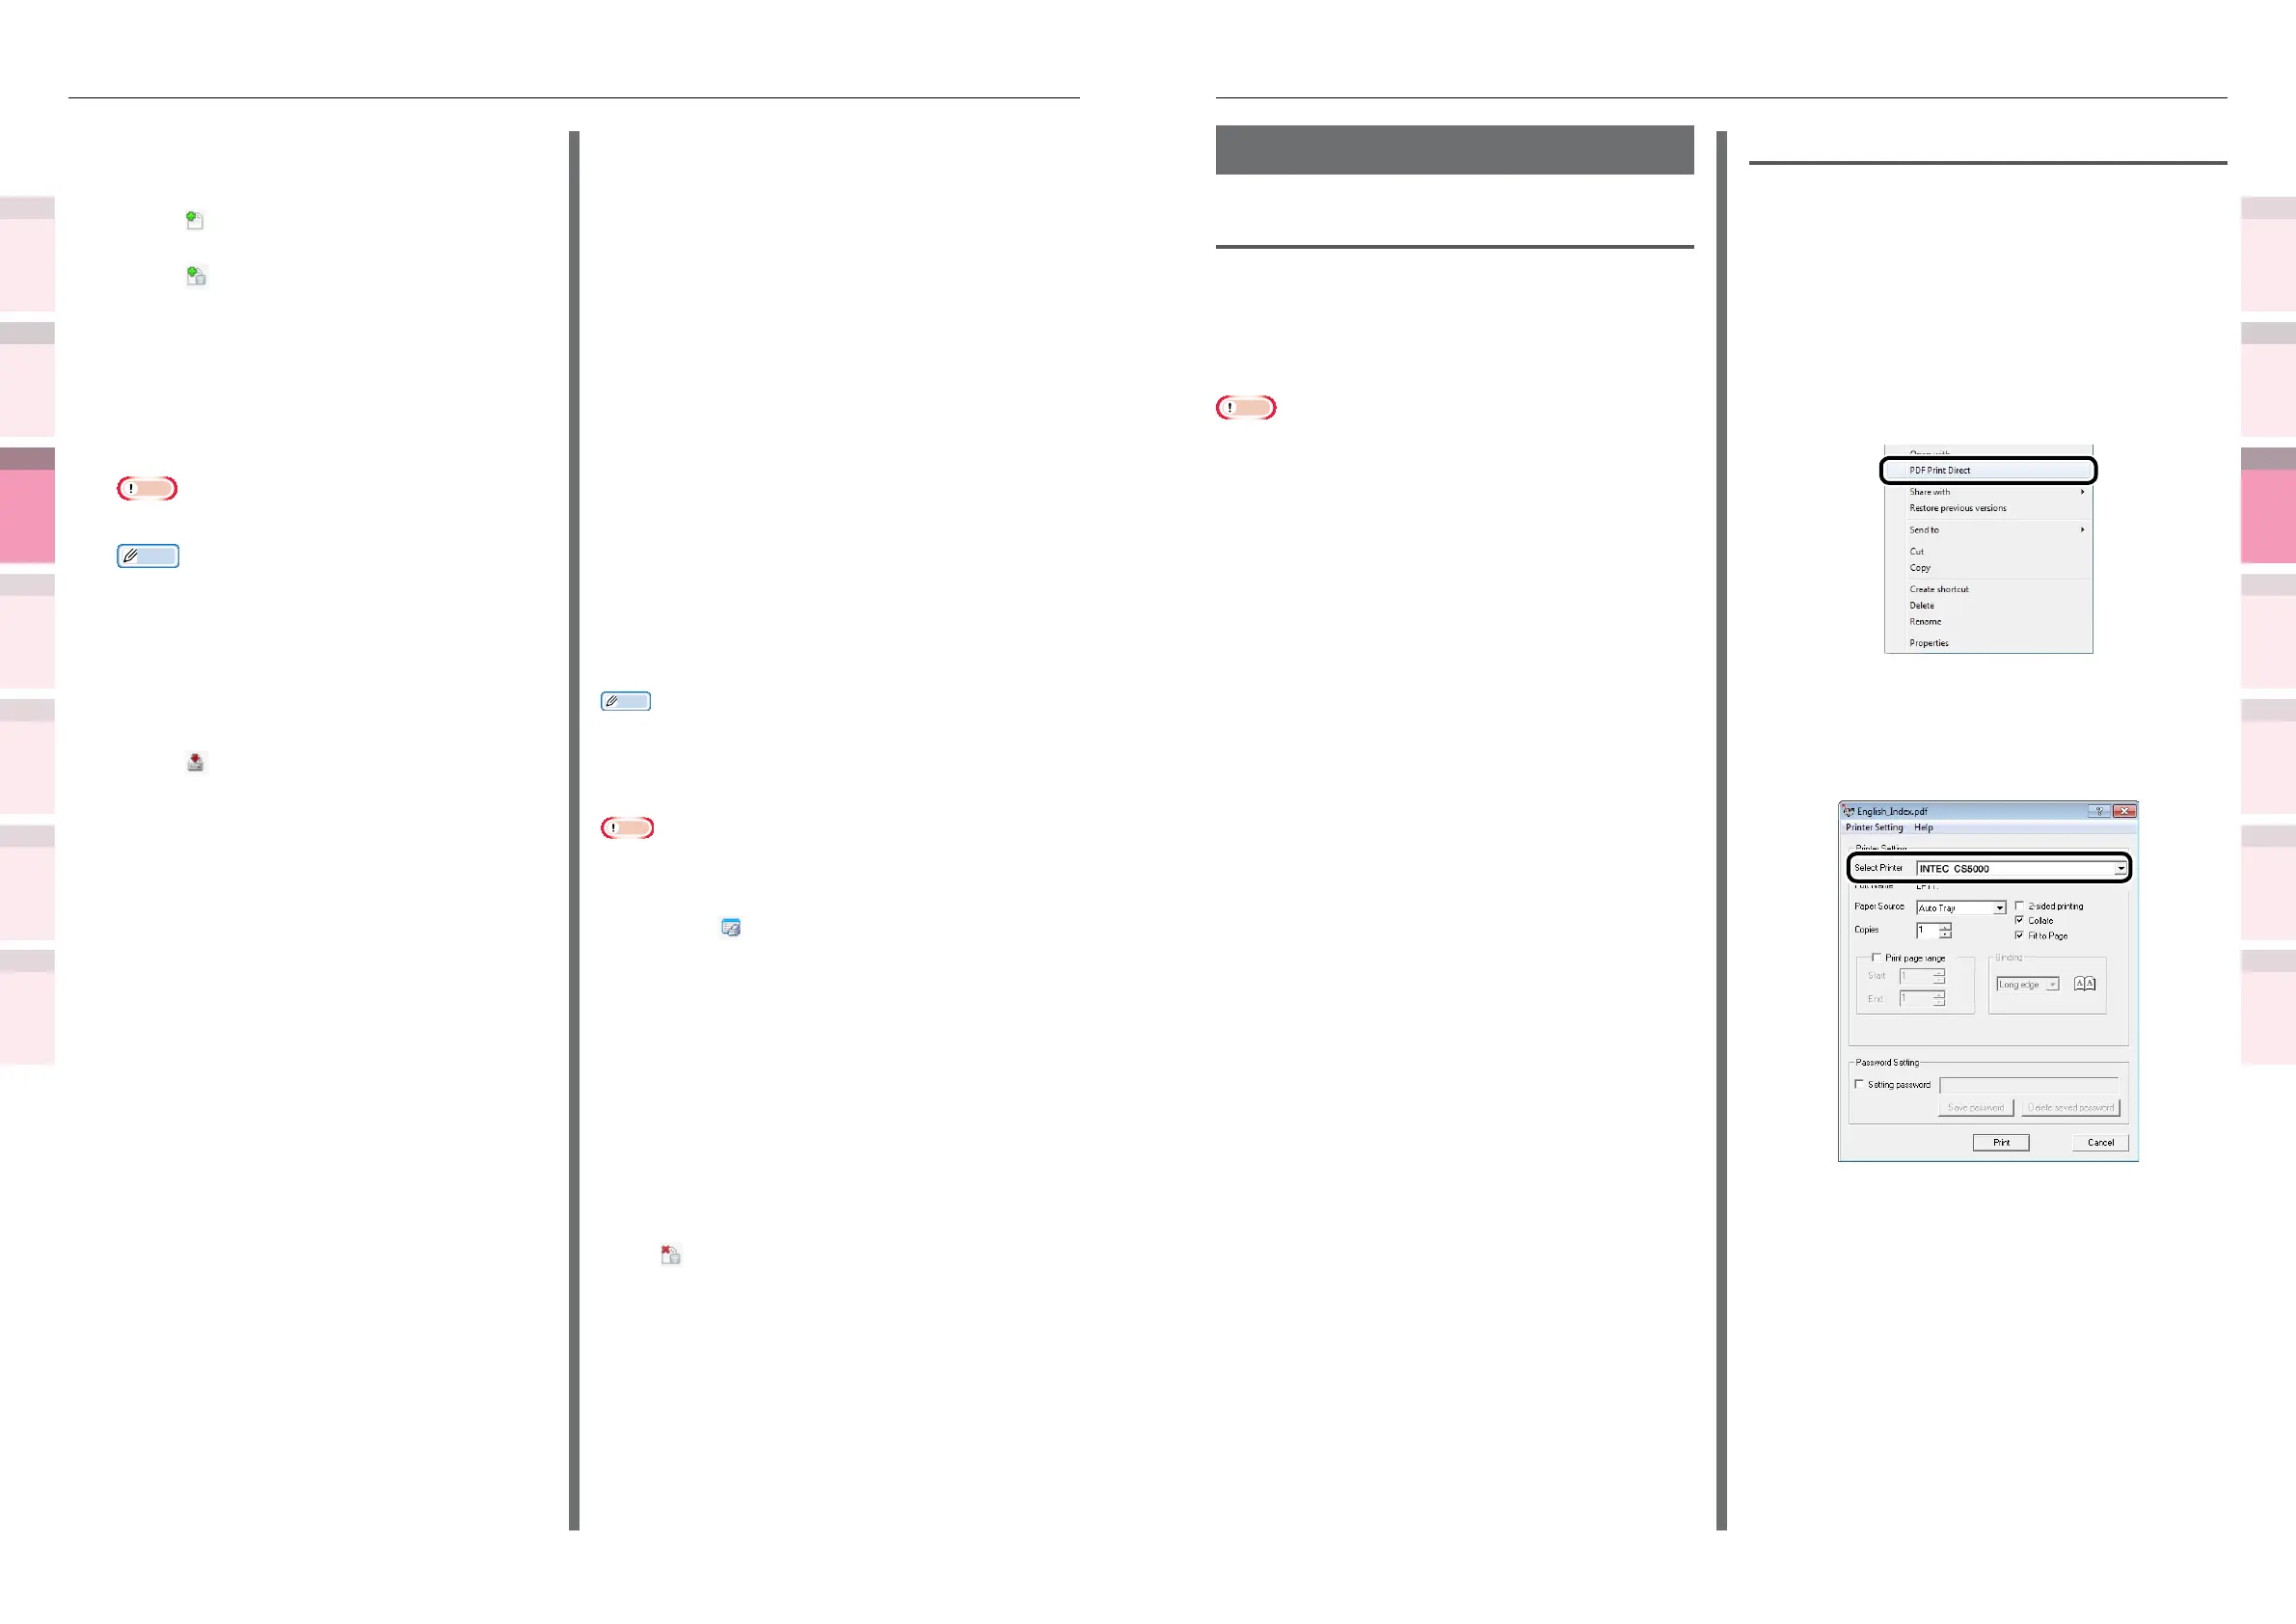
Printing PDF les
1
Check that the [Intec (product name)
(**)] icon (** describes the type of
printer driver: PS or PCL6) is in the
[Devices and printers] folder.
2
Select the PDF le to be printed, and
click the right mouse button. The
following menu will be displayed, so
select "PDF Print Direct".
3
If the PDF le is printable, the lower
window will be displayed. Select the
printer driver to be used in [Select
Printer].
4
If printing encrypted les, enable the
[Setting password] check box, and
enter a password. If using the same
password subsequently, click [Save
password]. One password can be
registered.
If deleting password, click [Delete
saved password].
5
Set the required items, and click [Print].
Register the form to the printer using the
Conguration Tool.
1
Click [ ].
2
Click [ ], and select the form le that
has been created.
The form will be added to the project.
3
Click the form le.
4
Enter the [ID], and click [OK].
Note
z
Do not change the [Volume] or [Path name].
Memo
z
If using Windows PS printer drivers, enter the
[Component].
5
Select the device using the window
below the Storage manager plug-in
window.
6
Click [ ].
7
Click [OK].
Checking the available HDD and
ash memory space
You can check the available HDD and ash
memory space.
1
Click the printer name from the device
selection area below the Storage
Manager plug-in screen to display
the resource window for the selected
printer.
2
Communications with the printer
will display the storage, partitions,
directories, and les, etc.
Deleting unnecessary jobs from
the HDD
You can delete print jobs in the [Shared]
partition of the HDD.
Memo
z
Even after the print data has been secure printed or
saved, the job remains in the [Shared] partition, so
unless the job is deleted, the available HDD space will be
reduced.
Note
z
The Storage manager plug-in cannot delete encrypted
secure prints.
1
Click [ ].
2
To view specic user print jobs, enter
the password, and then click [Job
password operations].
To view all print jobs, enter the
administrator password, and then click
[Administrator password operations].
The default administrator password is
"aaaaaa".
3
Select the job to be deleted, and click
[ ].
4
Click [OK].