- 86 - - 87 -
Advanced print functions Advanced print functions
4
1
2
3
5
4
1
2
3
5
Convenient print
functions
Appendix Index
Checking and
Changing Printer
Settings Using
the Control Panel
Network
Setup
Matching
Colors
Using Utility
Software
Convenient print
functions
Appendix Index
Checking and
Changing Printer
Settings Using
the Control Panel
Network
Setup
Matching
Colors
Using Utility
Software
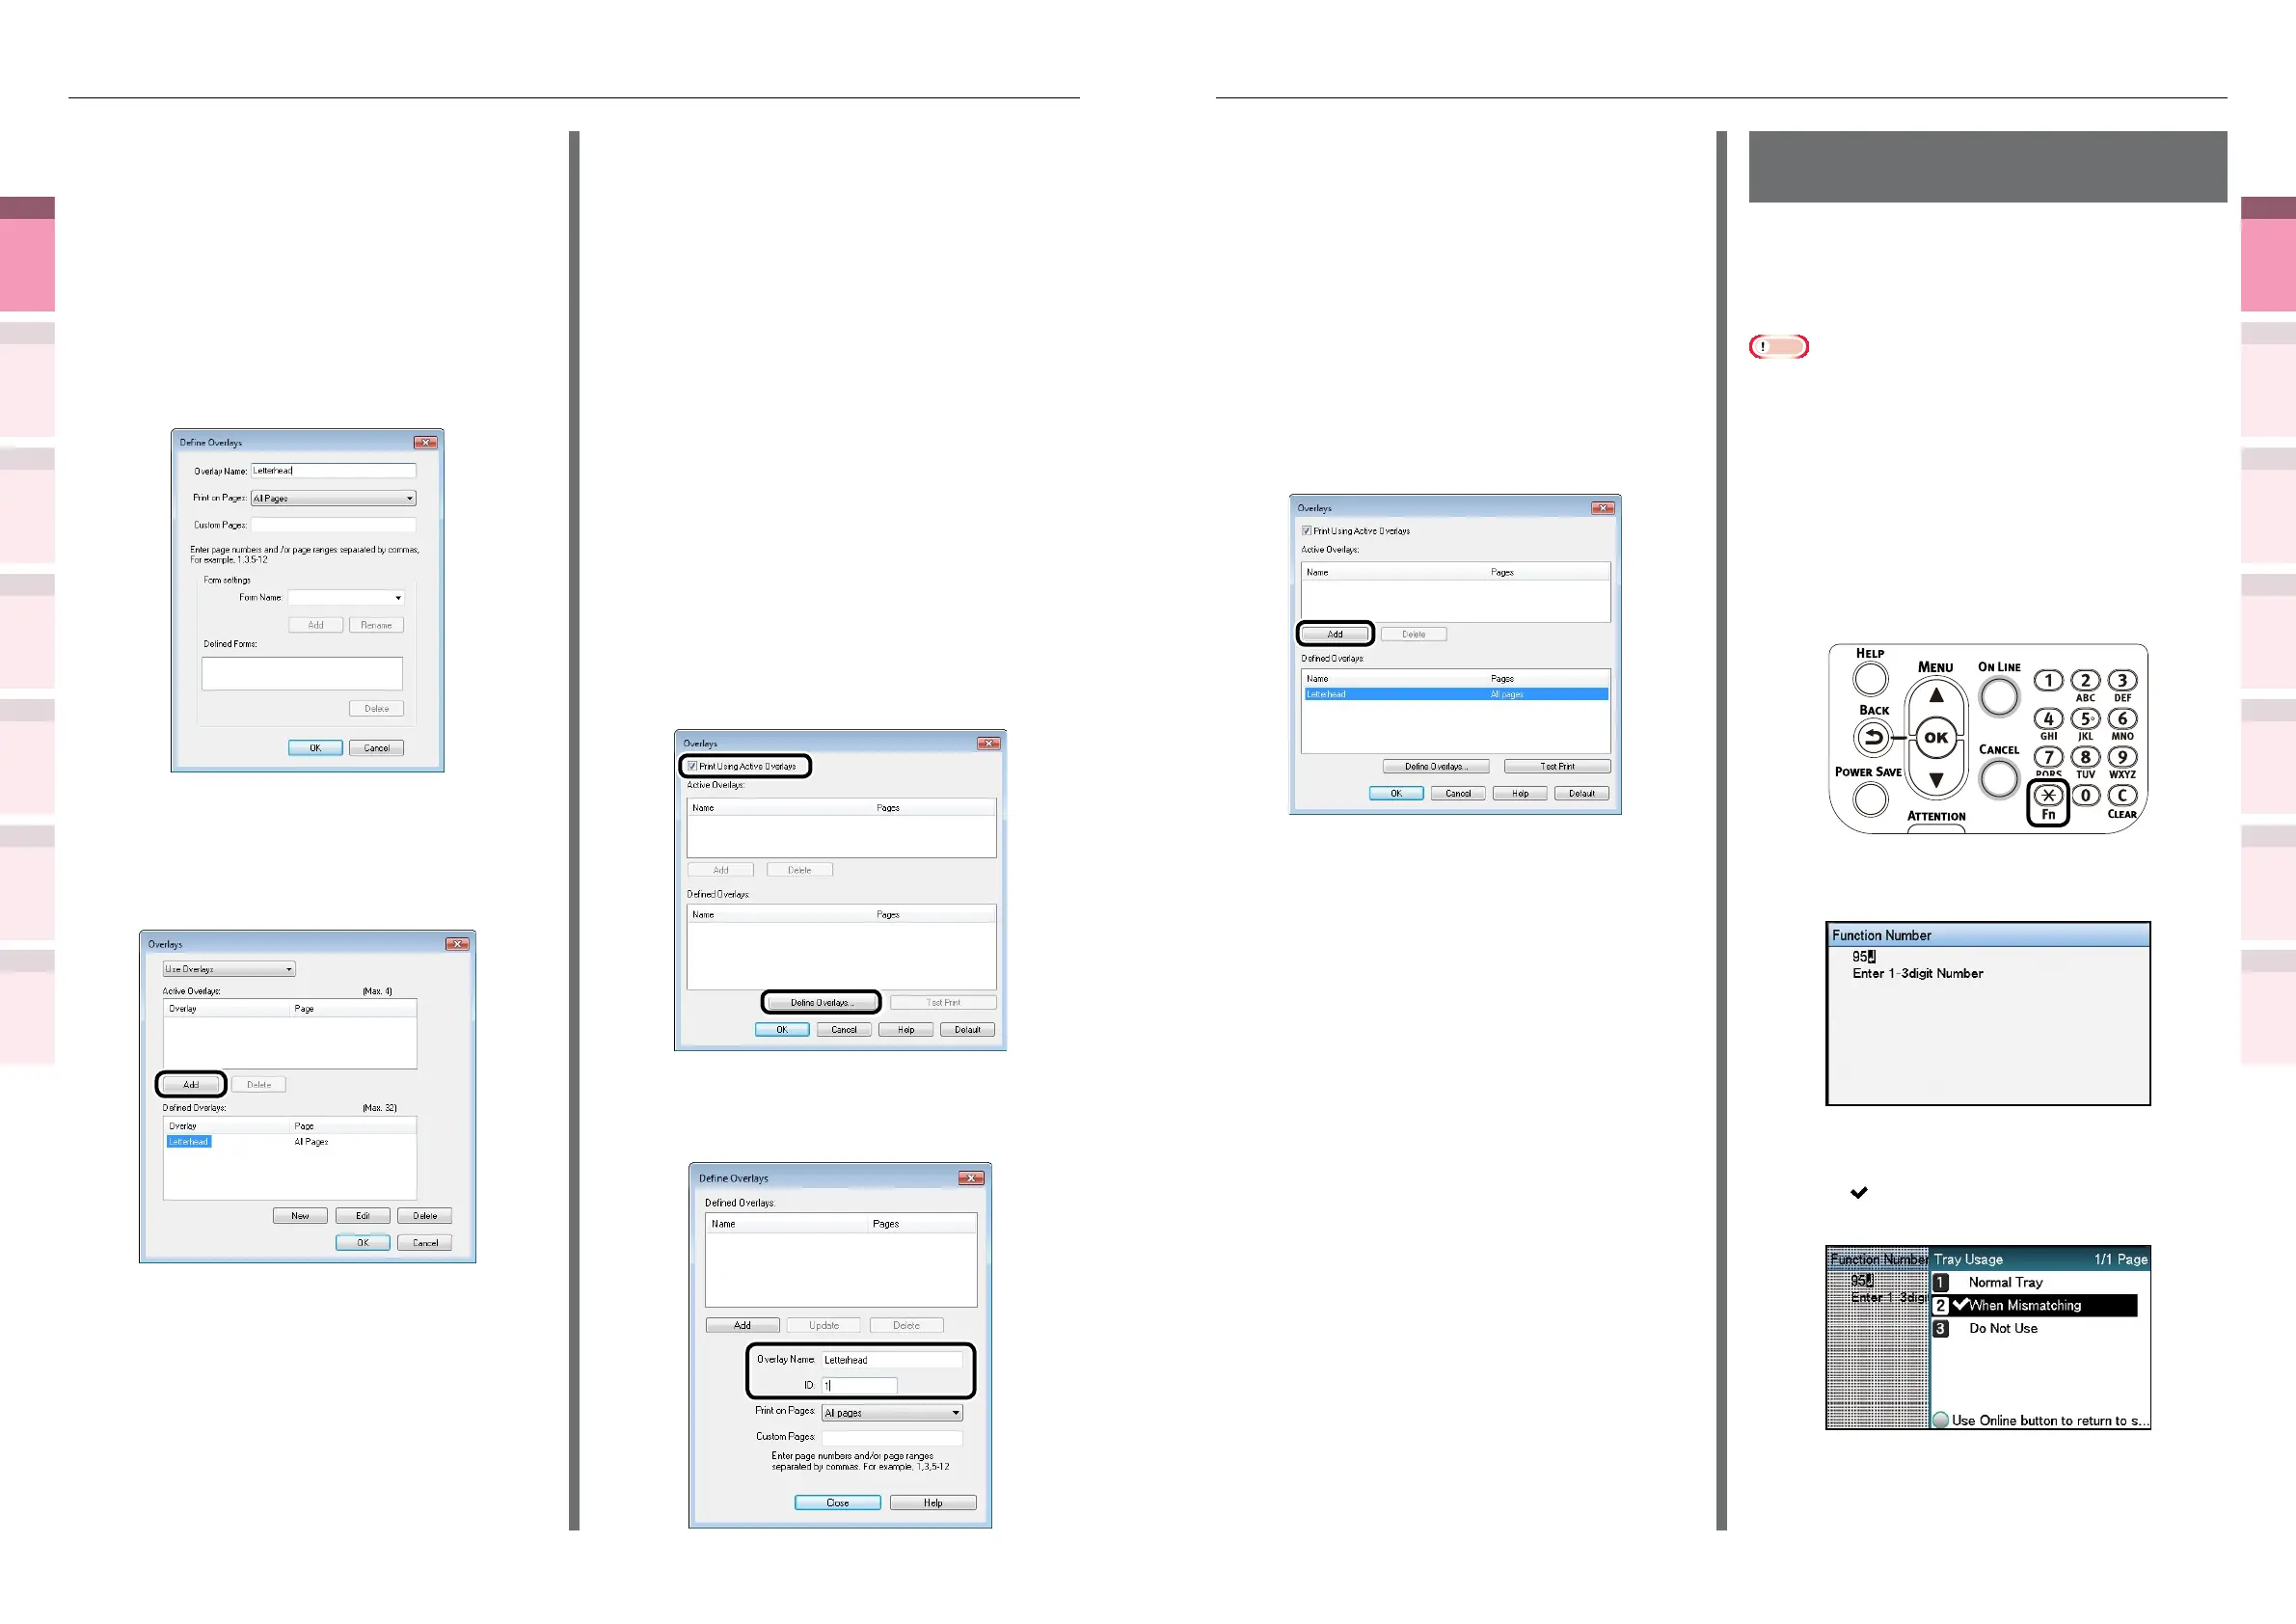
(7)
Select the page to which the
overlay will be applied using [Print
on Pages]. If specifying the page
to be applied, select "Custom", and
enter the pages for application in
[Custom Pages].
(8)
Click [Add].
(9)
Click [Close].
(10)
Select the overlay to be used in
printing from the dened overlays,
and click [Add].
(11)
Printing will be implemented.
Automatically switching
trays
If the same paper is set in tray 1, (optional)
trays 2 to 5, and the Multi-Purpose Tray, you can
print continuously from other trays if paper in
the current print tray runs out.
Note
z
Match the paper tray paper weight, paper type, and the
Multi-Purpose Tray paper size, paper weight, and paper
type using the control panel. For detailed, see "Setting
Paper" in "Basic".
1
Set how to use the Multi-Purpose Tray
using the control panel.
(1)
Press the [Fn] key.
The numerical values input screen
will be displayed.
(2)
Press functions numbers [9], [5],
and press the [OK] button.
(3)
Select [When Mismatching], and
press the [OK] button. Check that
is displayed to the left of [When
Mismatching].
(6)
Enter the form name registered
using the Conguration Tool in
[Form Name], and click [Add].
(7)
Enter the [Overlay Name], and
select the page to which the
overlay will be applied using [Print
on Pages]. If specifying the page
to be applied, select "Form Name",
and enter the pages for application
in [Custom Pages].
(8)
Click [OK].
(9)
Select the overlay to be used from
the [Dened Overlays] list, and
click [Add].
(10)
Click [OK].
(11)
Click [OK] to close the print setup
dialog box.
(12)
Open the le to be printed from the
application.
(13)
Printing will be implemented.
Using Windows PCL printer drivers
1
Create and register the form to the
device.
For details, see “Registering forms (form
overlay)” (P.145).
2
Register the form to the printer drivers
to print.
(1)
Open the le to be printed.
(2)
Select [Print] in the [File] menu.
(3)
Click [Advanced] (or
[Preferences]).
(4)
Click [Overlays] in the [Advanced]
tab.
(5)
Enable [Print Using Active
Overlays] in the [Overlays] screen,
and click [Dene Overlays].
(6)
Enter the [Overlay Name], and
enter the form ID registered using
the Conguration Tool in [ID].