- 202 - - 203 -
Setting the network from the web browser Setting the network from the web browser
5
1
2
4
3
5
1
2
4
3
Convenient print
functions
Appendix Index
Checking and
Changing Printer
Settings Using
the Control Panel
Network
Setup
Matching
Colors
Using Utility
Software
Convenient print
functions
Appendix Index
Checking and
Changing Printer
Settings Using
the Control Panel
Network
Setup
Matching
Colors
Using Utility
Software
Notifying errors using
e-mail
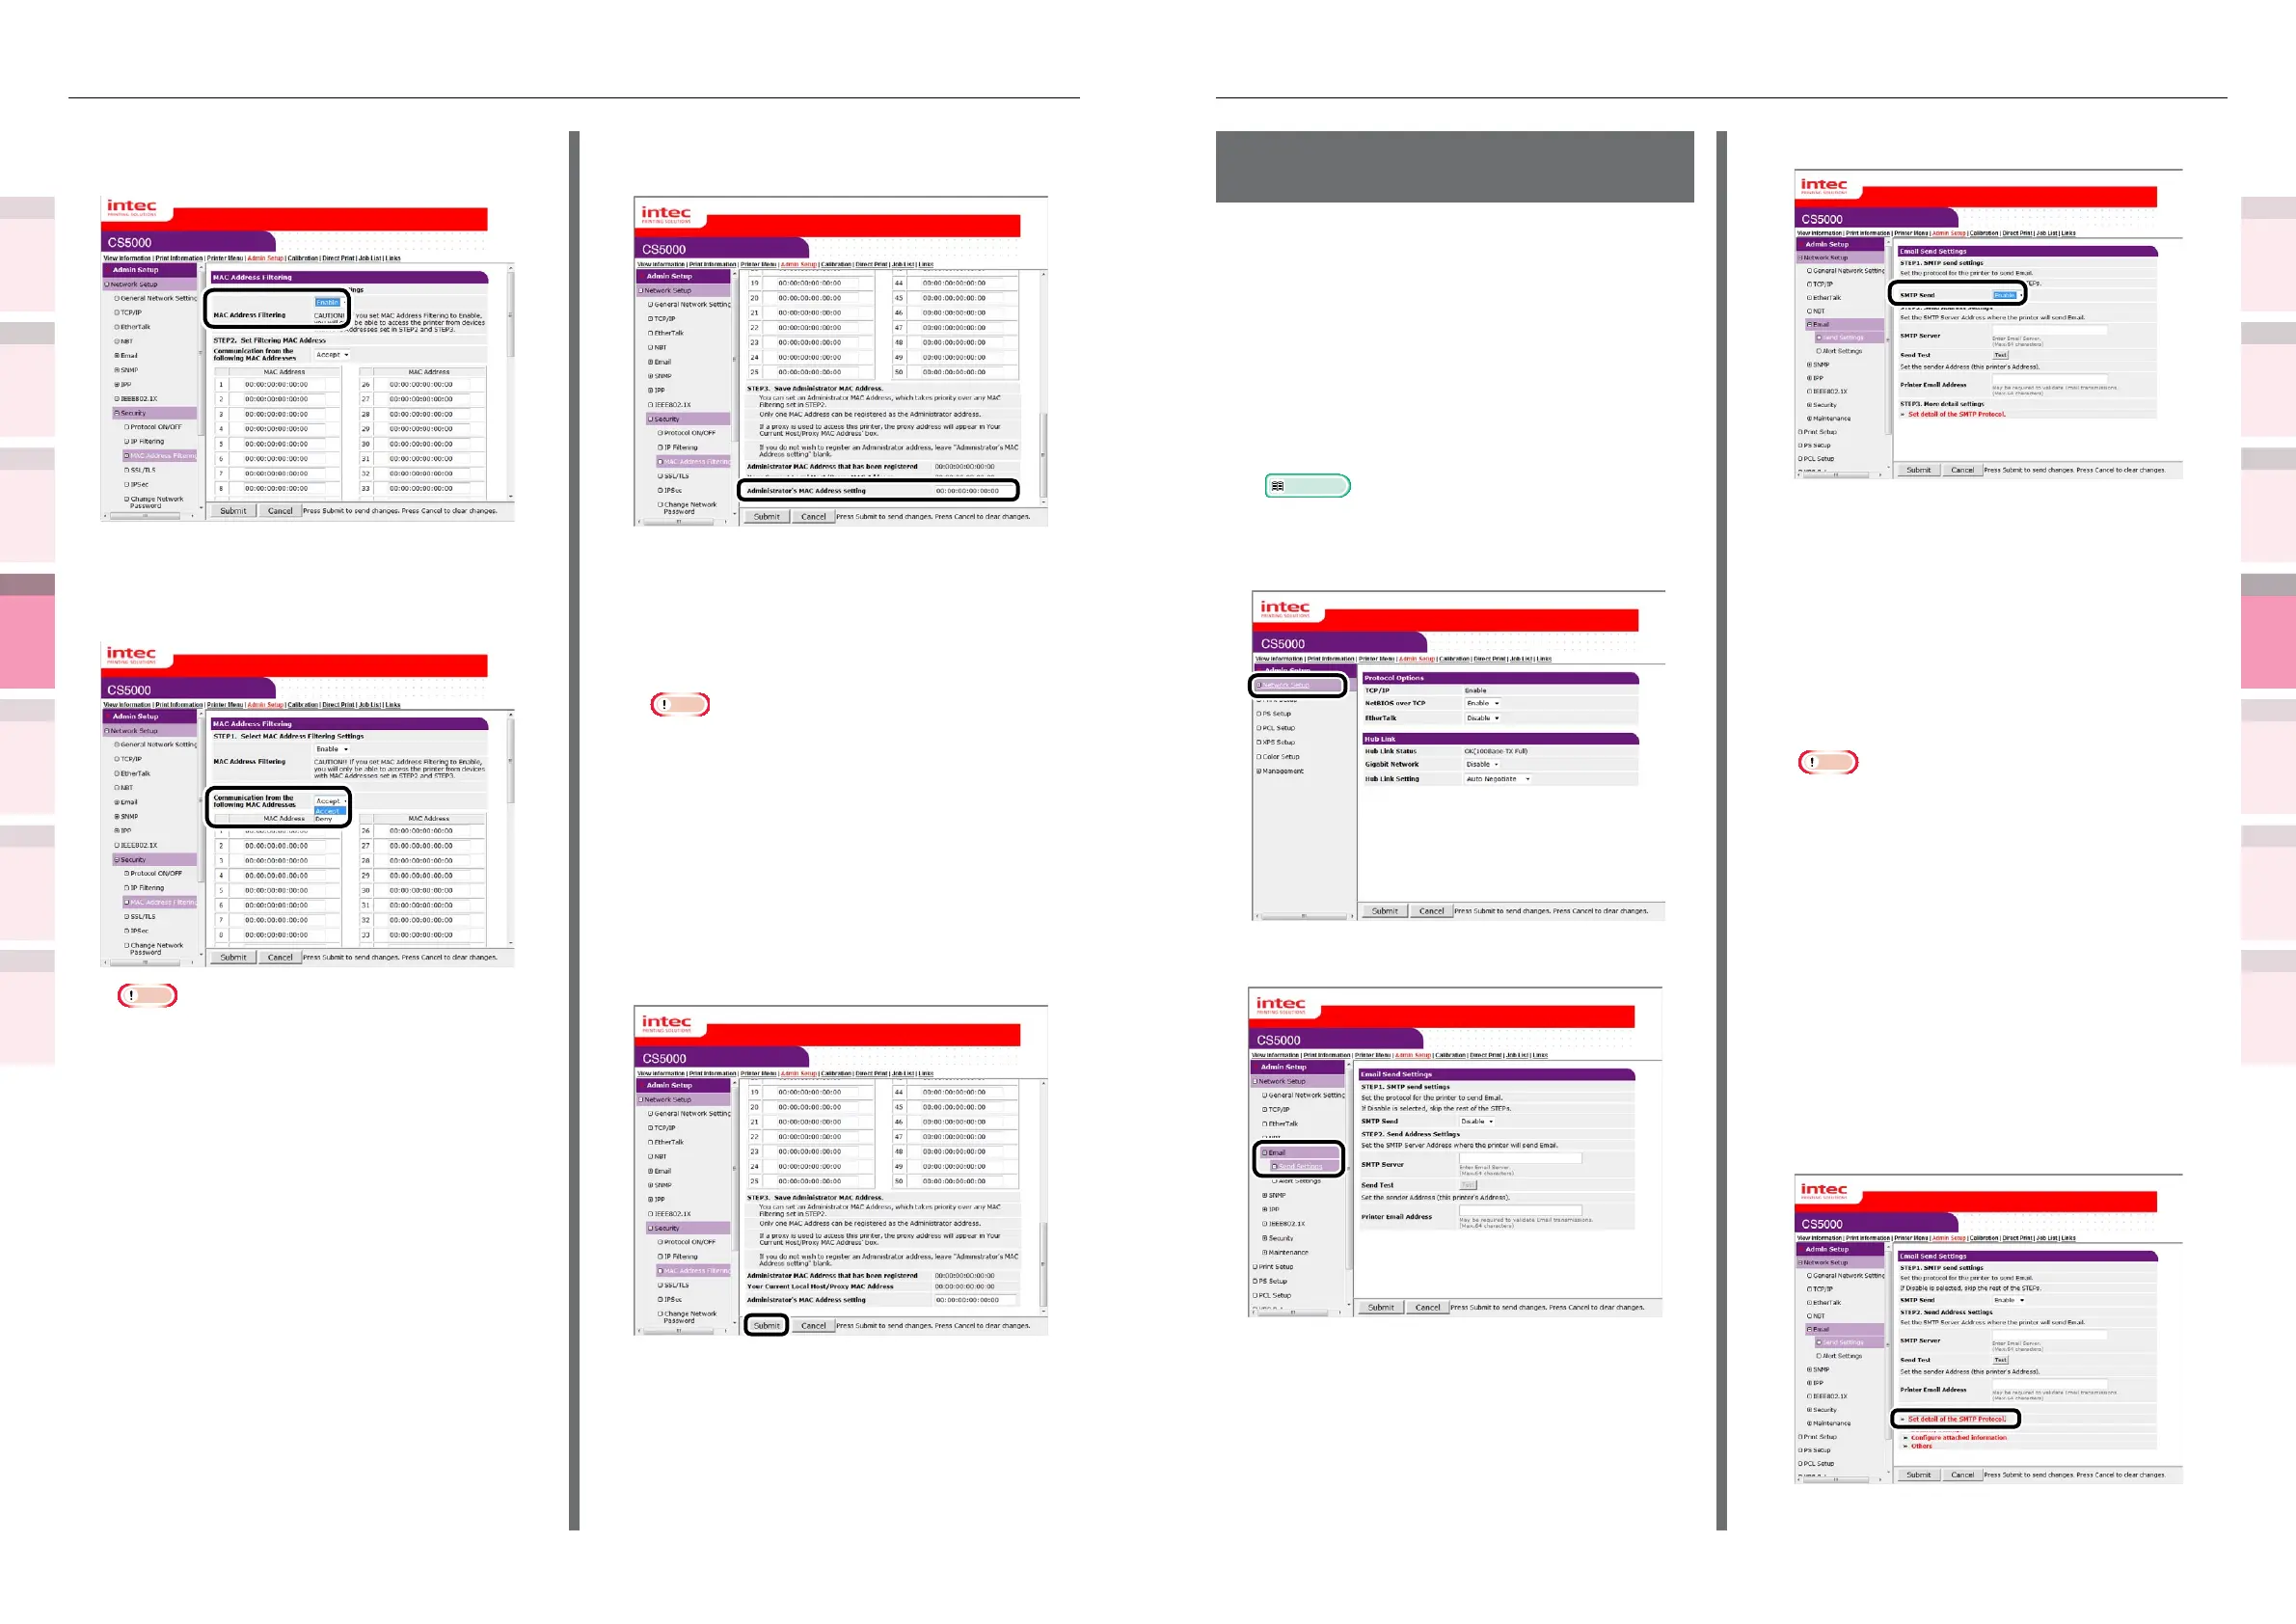
The device is equipped with a mail send function
(SMTP). You can send an e-mail if an error occurs
in the printer. You can select to send periodically
whether or not an error has occurred, and set to
send mails when an error occurs.
Setting e-mail sending
1
Log in as an administrator.
Reference
z
See “Logging in as an administrator” (P.184).
2
Click [Admin Setup]>[Network Setup].
3
Click [Email]>[Send Settings].
4
Enable [SMTP Send] in [STEP1].
5
Set the address required to send in
[STEP2].
(1)
Set the mail server domain name
or IP address in [SMTP Server].
(2)
Set the mail address allocated
to the printer in [Printer Email
Address].
Note
z
If setting the [SMTP Server] in the domain name, it
is necessary to set the DNS server in the [TCP/IP]
settings.
z
It is necessary to authorize sending mail from the
device in the mail server. Consult your network
administrator for the mail server settings.
z
If using Internet Explorer using the default settings,
send tests are disabled.
To implement send tests, it is necessary to change
the Internet Explorer 7 settings.
Enable [Tools]>[Customize security level]>
[Authorize input requests for information using
scripted Windows in web sites].
6
To make more advanced settings
subsequently, click [Set detail of the
SMTP Protocol] in [STEP3].
For all other presses, go to Step 16.
4
[Enable] the [MAC Address Filtering] in
[STEP1].
5
Select whether to [Accept (Deny)]
communications from a specic MAC
address in [STEP2].
Note
z
Use the MAC address to enter the host MAC address
that authorizes (or denies) the communications.
z
For the MAC address, use single-byte numbers
separated by ":".
z
Regardless of the specications in Step 2, the
administrator addresses that can communicate can
be set in Step 3.
6
Set the value in [Administrator’s MAC
Address setting] in [STEP3].
Even if the incorrect settings were made in
[STEP2] by entering the administrator MAC
address in [Administrator’s MAC Address
setting], the administrator can reset from
the MAC address host set in [Administrator’s
MAC Address setting].
Note
z
If accessing the device via a proxy, the address of
the proxy device will be displayed as [Your host
MAC address]. Consequently, the [Your host MAC
address] displayed in your host address may differ.
z
If nothing is registered as the administrator MAC
address, access to the device may be completely
disabled depending on the settings in Step 2.
z
If you do not wish to register an administrator
MAC address, enter "00:00:00:00:00:00" in the
[Administrator’s MAC Address setting].
7
Click [Submit].
8
The settings will be save in the printer,
and the network functions will restart.